REGULATORS
DXI INTEGRATED FIRST STAGE
© 2002 Design 2000
OCEANICOCEANIC
OCEANICOCEANIC
OCEANIC®
Product Service Guide Product Service Guide
Product Service Guide Product Service Guide
Product Service Guide
Doc. 12-2205-r01 (01/00)
PG-4
16. Remove the diaphragm(30) from the main body(28) by covering
the transmitter opening in the body with the palm of your hand and
directing short blasts of low pressure air through the open LP port.
(Fig.7) Lift the diaphragm out carefully and discard, regardless of
its condition, and DO NOT attempt to reuse.
17 Remove the button-pin(29) and inspect for signs of wear or
distortion. Discard if found.
18. Remove all port plugs(18 & 20) with a 5/32" hex key. Remove and
inspect the port plug o-rings(19 & 21) for any signs of decay.
Discard if found.
NOTE: For units received with Yoke connectors perform step
19Y, for units received with DIN connectors perform step 19D.
19Y. Yoke connector disassembly:
A. Remove the knob assembly(1) from the yoke(2)
B. Secure the first stage body(28) in a soft jawed or well padded
vise and apply a thin wall, or modified, 1" box wrench to the yoke
retainer(6). Using firm steady force, turn the yoke retainer counter
clockwise to remove. DO NOT use impact to loosen.
NOTE: It is important that the wrench is properly seated over
the entire hex portion of the yoke retainer to prevent any
damage to the part. (Fig. 8)
CAUTION: Tighten the vise only as needed to hold the first
stage secure, and DO NOT overtighten. Doing so will result in
permanent damage, rendering it inoperable.
C. After removing the yoke retainer(6), remove the yoke(2)
protector cap(8), and saddle(17) and set these aside. Remove and
discard the yoke retainer o-ring(7). DO NOT attempt to reuse.
D. Using Internal Circlip Pliers, remove the retaining clip(3) that
retains the cone filter(4). The cone filter should drop out freely into
your hand. Discard, and DO NOT attempt to reuse. Remove and
inspect the filter o-ring(5) for any signs of decay. Discard if found
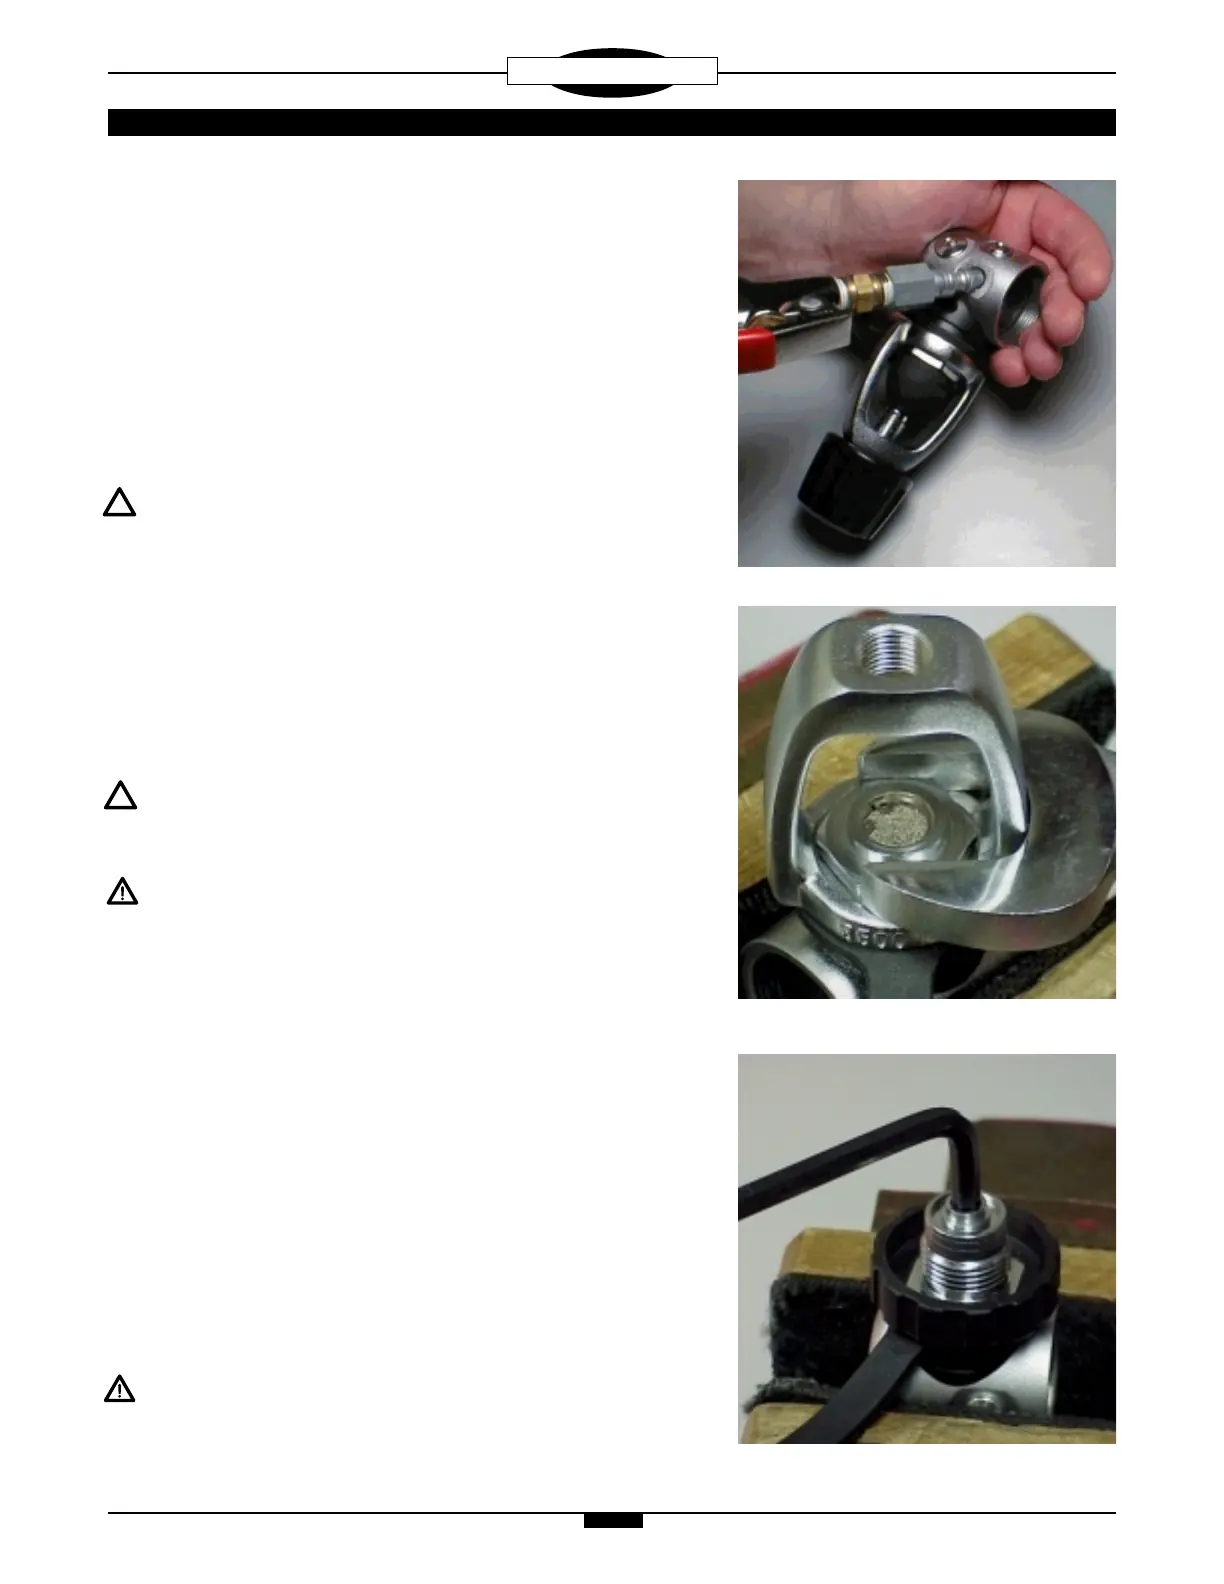
19D. DIN connector disassembly:
A. Secure the first stage in a soft-jawed or well padded vise, with
the DIN connector facing up. Apply a 1/4" hex key to the filter
retainer(10) and loosen in a counter clockwise direction to remove.
(Fig. 9) Remove the DIN face o-ring(9) and filter retainer o-ring(11)
and inspect for any signs of decay. Discard if found.
CAUTION: Tighten the vise only as needed to hold the first
stage secure, and DO NOT overtighten. Doing so will result in
permanent damage, rendering it inoperable.
Fig. 8
Fig. 7
Fig. 9
 Loading...