REGULATORS
DXI INTEGRATED FIRST STAGE
© 2002 Design 2000
OCEANICOCEANIC
OCEANICOCEANIC
OCEANIC®
Product Service Guide Product Service Guide
Product Service Guide Product Service Guide
Product Service Guide
Doc. 12-2205-r01 (01/00)
PG-8
11. Carefully guide the shaft of the HP seat(27) so that it passes
through the spring(26) and into the seat o-ring(25) in the inner bore
of the transmitter(22). (Fig. 19)
12. Hold the body(28) at a slight angle, so that you may see the stem
end of the button-pin(29) protruding through the center of the
machined orifice cone. Insert the transmitter/hp seat assembly
directly into the center of the opening in the body(28) and carefully
guide the center opening of the HP seat(27) onto the button pin(29).
Ensure the button-pin(29) enters directly into the opening of the HP
seat(27) without any restriction.(Fig. 20)
CAUTION: Improper alignment of the button-pin(29) and the
HP seat(27) during installation will result in damage to the
seating surface of the HP seat(27), requiring its replacement.
13. While holding the body (28) secure, turn the Transmitter/HP seat
assembly clockwise while exerting continuous inward force to
overcome spring pressure and engage the threads. Continue
tightening by hand until secure.
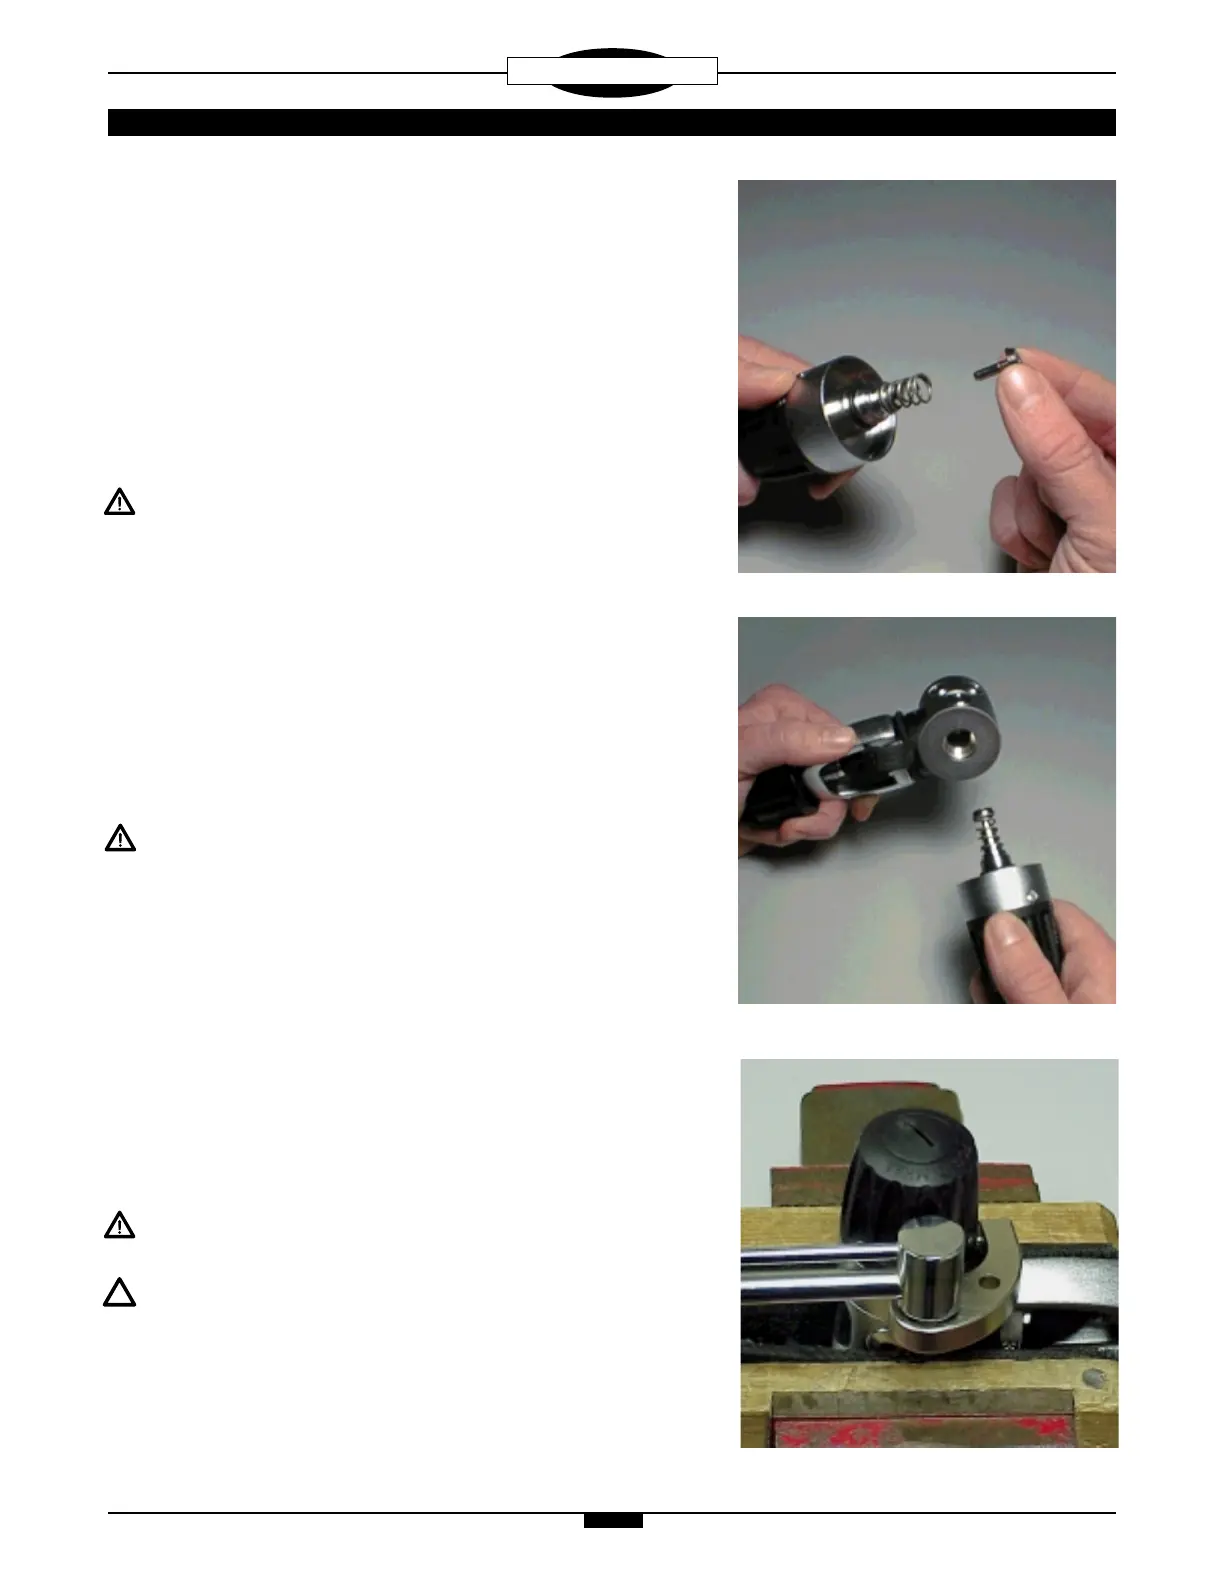
14. Secure the first stage body in a soft jawed or well padded vise.
Using a CDx Spanner on an inch-pounds torque wrench, tighten the
Transmitter assembly(22) into the body to a torque of 80 to 100
in-lbs. (Fig. 21)
CAUTION: Tighten the vise only as needed to hold the first
stage secure, and DO NOT overtighten. Doing so will result in
permanent damage, rendering it inoperable.
15. Lubricate and install port plug o-rings(19 & 21) onto the port
plugs(18 & 20) and install the port plugs into the body(28),
tightening clockwise with a 5/32" hex key socket to a torque of 35-
40 in-lbs.
16. Lubricate and install all hose o-rings onto hoses and install the
hoses into the body(28). Tighten the low pressure second stage
hose(s) clockwise with a 9/16" crows foot wrench, the high
pressure hose(s) with a 5/8" crows foot wrench, and the low
pressure inflator hose(s) with either a 9/16" or 1/2" crows foot
wrench, to a torque of 35-40 in-lbs.
CAUTION: Be certain not to install any low pressure hose into
a high pressure port via an adaptor.
NOTE: Perform step 17 only if an Environmental Protection Kit
has NOT been installed.
17. Ensuring proper alignment and secure placement, install the end
cap boot(36) onto the end cap(32).
Fig. 20
Fig. 19
Fig. 21
 Loading...