REGULATORS
DXI INTEGRATED FIRST STAGE
© 2002 Design 2000
OCEANICOCEANIC
OCEANICOCEANIC
OCEANIC®
Product Service Guide Product Service Guide
Product Service Guide Product Service Guide
Product Service Guide
Doc. 12-2205-r01 (01/00)
PG-7
H. Insert the threaded end of the filter retainer(10) through the
coupler wheel(12), into the filter housing(15), and tighten until
secure. Apply a 1/4" hex socket and tighten to a torque of 120-
140 in-lbs.
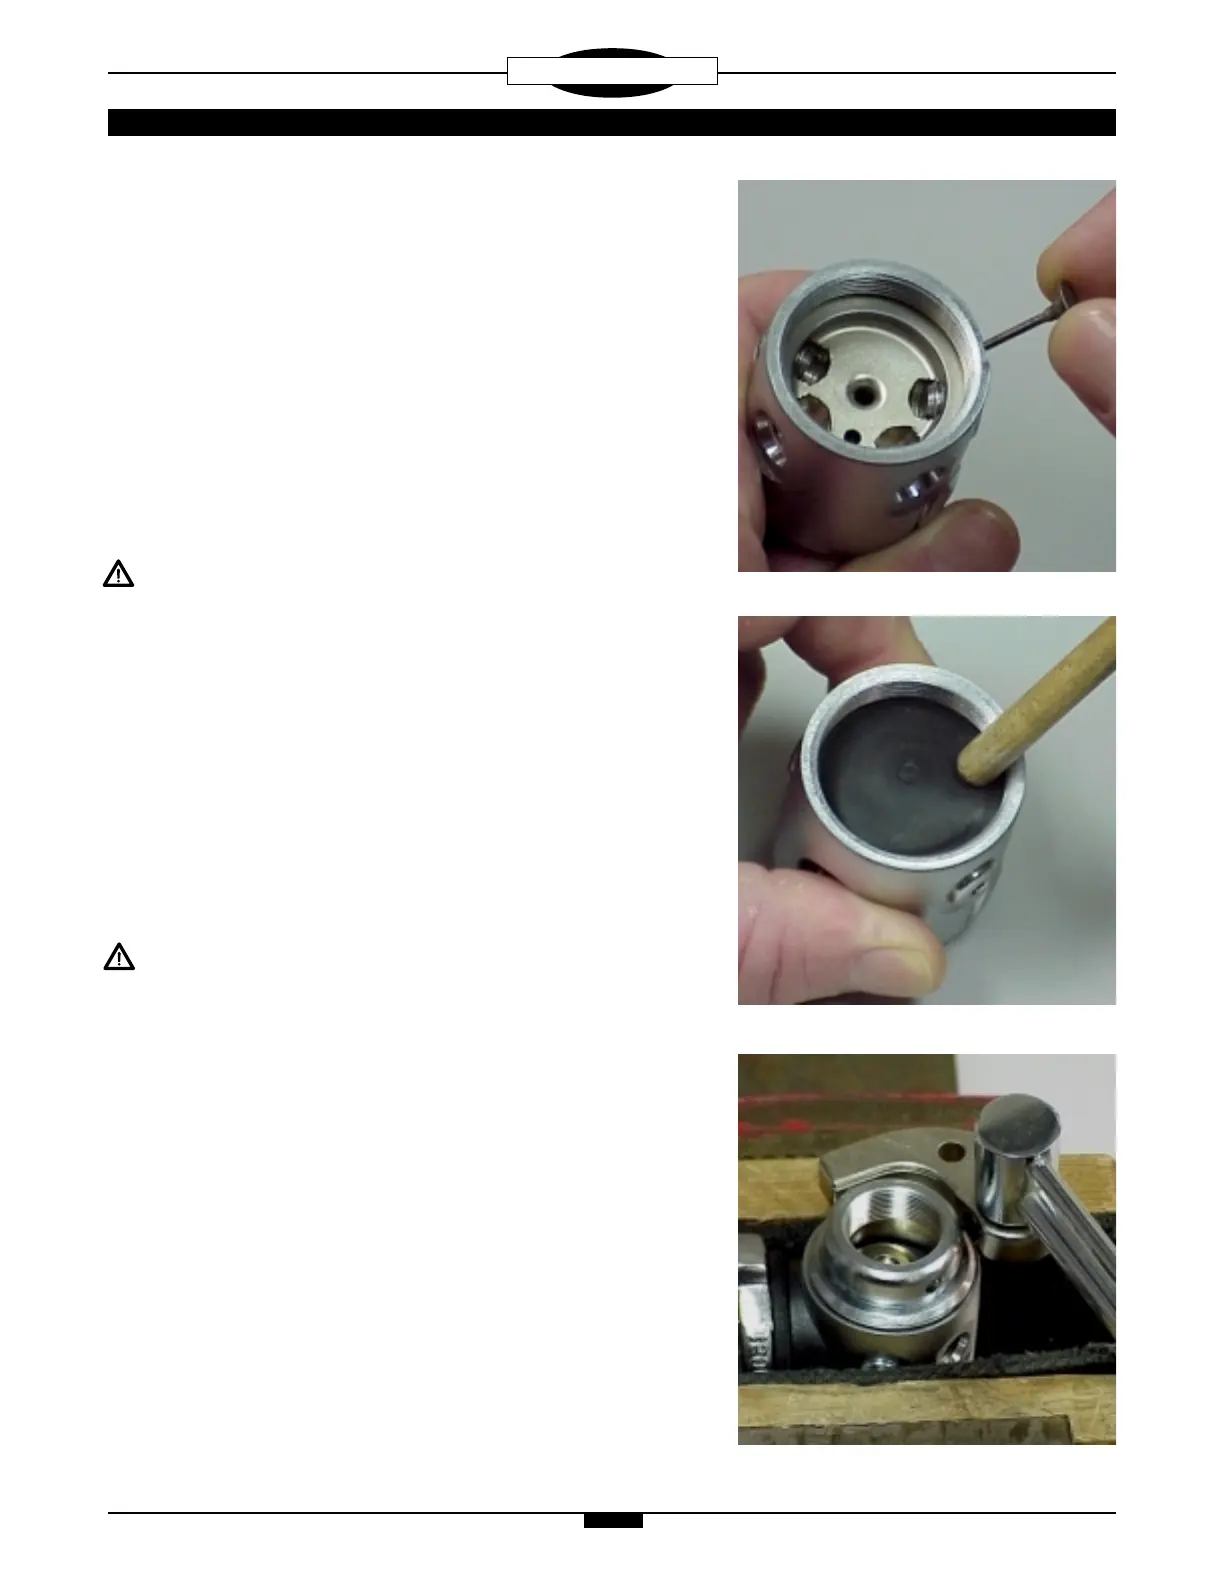
2. Place the stem of the button-pin(29) directly into the center hole
in the body(28), ensuring that it enters without any restriction.
(Fig. 16)
3. Position the diaphragm(30) flat, directly over the opening of the
body(28). Gently push the edges of the diaphragm down inside the
internal threads of the body, one thread at a time. Rotate the body
while doing this, to facilitate an even seating of the diaphragm, and
closely inspect to ensure it is well seated at the base of the
threads. (Fig. 17)
CAUTION: DO NOT force the diaphragm(30) into the body(28)
in a manner that will damage either the lip or surface of the
diaphragm, or the threads of the body. The use of a sharp
instrument, such as a screwdriver, is to be strictly avoided.
4. Lay the spring pad(31) onto the center of the diaphragm(30), with
its flat surface against the diaphragm(30).
5. Thread the end cap(32 or 37), into the body(28), turning clockwise
by hand until secure.
6. Secure the first stage body in a soft jawed or well padded vise, and
using CDx Spanner and a foot-pounds torque wrench, tighten the
end cap(32 or 37), into the body to a torque of 30-38 ft-lbs.
(Fig. 18)
CAUTION: Tighten the vise only as needed to hold the first
stage secure, and DO NOT overtighten. Doing so will result in
permanent damage, rendering it inoperable.
7. Apply a very light film of lubricant (Christo- Lube MCG #111) to
both ends of the diaphragm spring(33), and place it on the spring
pad(31).
8. Place the spring washer(34) directly onto the upper end of the
spring(33) and install the adjustment cup(35) into the end cap(32
or 37). Using a 5/16" hex key, turn the adjustment cup(35)
clockwise until only two threads are showing.
9. Lightly lubricate and install the transmitter o-rings(23, 24) onto the
transmitter(22) and the HP seat o-ring(25) into the inner bore of the
transmitter. Lightly lubricate the threads of the transmitter(22).
10. Apply a very light film of lubricant to both ends of the HP seat
spring(26) and the lower 1/4" of the HP seat shaft(27). Install the
HP seat spring(26) onto the end of the transmitter(22).
Fig. 17
Fig. 16
Fig. 18
 Loading...