Note:
Handle the headset with care. Never drop it or treat it roughly.
Follow our Rift S Headset and Lens Care recommendations at all times.
2. Remove the protective film from the sensor lens (the shiny side of the sensor body).
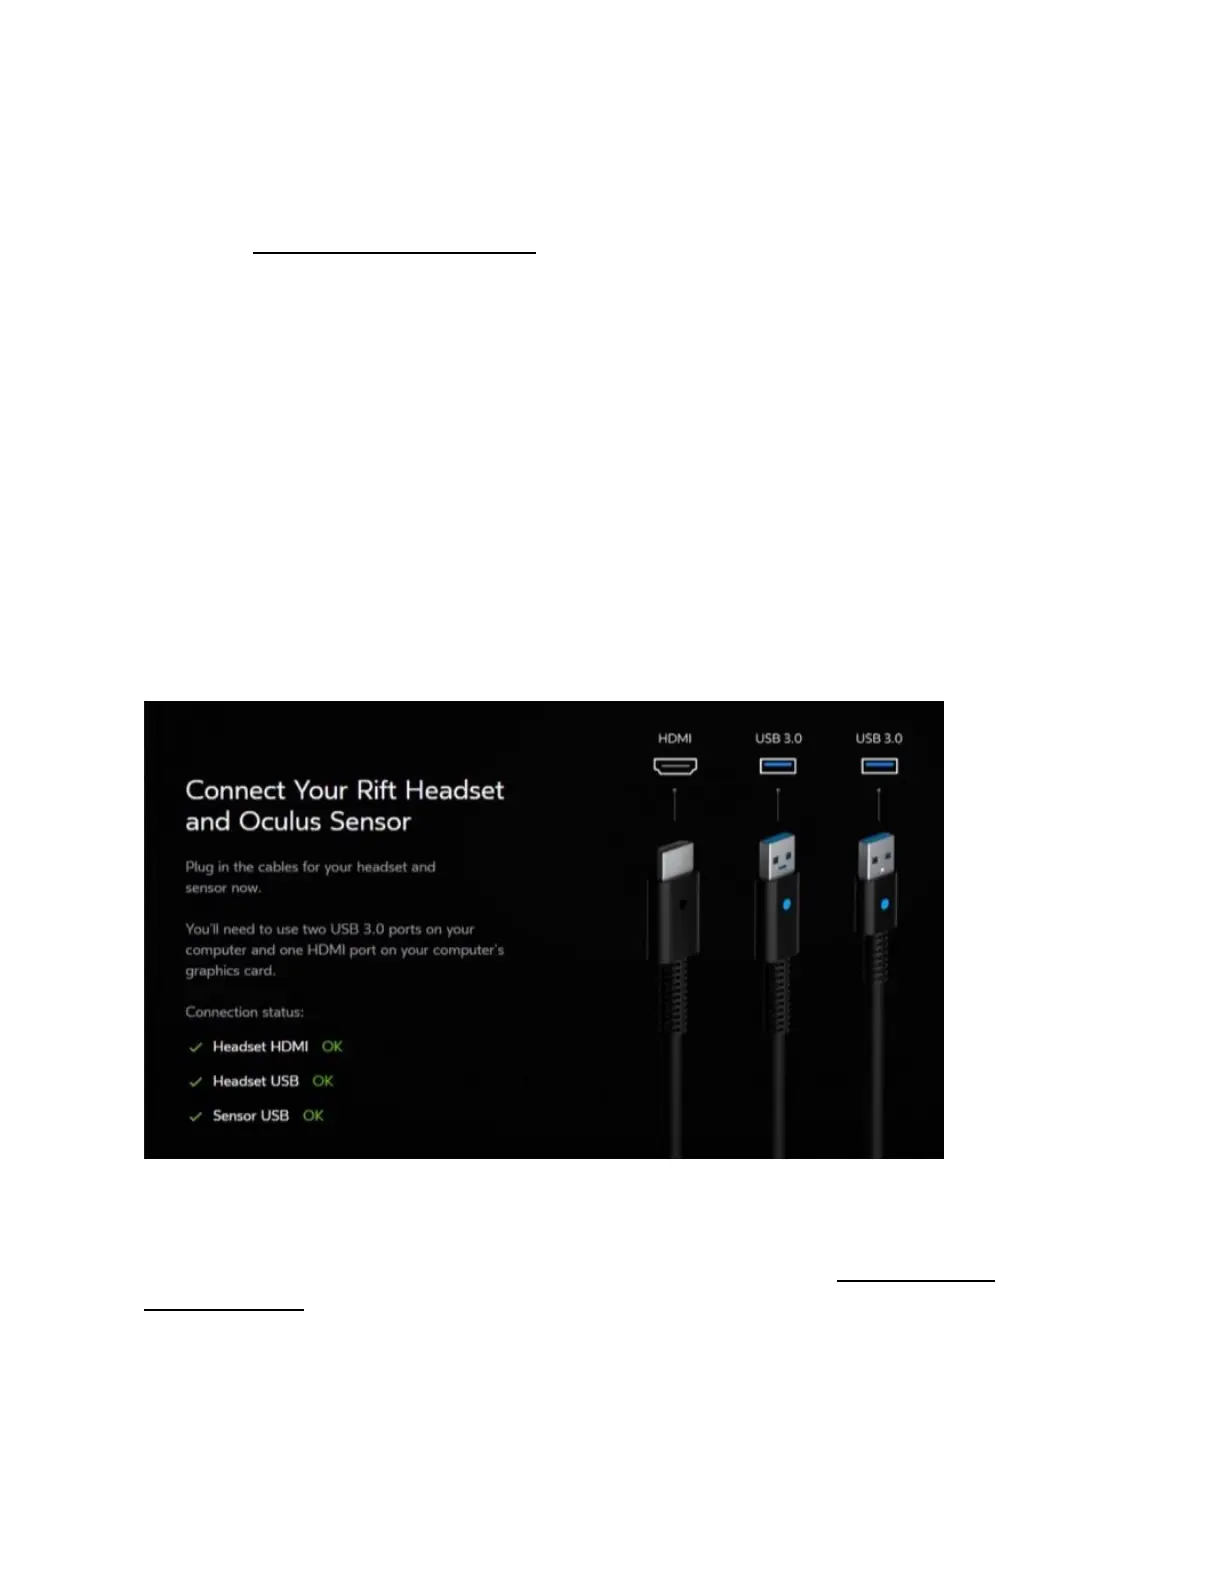
3. Connect the HDMI end of the headset cable to the HDMI port on your graphics card.
Note: Don't use the HDMI port on your motherboard, if you have one. If you aren't sure which
HDMI port to use, try the one on the narrower and simpler panel on the back of your computer.
(Most graphics cards are about 25 mm wide, whereas the motherboard panel will usually be
wider and have more ports on it.)
4. Connect the USB end of the headset cable to a USB 3.0 (blue) port on your computer.
5. Connect the sensor cable to another USB 3.0 (blue) port on your computer.
6. You'll see three green icons in the bottom-left of the Oculus screen indicating that
the headset and sensor have both been connected successfully.
7. Click Next.
Note:
If you see red or yellow warning icons or have any other issues, try our Rift S Hardware
Troubleshooting.
There's still a few more things we'll need to do before you're ready to wear the Rift S headset.