8.ENGINE
8-89
CONTINUOUSLY VARIABLE
TRANSMISSION (CVT)
GENERAL
NOTE:For a better understanding,the
following illustration are taken with
engine out of vehicle.
To perform the following instruction,it is
not necessary to remove engine.
This CVT is lubrication free. Never
lubricate any components except drive
pulley hub.
Never touch CVT while engine is running.
Never drive vehicle when CVT cover is
re-moved.
Any drive pulley repairs must be
performed by an authorized Can-Am
dealer. Subcompo-nent installation and
assembly tolerances re-quire strict
adherence to procedures detailed.
The clutch assembly is a precisely
balanced unit. Never replace parts with
used parts from another clutch assembly.
PROCEDURES
CVT COVER
CVT Cover Access
Tilt the cargo box.
Remove the rear deflector on the driver
side.
The wheel can also be removed to make
more room.
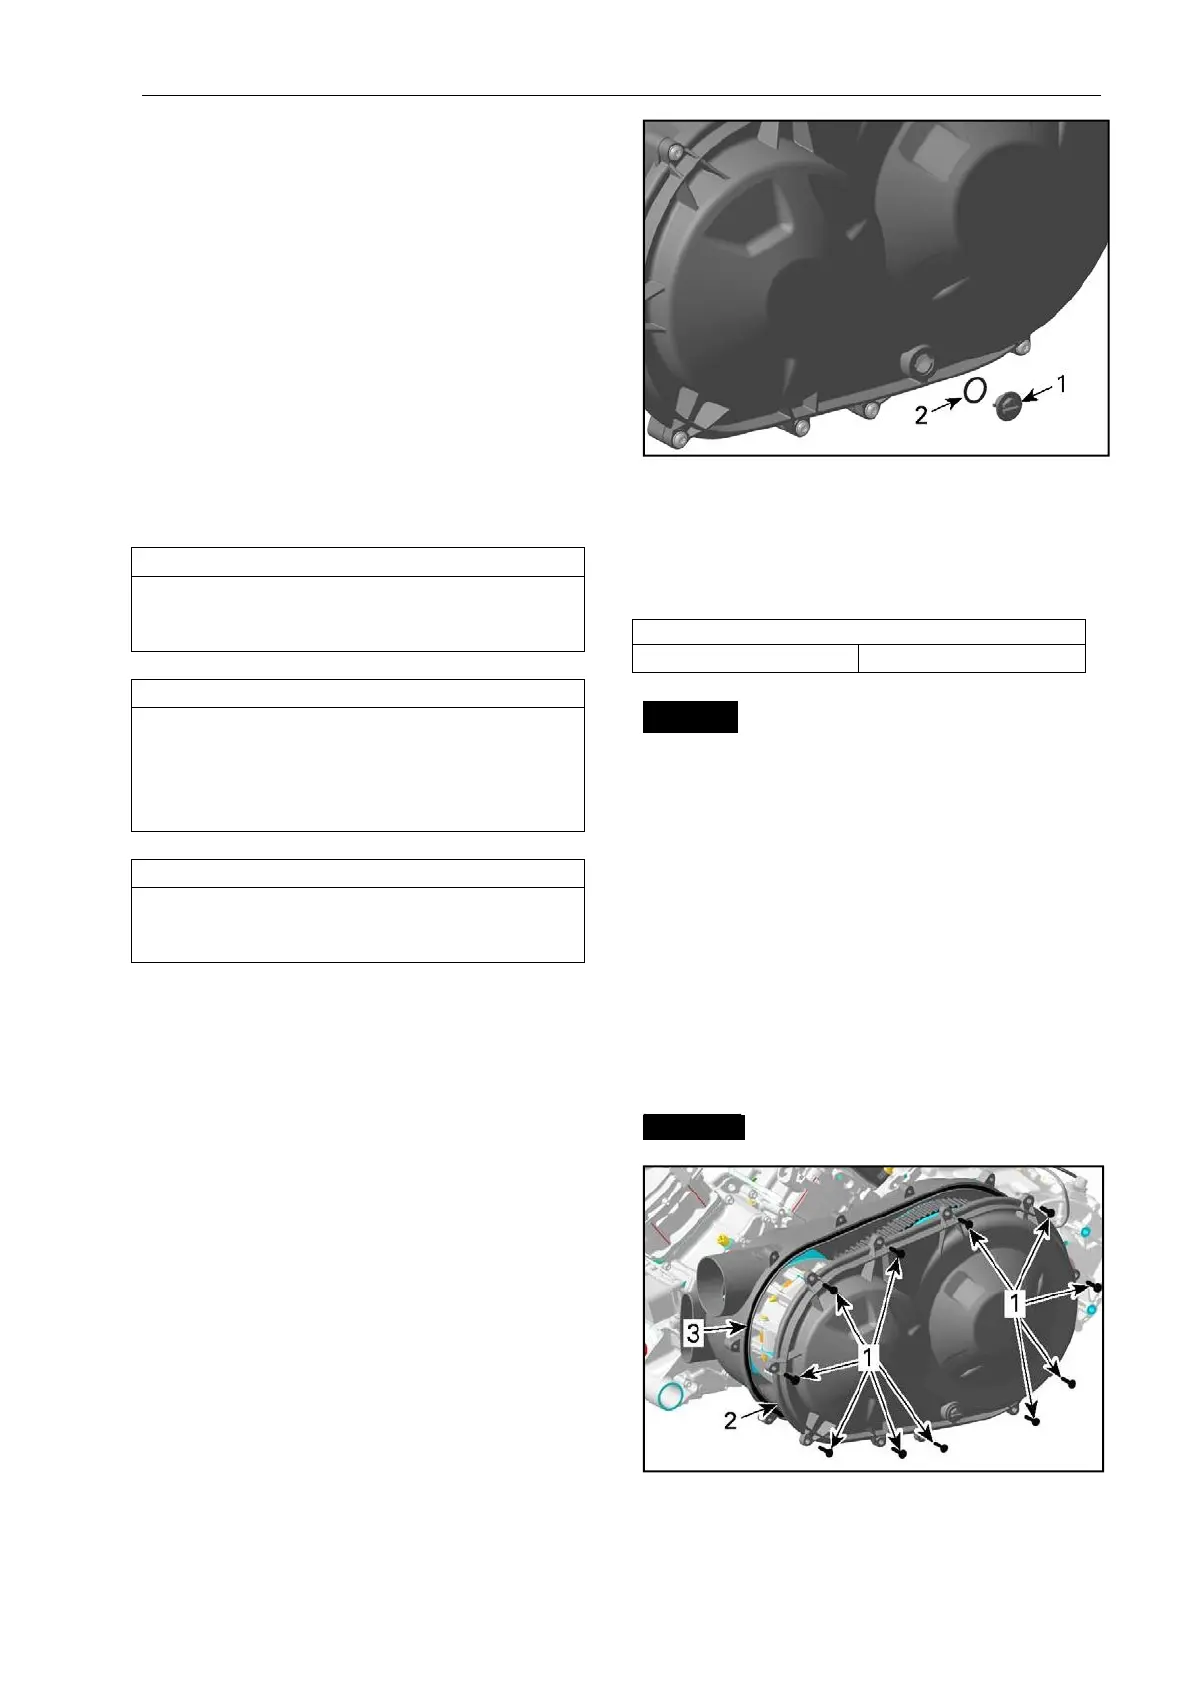
Draining the CVT Cover
If water is present in CVT cover, it can
be drained as follows:
Turn bayonet cap 90 °
counterclockwise to open it.
Remove bayonet cap and O-ring.
1. Bayonet cap
2. O-ring
3. Let water drain from CVT cover.
4. Reinstall bayonet cap and O-ring.
NOTICE If any debris entered the CVT
cover, CVT must be cleaned and
inspected.
Removing the CVT Cover
Remove:
– Retaining screws
–
CVT cover
–
Gasket.
NOTE: Remove the center top screw
last to sup-port the cover during
removal.
NOTICE Do not use and impact tool to
re-move CVT cover screws
1. Retaining screws
2. CVT cover
3. Gasket