Oki Data CONFIDENTIAL
3. Parts replacement
44983601TH Rev.1
3-21 /
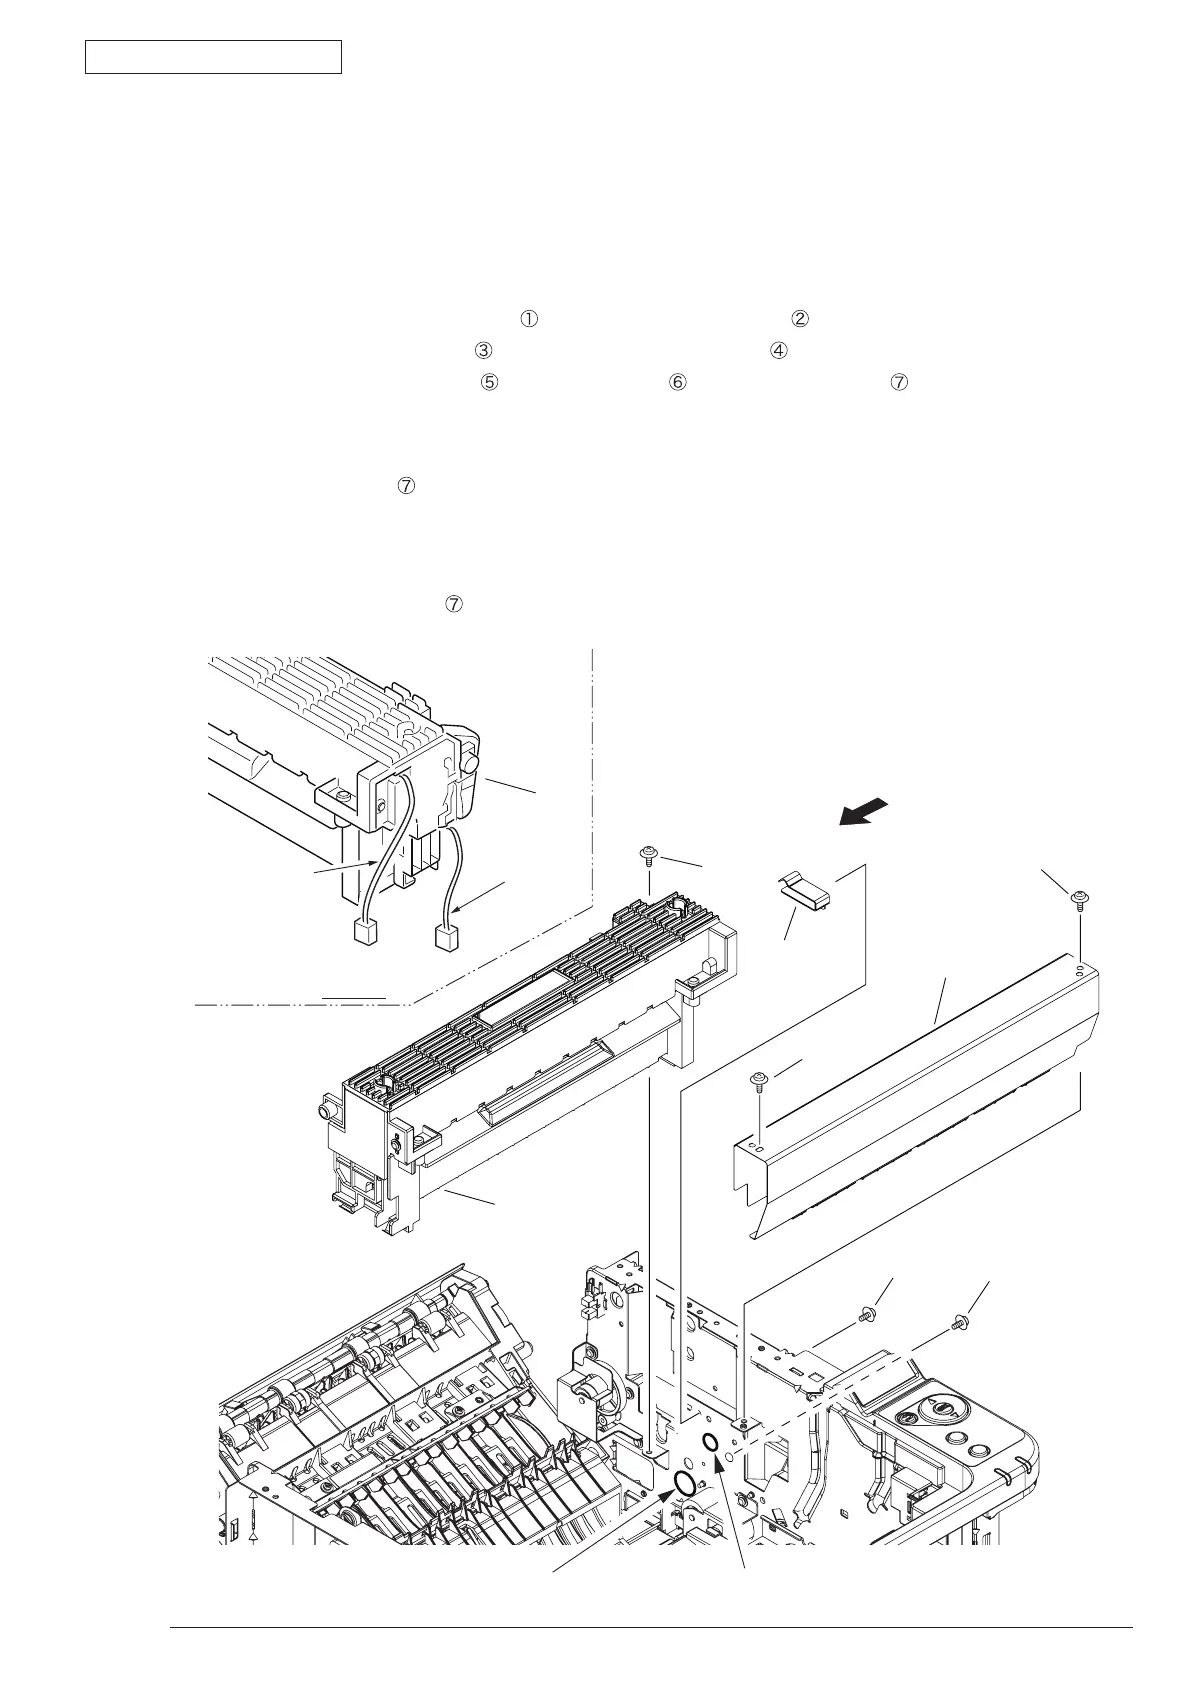
3.3.15 Fuser Assy
Note! Replace the Fuser-Assy by Assy unit.
It is forbidden for disassembling the Fuser-Assy, also, reusing the disassembled Fuser-Assy.
(1) Take out the Frame-Assy-TR. (Refer to 3.3.2)
(2) Remove the Cover Assy Stacker. (Refer to 3.3.13)
(3) Remove the two screws (Silver)
. Remove the
Plate-Duct-Assy .
(4) Remove the screw (Silver)
. Remove the
Plate-Stacker-Lock .
(5) Remove the screw (Silver)
and screw (Black) and lift off Fuser-Assy after disconnecting every
cable from it.
(6) Installing is performed by the inverse procedure with removing.
Note! Fuser-Assy
may be really hot, beware of handling.
(Note on removing / installing)
1. Beware of not to touch the DC motor inattentively (Do not rotate the motor).
2. Install the Fuser-Assy
carefully to avoid cables from being caught.
①
①
②
④
⑤
⑦
⑦
③
⑥
A hole to draw the thin cableA hole to draw the thick cable
Thick cable
Thin cable
View A
View A