This document is the user manual for the OKP ROBOTICS Robotic Vacuum Cleaner K7 series. It provides instructions for operation, programming, and maintenance of the device.
Function Description
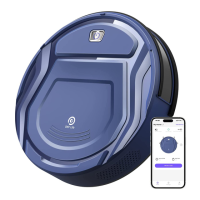
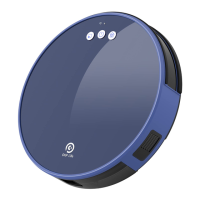
The K7 Robotic Vacuum Cleaner is designed to autonomously clean various floor types. It features multiple cleaning modes, including AUTO Cleaning, Spot Cleaning, Edge Cleaning, and Programmed Cleaning, to effectively address different cleaning needs. The robot can be controlled via physical buttons on the device, a remote control, or a mobile application. It is equipped with sensors to detect obstacles, prevent falls from steps or stairs, and automatically return to its charging dock when the battery is low.
Important Technical Specifications
The manual does not explicitly list detailed technical specifications such as battery capacity, motor power, or dimensions. However, it does mention:
- Operating Environment: Suitable for indoor household use only. Not for outdoor, commercial, or industrial environments.
- Temperature Range: Operates in temperatures between -5°C/23°F and 40°C/104°F.
- Connectivity: Supports 2.4G Wi-Fi networks for app control.
- Clearance: Requires at least 8 cm (3 inches) clearance to clean under furniture.
- Charging Time: Approximately 5.5 hours for a full charge from low battery mode.
- Battery: Contains replaceable batteries, which should be handled by skilled persons or customer service for replacement. Batteries must be removed and discarded according to local laws and regulations.
Usage Features
Quick Start:
- Charging Dock Placement: Place the charging dock against a wall, ensuring a 2m (6.6') clear area in front and 1m (3.3') on both sides. Plug in the power adapter; the power indicator light on the dock will glow.
- Side Brush Installation: Attach the side brushes to the bottom of the robot by pressing them into their respective slots until they click.
- Protector Removal: Before first use, remove the protective strip from the front bumper and charging station, as well as any protective film.
- Power On: Turn the robot's side power switch to the "ON" position (indicated by "-"). The START/PAUSE button will glow continuous blue, indicating the robot is powered on.
- Initial Charge: Place the robot on the charging dock, ensuring the charging contacts on the robot and the dock pins make a connection. Charge for at least 4 hours before the first use. The START/PAUSE button will breathe blue while charging and stop glowing when fully charged.
Cleaning Modes:
- AUTO Cleaning Mode: The robot starts cleaning immediately in this mode when the START/PAUSE button on the robot or remote control is pressed.
- Spot Cleaning Mode: (Less than 3 minutes) Ideal for areas with highly concentrated dirt. The robot cleans in a spiral pattern with MAX suction power. Activated by pressing the Spot Cleaning Mode button on the remote control.
- Edge Cleaning Mode: Designed for cleaning room edges and corners. The robot cleans along borders (e.g., walls) with MAX suction power. Activated by pressing the Edge Cleaning Mode button on the remote control.
- Programmed Cleaning Mode: The robot cleans in a pre-optimized pattern for hard floors. Activated by pressing the Programmed Cleaning Mode button on the remote control.
- Return to Charger Mode: The robot automatically returns to the charging dock when the battery is low. Can also be manually activated by double-clicking the START/PAUSE button on the robot or pressing the Return to Charger button on the remote control.
Pause Function:
- To pause the robot, press the START/PAUSE button on the robot or the remote control. When paused, the robot can be moved forward, left, or right using the remote control.
Sleep Mode:
- The robot enters sleep mode after 10 minutes of standby, and the START/PAUSE button light turns off.
APP Control:
- Download: Scan the QR code or search "OKP life" in the app store (iOS 9.0+ or Android 4.0+).
- Network Configuration:
- EZ Mode (2.4G Wi-Fi only): Connect your mobile device to a 2.4G Wi-Fi network. Turn on the robot's power switch. Press and hold the START/PAUSE button for about 3 seconds until a beep is heard. The Wi-Fi indicator will flash quickly, indicating EZ network configuration mode.
- AP Mode (2.4G Wi-Fi only): If EZ mode fails, try AP mode. Turn on the robot's power switch. Press and hold the START/PAUSE button for about 3 seconds until one beep, then continue holding for another 3 seconds until two beeps are heard. The Wi-Fi indicator will flash slowly, indicating AP network configuration mode.
- Connection: After setting the robot to EZ or AP mode, connect your phone to the Wi-Fi network named "SmartLife" (for AP mode) and then return to the app to start network configuration.
Maintenance Features
The manual outlines maintenance procedures for various components to ensure optimal performance:
- Dust Bin and Filters: Regular cleaning is required. The dust bin includes a filter net, sponge filter, and high-efficiency filter (HEPA).
- Roller Brush Suction and Side Brushes: Instructions for cleaning or replacing these components are provided.
- Other Components: General maintenance for other parts of the robot.
Important Safety Instructions:
- Children aged 8 and above, and persons with reduced physical, sensory, or mental capabilities, can use the appliance under supervision.
- Clear the cleaning area of power cords and small objects to prevent entanglement.
- Manage rug fringes and lift curtains/tablecloths.
- Ensure the robot can detect steps/stairs; use physical barriers if necessary.
- Use only manufacturer-recommended attachments.
- Do not use on wet surfaces, with standing water, or to pick up flammable/combustible materials, burning/smoking items, or large objects.
- Keep hair, loose clothing, and body parts away from moving parts.
- Do not operate without the dust bin and/or filters.
- Turn off the power switch before cleaning or maintaining the appliance.
- Unplug the charging dock if not used for a long time.
- If the robot will not be used for a long time, fully charge it and power it off for storage.