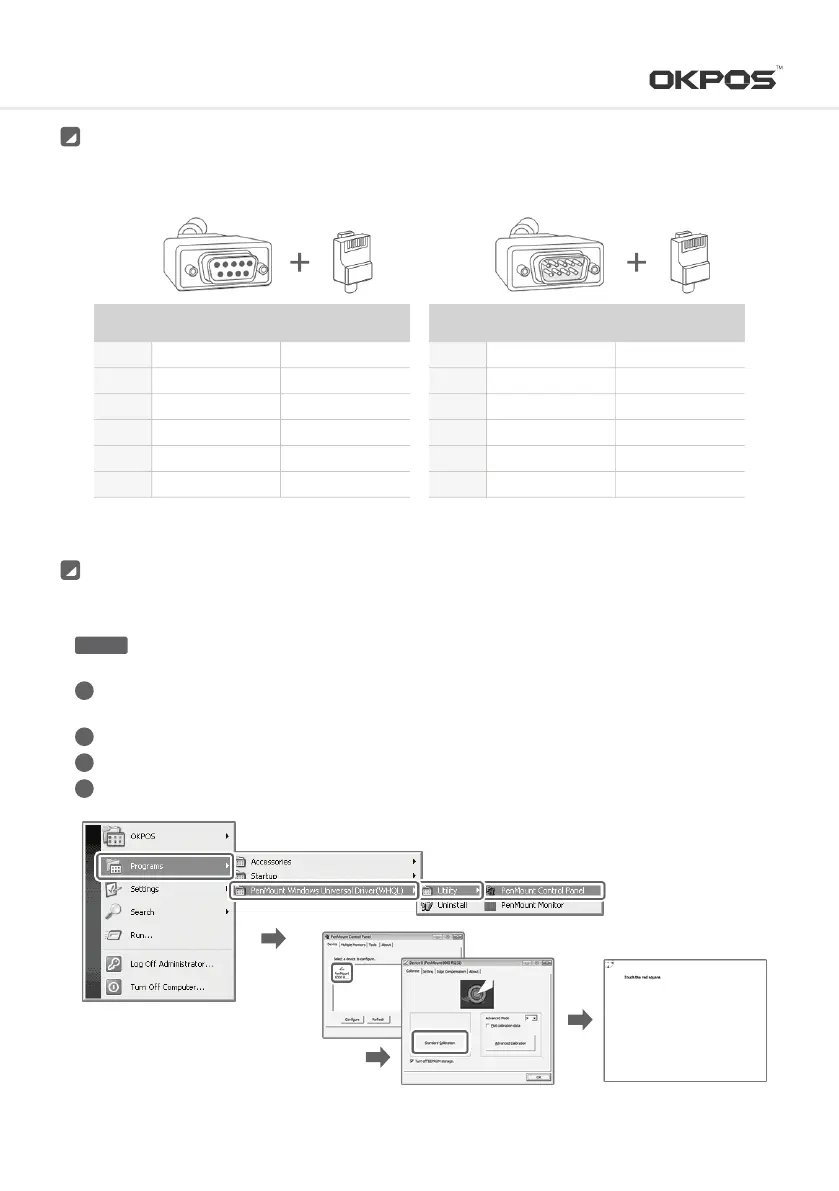
SETTING
For the connection of POS and kitchen printer, please refer below
Kitchen printer
2 (White)
3 (Red)
4 (Green)
5 (Black)
6 (Blue)
8 (Blue)
4 (Blue)
3 (W/Green)
7 (W/Brown)
RXD
TXD
DTR
GND
DSR
CTS
SIGNAL
NAME
DB 9P
FEMALE (POS)
RJ45
(PRINTER)
3 (White)
2 (Red)
6 (Green)
5 (Black)
4 (Blue)
4 (Blue)
3 (W/Green)
4 (Blue)
7 (W/Brown)
TXD
RXD
DSR
GND
DTR
DTR
SIGNAL
NAME
DB 9P
MALE (PRINTER)
RJ45-COM4
(POS)
If a sharp one like a ballpoint pen is used in calibration, damage to the touch screen may occur. This is not the way to be recommended.CAUTION
If touch screen is not calibrated correctly, re-calibrate as follows
Touch Screen
Select ‘PenMount 6000 RS232’ in device selection tab to configure in ‘PenMount Control Panel’
Press ‘Standard calibration’ button in the coordinate calibration tab
4 Follow the on-screen instructions
After you click the Windows start button, select as follows: <Program ▶
PenMount Windows Universal Driver (WHQL) ▶ Utility▶ PenMount Control Panel>
1
2
3
4
17
Service Manual