OLCT 700/710 TP
Page 30 of 45 Rev. C.1 OLCT 700/710 TP Instruction Manual
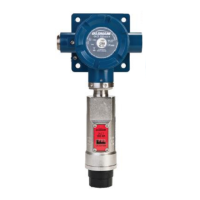
a) Remove power to OLCT 700/710 TP detector by lifting the + 24VDC wire in J-Box.
b) Use a M1.5 Allen wrench to release the locking setscrew that locks the ITM and bottom housing
together (One turn will suffice - Do not remove setscrew completely).
c) Remove splashguard. Unthread and remove the Bottom Housing from the ITM.
d) Gently pull the plug-in H
2
S sensor cell out of the ITM. Orient the new plug in sensor so that it matches
with the female connector pins. It may be necessary to look from below to assure alignment is correct.
When properly aligned, press the sensor in firmly to make the proper connection.
e) Thread the Bottom Housing onto the ITM to a snug fit and tighten the locking setscrew using the 1/16”
Allen wrench. Reinstall the splashguard.
f) Perform “Set Heater Power (Section 3.5.6 to match the new sensor with the ITM. Perform a successful
AutoSpan to match the new sensor with the ITM (Section 3.4).