15
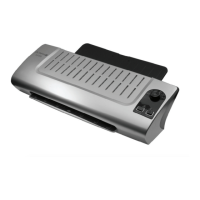
6 Insert the foil pocket containing the document in the insertion slot on
the rear of the laminator. Insert the ready closed side of the foil pocket
first.
Note: To prevent the laminating foil from creasing, never feed the
open side of the foil pocket first in the insertion slot of the laminator.
The laminating process occurs automatically.
Attention: The foil is very hot and soft when ejected following lamina-
tion. Therefore, handle the laminated product with extreme care.
Note: To flatten the laminated product, place a book or similar heavy,
flat object, on it.
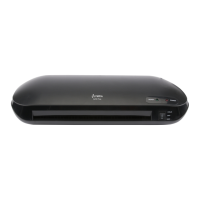
Cold Lamination
1 Connect the power cable to an easily accessible, properly installed
power socket.
Attention: Check that the voltage specifications of the machine
correspond to that of your power supply network (220 - 240 V, 50 Hz).
2 Switch on the On/Off switch on the right-hand side of the unit (I).
3 The "COLD" LED lights up and the drive motor for the transport roll-
ers start up.
Attention: If you have just finished using the laminator for hot laminat-
ing, you must let the laminator cool down. The cool down phase can
take up to 30 minutes.
4 Remove the protective foil from the foil pocket.
5 Insert the document to be laminated in the foil pocket so that there is a
margin of approx. 3 - 5 mm to the edge of the foil on all sides.
6 Insert the foil pocket containing the document in the insertion slot on
the rear of the laminator. Insert the ready closed side of the foil pocket
first.
Note: To prevent the laminating foil from creasing, never feed the
open side of the laminating pocket first in the insertion slot of the lami-
nator. The laminating process occurs automatically.