J
Joseph CunninghamSep 23, 2025
What to do if my Olympus Digital Camera says 'NO CONNECTION'?
- WwhammondSep 23, 2025
If your Olympus Digital Camera displays 'NO CONNECTION', disconnect the camera and connect it again correctly.
What to do if my Olympus Digital Camera says 'NO CONNECTION'?
If your Olympus Digital Camera displays 'NO CONNECTION', disconnect the camera and connect it again correctly.
Why are my Olympus Stylus 410 Digital Digital Camera pictures out of focus?
If your pictures are out of focus, it could be due to these reasons: * The camera moved when the shutter button was pressed; hold the camera correctly and press the shutter button gently. * The subject is too close; use the macro mode. * In self-timer mode, you were standing in front of the lens when you pressed the shutter button; avoid standing in front of the lens when pressing the shutter. * The green lamp blinked when the shutter button was pressed halfway; wait until the green lamp lights before pressing fully. * You didn't use focus lock when the subject was outside the center; use focus lock for accurate focus. * The lens was dirty; wipe the lens with a blower brush and lens cleaning paper.
What does 'WRITE PROTECT' mean on my Olympus Digital Camera?
If your Olympus Digital Camera displays 'WRITE PROTECT', use a computer to cancel the read-only setting. If the message persists, save the images to your computer and format the card with the camera.
What does 'PICtURE ERROR' mean on my Olympus Stylus 410 Digital Digital Camera?
If your Olympus Digital Camera displays 'PICtURE ERROR', use image processing software to view the pictures on a computer. If that doesn't work, the image file is damaged.
Why my Olympus Digital Camera settings reset to default when turned off?
If your Olympus Digital Camera settings revert to factory defaults when turned off, it's likely because the camera was turned off without saving the settings. Set ALL RESET to OFF.
Why does my Olympus Digital Camera say 'NO PICTURE'?
If your Olympus Digital Camera displays 'NO PICTURE', record pictures before attempting playback.
Why do colors look unnatural in my Olympus Stylus 410 Digital Digital Camera indoor pictures?
If the colors of your Olympus Digital Camera's indoor pictures look unnatural, it may be because indoor lighting affects the picture’s colors, so adjust the white balance. Also, if there is no white in the subject include something white or use fill-in flash mode. Finally, ensure the white balance setting is correct for the light source.
Why do my Olympus Stylus 410 Digital Digital Camera pictures have obscured edges?
If your Olympus Digital Camera pictures have obscured edges, your finger or the strap might be blocking the lens; hold the camera correctly. The subject might be too close; check the picture area using the monitor.
How to fix wrong date on Olympus Digital Camera photos?
If the date recorded in your Olympus Digital Camera's image data is wrong, it could be due to several reasons: * The date/time was not initially set (it's not set at the time of purchase), so set it. * The camera has been left with the battery removed; set the date and time again. * The camera detected a power supply problem; after normal operation is restored, set the date and time again. * A card charged with static electricity was inserted; set the date and time again.
Why isn't my Olympus Stylus 410 Digital taking pictures when I press the shutter button?
If your Olympus Digital Camera isn't taking pictures when you press the shutter button, consider these possibilities: * The lens barrier might not be fully open; make sure it is. * The card might be full; erase unwanted pictures or insert a new card. * The flash might be charging; wait until the orange lamp stops blinking. * The image might be writing to the card; wait until the orange lamp stops blinking. * The memory gauge might be full; wait until there is room in the memory gauge.
Lists all items included in the camera package for initial setup and verification.
Provides essential safety precautions and warnings for handling the camera, battery, and charger.
Explains the camera's weatherproof capabilities and precautions to maintain its resistance to water.
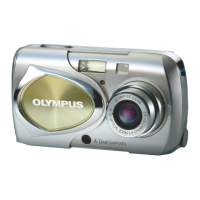
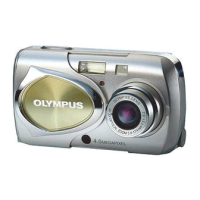
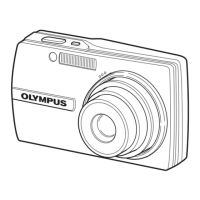
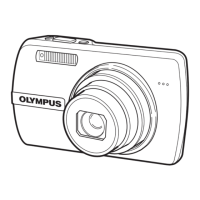
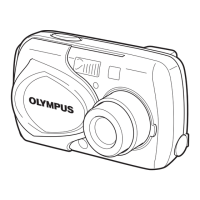
Identifies and labels the various external components and controls of the digital camera.
Details the various icons and symbols displayed on the camera's monitor during shooting and playback.
Instructions on how to properly attach the camera strap to the device for secure carrying.
Step-by-step guide on how to charge the camera's lithium-ion battery using the provided charger.
Detailed instructions on how to insert and remove the lithium-ion battery from the camera.
Information on using the optional AC adapter for powering the camera, including its benefits.
Guides on how to insert and remove the xD-Picture Card from the camera for image storage.
Explains the specifications and usage of the xD-Picture Card for the camera.
Instructions on how to turn the camera on and off in different modes like shooting and playback.
Explains how to navigate and use the camera's menu system to adjust settings.
Instructions for setting the camera's internal clock for accurate photo timestamps.
Process for preparing a memory card for use in the camera, erasing all data.
How to increase or decrease the brightness of the camera's LCD monitor.
Feature to check and adjust the camera's sensor and image processing for optimal performance.
Proper techniques for holding the camera with both hands to ensure stable shooting.
Basic steps and process for capturing still photographs using the camera's monitor.
Method for locking focus on a subject not centered in the frame for accurate focusing.
How to select different shooting modes (e.g., Portrait, Landscape) to suit various scenes.
Instructions on operating the optical and digital zoom for framing shots.
Guide to selecting and using different flash modes (Auto, Red-eye, Fill-in, Off).
How to select image resolution and compression quality based on intended use.
Adjusting white balance to ensure accurate colors under different lighting conditions.
Using exposure compensation to adjust image brightness for subjects that are too bright or dark.
Instructions for using macro mode to photograph small subjects up close.
How to use the self-timer to take pictures with a delay, allowing the photographer to be in the shot.
Capturing a rapid sequence of shots by holding down the shutter button.
Basic operation for viewing still images stored on the camera's memory card.
Zooming in on displayed pictures to check image clarity and details.
Adjusting the orientation of images to display them correctly (portrait/landscape).
Converting selected color images into black and white versions.
Resizing images to smaller dimensions, suitable for email or web posting.
Preventing accidental deletion of important images by marking them as protected.
Deleting individual unwanted pictures from the memory card.
Basic steps to start recording video clips with the camera.
Activating digital zoom for movie recording to further magnify the subject.
Selecting recording modes (HQ, SQ) to affect movie resolution and recording time.
Using exposure compensation to manage brightness in movie scenes with varying light.
Instructions for playing recorded movie clips on the camera's monitor.
Method for advancing or reversing movie playback one frame at a time.
Deleting individual unwanted movie clips from the memory card.
Generating a still image index from selected frames of a movie for quick review.
Overview of different options for printing photos, including computer and direct printing.
Setting up print orders and specifying desired prints directly from the camera.
Connecting the camera directly to a PictBridge printer for printing without a computer.
Selecting print modes (e.g., Print, All Print, Multi Print) on the camera for direct printing.
Printing all images stored on the memory card automatically.
General workflow for transferring images from camera to computer.
Instructions specific to using the camera with Windows operating systems.
Instructions specific to using the camera with Macintosh operating systems.
Guide to installing and using the CAMEDIA Master software for image management.
Lists common error messages and provides corrective actions to resolve them.
Troubleshooting guide for common camera issues like not responding or not working properly.
Steps to diagnose and fix issues when the computer fails to detect the camera.
Explains the meaning of camera indicator lamps and flash status for operational feedback.
Comprehensive list of camera menu functions, their settings, and corresponding reference pages.
Instructions on cleaning, storing, and preventing condensation for camera care.
Detailed technical specifications of the camera, including hardware and performance metrics.
| Optical Zoom | 3x |
|---|---|
| Digital Zoom | 4x |
| Screen Size | 1.5 inches |
| Type | Compact |
| Image Sensor | 1/2.5-inch CCD |
| Storage | xD-Picture Card |
| Battery | LI-10B Lithium-Ion Battery |
| Weight | 165 g |