~'iimiiiiO)ifi!
/ BEFORE USE: Inspect your camera.! AVANT UTILISATION: Inspectez votre appareil photo.! ANTES
DE
USAR: Revise
la
camara.
~'iim1iO)a=FAtt!
AFTER USE: Clean your camera.! APRES UTILISATION: Nettoyez votre appareil photo. I DESPUES DE USAR: Limpie
la
camara.
h-r
':J
C:1§-tJ~'9-Q
*c\
14t;th/h -
~
h/~-,
:J
*:7:9
h/~-~
L<J
tJ)U
c:~G*90
Close the battery/card compartment cover and connector cover firmly
until they click,
Cierre firmemente la tapa del compartimiento de
la
bateria/tarjeta y del
conector hasta
oir
un
c1ic.
Fermez
Ie
couvercle de la carte/du compartiment de
la
batterie et
Ie
couvercle du connecteur fermement jusqu'a ce
qu'i1s
soient verrouilles,
~.1J7.k/\,:;::t-/
Water resistant sealants
Joints d'etancheite a I'eau
Juntas
de
sellado impermeable
Verifiez qu'il n'y a aucun objet etranger (comme
un
cheveu ou
du
sable)
ou
des gouttes d'eau aI'interieur du couvercle de
la
carte/du compartiment de
la
batterie ou sur
Ie
couvercle du connecteur (zones en bleu sur les illustrations). S'il
ya
un
objet
etranger ou des gouttes d'eau, retirez-Ies avec un chiffon doux
non
pelucheux, Verifiez que les joints d'etancheite aI'eau ne sont
pas fissures
ou
endommages,
Asegurese de que no hay elementos extranos (tales como pelo
0 arena) 0 gotas de agua en
el
interior de
la
tapa del compartimiento
de
la
bateria/tarjeta 0
en
la
tapa del conector (las zonas coloreadas de azul
en
las ilustraciones),
Si
hay objetos extranos 0 gotas de
agua, Ifmpielas con
un
pano suave sin hilos. Asegurese de que
no
hay grietas
ni
fisuras
en
la
juntas de sellado impermeable.
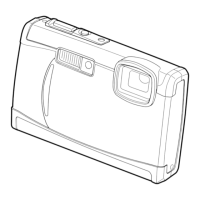
Be sure that there are no foreign objects (such as hair or sand) or water drops inside of the battery/card compartment cover or
connector cover (the blue areas
in
the illustrations). If there are any foreign objects or water drops, wipe them off with a soft, lint-
free cloth. Make sure that there are no cracks or tears
in
the water resistant sealants.
14t;th/h-
~h/~-t:3e:tlj:J*:7:9h/~-i*Jg~(
-15;\
r--o)~L\g~5J')
1::J"2
(~O)=E
1;$:,
~~*iL
1@tJ:c)
~*;jiiijtJ~tJ:L\'='c:
~~~;f:!.L-*90
:J"2.
*;jiiijtJ~-:>L
\TL
\-Q~~Ij:,
*,@*l<
90)
t±:ltJ:
L
\ffl--C,,)\~IJ;J[()
*90
~h*/\':;.:f/r:U-lj~IJ11.tJ~tJ:L
\.=.
c:~~
~~,L-*90
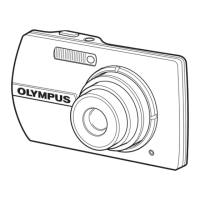
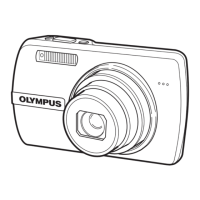
V/A'/\I)?
Lens barrier
Volet de I'objectif
Barrera objetivo
~
ress
the POWER button repeatedly while the camera is submerged to remove any debris from the lens cover.
If
the lens cover cannot be moved, place it
nder running tap water and press the POWER button repeatedly.
or cameras with a lens barrier: Place the front
of
the camera under running tap water to remove any debris around the lens barrier, If the lens barrier does
ot move smoothly, do not force
it;
rinse the lens barrier by gently moving it while placed under a strong stream
of
running tap water.
4ppuyez plusieurs fois sur la touche POWER pendant que I'appareil photo est immerge afin d'enlever les salissures du couvercle de I'objectif. Si
Ie
couvercle
de
I'objectif ne peut pas etre retire, passez-Ie sous un robinet d'eau claire et appuyez plusieurs fois sur
la
touche POWER.
~our
les appareils photo munis d'un volet de I'objectif: placez I'avant de I'appareil photo sous
Ie
jet
d'un robinet d'eau claire afin d'enlever les salissures du
Volet
de I'objectif.
Si
Ie
volet de I'objectif ne se retire pas facilement, ne forcez pas; rincez
Ie
volet de I'objectif en
Ie
passant doucement sous
Ie
jet
puissant
d'un robinet d'eau claire.
Rresione
el
boton POWER varias veces mientras
la
camara esta sumergida para eliminar cualquier resto de la tapa del objetivo.
Si
no puede mover
la
tapa
el
objetivo, coloquela bajo un chorro de agua y presione
el
boton POWER varias veces.
ara camaras con barrera objetivo: Situe
la
parte delantera de
la
camara bajo
un
chorro de agua corriente para eliminar cualquier resto de
la
tapa de
la
barrera
bjetivo.
Si
la
barrera objetivo
no
se mueve suavemente,
no
la
fuerce, enjuague
la
barrera objetivo moviendola con cuidado bajo
un
chorro
de
agua corriente fuerte.
V/
"j]/'\.-
«~
Len;over
Cou
erde
de
I'objectif
La
t a del objetivo
IIiI JO) '!'C'
POWER
*7
;'-~lll
'J
i!<
LA~
[,
'C
v;'-
;;(;iJJ,-g~O)
::L,:
~:l'c
[,"',.
v
/;(
;iJJ\-f.)'O!Jt.Nd:
(\~i;I~,
l!lW)O)*i1!*~
v;,-;;(oo
1::"H~"lll,
rOWER
*:9
/~**Uj[gL-tfflL-*90
v/:;Z'/~
I)
7:9-17'0)~fI0)~~
:
*~*~h
j.
50)MiIDl:3TT,
v
/A'/~
I)
7g~0):J"
2
~~c:
L-*90
v/A:/~
I)
7tJ~;\D.-A'I:t1JtJ)tJ:L
\~~Ij:~I!
I
~61')9,
~ta61')O)*~*~
V/A'/~
I)
71:~TtJ:tJ~'G
V/A'/~I)
7~1~~
r:t1JtJ)L-T,
99~';JtL\~
L-*90
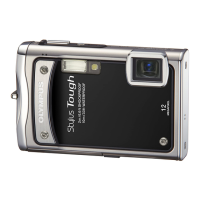
After use, submerge the camera
in
fresh
water for about
10
minutes to remove any
dirt, sand, salt or other debris,
{~fflf~rj:,
hj.5~~*r:
107H¥J3r;~L
T,
;/t.
~~~c:
L-*90
Apres utilisation, immergez I'appareil
photo dans I'eau pendant environ
10
minutes pour enlever toute salete,
sable, sel ou autre poussiere.
Despues de usarla, sumerja
la
camara en
agua dulce durante unos
10
minutos para
eliminar cualquier suciedad, arena, sal u
otros restos.
~*.~~~~<~fflr~~~~.
*~~~~fflM
/C::'~ffl~~;t~#~~~,9fiJ"'«t::'~~\o
IJ;J[t:&ID?
Sjj
=1=
I:
t>~$L-L
\ID?SjjtJ~~cj1~
11.
TL
\*90
I~h*
.
it1jJ~t1~gl:-:>L
\TJ
0)""-:/t>!t'9t:3~?'C&<
t':~
L\o
;$:*IEO)hj.
5-15;\
r--Ij:t:3~L\..t(fL\t;:t':L\t;:hj.
5c:~
tJ:-Q~~tJ~~
()
*9tJ\
IJ;J[
UtlH \l:J-;:ti:l:iiL
\rj:~
U
*ttlvo
Proper care before and after using your camera
is necessary to maintain water resistance.
Details are also noted
in
the user manual.
Be
sure to read
the page entitled "IMPORTANT INFORMATION ABOUT
WATER AND SHOCK RESISTANT FEATURES".
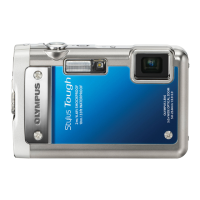
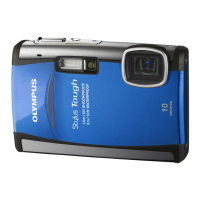
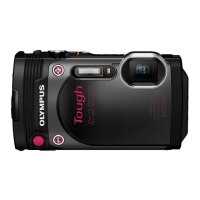
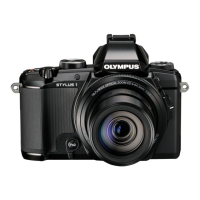
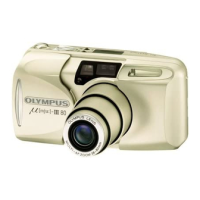
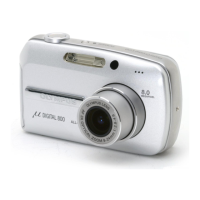
The camera illustrations shown
in
this manual may differ
from the actual product, but the operation
is
the same.
Un bon entretien de I'appareil photo avant et
apres toute utilisation est necessaire pour
maintenir I'etancheite
aI'eau.
Des informations detaillees sont egalement disponibles
dans
Ie
manuel de I'utilisateur. Lisez attentivement
la
page concernant les "INFORMATIONS IMPORTANTES
RELATIVES AUX FONCTIONS D'ETANCHEITE
AL'EAU ET DE RESISTANCE AUX CHOCS".
Les illustrations de I'appareil photo presentees dans ce
manuel peuvent ne pas correspondre
au
produit reel mais
I'operation est
la
meme,
Es
necesario actuar con el debido cuidado antes
y despues de usar
la
camara para mantener
la
resistencia
al
agua.
Mas informacion
al
respecto en
el
manual de usuario.
No se olvide de leer
la
pagina titulada "INFORMACION
IMPORTANTE ACERCA DE LAS FUNCIONES DE
IMPERMEABILIDAD Y RESISTENCIA A LOS GOLPES".
Las ilustraciones de la camara que aparecen
en
este manual pueden diferir del producto real pero
el
funcionamiento es
el
mismo.
~'iimiiiiO)ifi!
/ BEFORE USE: Inspect your camera.! AVANT UTILISATION: Inspectez votre appareil photo.! ANTES
DE
USAR: Revise
la
camara.
~'iim1iO)a=FAtt!
AFTER USE: Clean your camera.! APRES UTILISATION: Nettoyez votre appareil photo. I DESPUES DE USAR: Limpie
la
camara.
h-r
':J
C:1§-tJ~'9-Q
*c\
14t;th/h -
~
h/~-,
:J
*:7:9
h/~-~
L<J
tJ)U
c:~G*90
Close the battery/card compartment cover and connector cover firmly
until they click,
Cierre firmemente la tapa del compartimiento de
la
bateria/tarjeta y del
conector hasta
oir
un
c1ic.
Fermez
Ie
couvercle de la carte/du compartiment de
la
batterie et
Ie
couvercle du connecteur fermement jusqu'a ce
qu'i1s
soient verrouilles,
~.1J7.k/\,:;::t-/
Water resistant sealants
Joints d'etancheite a I'eau
Juntas
de
sellado impermeable
Verifiez qu'il n'y a aucun objet etranger (comme
un
cheveu ou
du
sable)
ou
des gouttes d'eau aI'interieur du couvercle de
la
carte/du compartiment de
la
batterie ou sur
Ie
couvercle du connecteur (zones en bleu sur les illustrations). S'il
ya
un
objet
etranger ou des gouttes d'eau, retirez-Ies avec un chiffon doux
non
pelucheux, Verifiez que les joints d'etancheite aI'eau ne sont
pas fissures
ou
endommages,
Asegurese de que no hay elementos extranos (tales como pelo
0 arena) 0 gotas de agua en
el
interior de
la
tapa del compartimiento
de
la
bateria/tarjeta 0
en
la
tapa del conector (las zonas coloreadas de azul
en
las ilustraciones),
Si
hay objetos extranos 0 gotas de
agua, Ifmpielas con
un
pano suave sin hilos. Asegurese de que
no
hay grietas
ni
fisuras
en
la
juntas de sellado impermeable.
Be sure that there are no foreign objects (such as hair or sand) or water drops inside of the battery/card compartment cover or
connector cover (the blue areas
in
the illustrations). If there are any foreign objects or water drops, wipe them off with a soft, lint-
free cloth. Make sure that there are no cracks or tears
in
the water resistant sealants.
14t;th/h-
~h/~-t:3e:tlj:J*:7:9h/~-i*Jg~(
-15;\
r--o)~L\g~5J')
1::J"2
(~O)=E
1;$:,
~~*iL
1@tJ:c)
~*;jiiijtJ~tJ:L\'='c:
~~~;f:!.lJ*90
:J"2.
*;jiiijtJ~-:>L
\TL
\-Q~~Ij:,
*,@*l<
90)
t±:ltJ:
L
\ffl--C,,)\~IJ;J[()
*90
~h*/\':;.:f/r:U-lj~IJ11.tJ~tJ:L
\.=.
c:~~
~~,lJ*90
V/A'/\I)?
Lens barrier
Volet de I'objectif
Barrera objetivo
~
ress
the POWER button repeatedly while the camera is submerged to remove any debris from the lens cover.
If
the lens cover cannot be moved, place it
nder running tap water and press the POWER button repeatedly.
or cameras with a lens barrier: Place the front
of
the camera under running tap water to remove any debris around the lens barrier, If the lens barrier does
ot move smoothly, do not force
it;
rinse the lens barrier by gently moving it while placed under a strong stream
of
running tap water.
4ppuyez plusieurs fois sur la touche POWER pendant que I'appareil photo est immerge afin d'enlever les salissures du couvercle de I'objectif. Si
Ie
couvercle
de
I'objectif ne peut pas etre retire, passez-Ie sous un robinet d'eau claire et appuyez plusieurs fois sur
la
touche POWER.
~our
les appareils photo munis d'un volet de I'objectif: placez I'avant de I'appareil photo sous
Ie
jet
d'un robinet d'eau claire afin d'enlever les salissures du
Volet
de I'objectif.
Si
Ie
volet de I'objectif ne se retire pas facilement, ne forcez pas; rincez
Ie
volet de I'objectif en
Ie
passant doucement sous
Ie
jet
puissant
d'un robinet d'eau claire.
Rresione
el
bot6n POWER varias veces mientras
la
camara esta sumergida para eliminar cualquier resto de la tapa del objetivo.
Si
no puede mover
la
tapa
el
objetivo, col6quela bajo un chorro de agua y presione
el
bot6n POWER varias veces.
ara camaras con barrera objetivo: Situe
la
parte delantera de
la
camara bajo
un
chorro de agua corriente para eliminar cualquier resto de
la
tapa de
la
barrera
bjetivo.
Si
la
barrera objetivo
no
se mueve suavemente,
no
la
fuerce, enjuague
la
barrera objetivo moviendola con cuidado bajo
un
chorro
de
agua corriente fuerte.
V/
"j]/'\.-
«~
Len;over
Cou
erde
de
I'objectif
La
t a del objetivo
IIiI JO) '!'C'
POWER
*7
;'-~lll
'J
i!<
LA~
[,
'C
v;'-
;;(;iJJ,-g~O)
::i:,:
~:l'c
[,"',.
v
/;(
;iJJ\-f.)'O!Jt.Nd:
(\~i;I~,
l!lW)O)*i1!*~
v;,-;;(oo
1::"H~"lll,
rOWER
*:9
/~**Uj[glJtffllJ*90
v/:;Z'/~
I)
7:9-17'0)~fI0)~~
:
*~*~h
j.
50)MiIDl:3TT,
v
/A'/~
I)
7g~0):J"
2
~~c:
lJ*90
v/A:/~
I)
7tJ~;\D.-A'I:t1JtJ)tJ:L
\~~Ij:~I!
I
~61')9,
~ta61')O)*~*~
V/A'/~
I)
71:~TtJ:tJ~'G
V/A'/~I)
7~1~~
r:t1JtJ)lJT,
99~';JtL\~
lJ*90
After use, submerge the camera
in
fresh
water for about
10
minutes to remove any
dirt, sand, salt or other debris,
Despues de usarla, sumerja
la
camara en
agua dulce durante unos
10
minutos para
eliminar cualquier suciedad, arena, sal u
otros restos.
Apres utilisation, immergez I'appareil
photo dans I'eau pendant environ
10
minutes pour enlever toute salete,
sable, sel ou autre poussiere.
{~fflf~rj:,
hj.5~~*r:
107H¥J3r;~lJ
T,
;/t.
~~~c:
lJ*90
~*.~~~~<~fflr~~~~.
*~~~~fflM
/C::'~ffl~~;t~#~~~,9fiJ"'«t::'~~\o
IJ;J[t:&ID?
Sjj
=1=
I:
t>~$lJL
\ID?SjjtJ~~cj1~
11.
TL
\*90
I~h*
.
it1jJ~t1~gl:-:>L
\TJ
0)""-:/t>!t'9t:3~?'C&<
t':~
L\o
;$:*IEO)hj.
5-15;\
r--Ij:t:3~L\..t(fL\t;:t':L\t;:hj.
5c:~
tJ:-Q~~tJ~~
()
*9tJ\
IJ;J[
U
tlH
\l:J-;:ti:l:iiL
\rj:~
U
*ttlvo
Proper care before and after using your camera
is necessary to maintain water resistance.
Details are also noted
in
the user manual.
Be
sure to read
the page entitled "IMPORTANT INFORMATION ABOUT
WATER AND SHOCK RESISTANT FEATURES".
The camera illustrations shown
in
this manual may differ
from the actual product, but the operation
is
the same.
Un bon entretien de I'appareil photo avant et
apres toute utilisation est necessaire pour
maintenir I'etancheite
aI'eau.
Des informations detaillees sont egalement disponibles
dans
Ie
manuel de I'utilisateur. Lisez attentivement
la
page concernant les "INFORMATIONS IMPORTANTES
RELATIVES AUX FONCTIONS D'ETANCHEITE
AL'EAU ET DE RESISTANCE AUX CHOCS".
Les illustrations de I'appareil photo presentees dans ce
manuel peuvent ne pas correspondre
au
produit reel mais
I'operation est
la
meme,
Es
necesario actuar con el debido cuidado antes
y despues de usar
la
camara para mantener
la
resistencia
al
agua.
Mas informaci6n
al
respecto en
el
manual de usuario.
No se olvide de leer
la
pagina titulada "INFORMACION
IMPORTANTE ACERCA DE LAS FUNCIONES DE
IMPERMEABILIDAD Y RESISTENCIA A LOS GOLPES".
Las ilustraciones de la camara que aparecen
en
este manual pueden diferir del producto real pero
el
funcionamiento es
el
mismo.
 Loading...