Shinjuku Monolith, 3-1 Nishi-Shinjuku 2-chome, Shinjyuku-ku, Tokyo 163-0914, Japan. Tel. 03-3340-2111
http://www.olympus.com
3500 Corporate Parkway, P.O. Box 610, Center Valley, PA 18034-0610, U.S.A. Tel. 1-888-553-4448
http://www.olympusamerica.com
(Premises/Goods delivery) Wendenstrasse 14-18, 20097 Hamburg, Germany. Tel. 040-237730
(Letters) Postfach 10 49 08. 20034 Hamburg, Germany.
http://www.olympus-europa.com
Vision House 19 Colonial Way Watford Herts WD24 4JL. Tel. +44(0) 1923 831000
http://www.olympus.co.uk
DIGITAL VOICE RECORDER
VN-100
EN
INSTRUCTIONS
FR
MODE D’EMPLOI
ES
INSTRUCCIONES
PT
INSTRUÇÕES
U1-BS 0119-01
AP0807
Thank you fo r purchas ing an Olymp us Digita l Voice Record er.
Please rea d these inst ruction s for infor mation abou t using
the produc t correc tly and saf ely.
Keep the inst ruction s handy for fu ture refer ence.
To ensure succ essful re cording s, we recomme nd
that you tes t the record f unction a nd volume be fore use.
DIGITAL VOICE RECORDER
VN-100
MODE D’EMPLOI
Merci d’avoi r porté votr e choix sur c et enregis treur voca l numériq ue.
Lisez ce mod e d’emploi pou r une utilis ation corr ecte et sûr e de l’appare il.
Conserv ez-le à porté e de la main pou r toute consu ltation ul térieure .
Nous vous re commando ns de tester la f onction d ’enregist rement et
le volume ava nt l’utilis ation
pour obtenir de bons enregistrements.
EN
FR
Alimentat ion (Fig.
3
)
Le commutateur HOLD fonctionne comme une touche de démarrage.
Lorsque vous n’utilisez pas l’enregistreur, réglez le commutateur HOLD sur
la position [HOLD] si l’enregistreur est arrêté. Cela mettra l’enregistreur
hors tensi on et minimi sera l’app el de coura nt de batt erie.
Mise sous ten sion: Réinitialisez le com mutateur
HOLD
.
Mise hors tension: Réglez le commutateur HOLD sur la position
[
HOLD
].
Mode d’atten te et coupure de l ’affichage :
Sil’enregis treur e st mis à l’ar rêt ou en pa use pend ant 60 minu tes ou plu s
pendant l’enregistrement ou la lecture, il passe en mode d’attente (mode
d’économie d ’énergie) et l’aff ichage s’étein t. Appuyez sur un e touche
quelconqu e pour quit ter le mode d ’attente e t activer l ’affic hage.
L’indication “CE” signfi e que ce produit est
conforme au x exigen ces concema nt la sécur ité,
la santé, l’environnement et la protect ion du
consommateur.
Le symbole [poubelle sur roue barrée d’une croix
WEEE annexe IV] indique une collecte séparée
des déchets d’équipements électriqueset
électroniques dans les pays de L’UE. Veuillez
ne pas jeter l ’équipement dans les ordures
domestiques. A utiliser pour la mise en rebut
de ces types d’équipements conformément
aux systèmes de traitement et de collecte
disponibl es dans votre pays .
Produit applicable : VN -100
Ce symbole [ Poubelle rayée confo rmément
à la directive annexe 2006/66/EC annexe II]
indique que la collecte des batteries usagées
se fait séparement dans les pays EU. Veuillez
ne pas jeter le s batteries dans les ordur es
ménagères. Veuillez utiliser les systèmes de
collecti on disponibles dan s votre pays pour
l'enlèveme nt des batterie s usagées.
Identifi cation des élé ments (Fig.
1
)
Préparatifs
Enregistrement à partir d’un microphone
externe ou d’autres dispositifs (Fig. 8)
• Lorsque vous écoutez avec l’écouteur pendant la lecture, n‘augmentez
pas trop le volume. Cela pourrait entraîner une dégradation de
l’audition et diminuer votre ouïe.
• Aucun écouteur n’est fourni. Vous pouvez utiliser un ou des écouteurs
monaurau x standa rd 3,5 mm.
Insertion des piles (Fig.
2
)
Remarques:
• La fi n du fi chier se localis e en maintenant l a touche 9 pressée
pendant l’av ance rap ide. L’enregi stre ur fait u ne paus e à la fi n du fi chier.
Si vous ne relâchez pas la touche 9, l’avance rapide c ontinue ra.
• Le déb ut du fi chier se loc alise e n mainten ant la touc he 0 pressée
pendant le re tour rapide. L’enreg istreur fai t une pause au dé but du
fi chier. Si vous ne relâchez pas la touche 0, le retour rapide
continuera.
Maintien
3 Appuyez sur l a touche
PLAY
(`).
• Le voyant d’enregistrement/lecture devient rougeet
l’enregistrement commence.
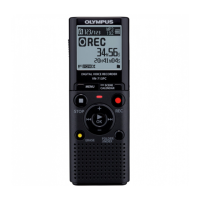
2 Numéro du fichier ac tuel
3 Indicateur du niveau d’enregistrement
4 Temps d’enregistrement
3 Appuyez sur la touche
STOP
(4) pour arrêter
l’enregistrement.
• Les nouveaux enregistrements sont sauvegardés comme
dernier fichier dans le dossier.
5 Temps d’enregistrementrestant
Lecture (Fig. 9)
Dépannage
Q1: Rien ne s e produit lor squ’une touche e st pressée.
A1: L’enregistreur es t peut-être réglé sur HOLD.
Les piles sont peut-être usées.
Les piles sont peut-êt re mal introdu ites.
Q2: Aucun son ou un son assour di est audible du hau t-parleur
pendant la lecture.
A2:
La f iche de l’écouteur peut être branchée dans l’enregistreur.
Le volume est peut-être réglé au minimum.
Q3: L’enregistrement n’est pas possible.
A3: En appuyant sur la touche STOP (4) à plusieurs reprises quand
l’enregistreur est arrêté, vérifier que ce qui suit s’affiche:
• La durée limite d’enreg istrement restante dans le dossier
sélectionné est peut-être atteinte [00:00].
• Le nombre de messages enregistrés dans le dossier
sélectio nné est peutê tre arrivé à 100.
Vérifiez q ue [FULL] s’affiche q uand vous appuyez su r REC
(s ).
Q4: La v itesse de le cture es t trop rapi de (lente).
A4: Il est possibl e que l’enregistreur s oit réglé sur Lect ure rapide
(lente).
Spécifications
Support d’enregistrement:
Mémoire flash incorporée
Réponse en fréquence générale:
Mode SP: 300 à 4. 700 Hz
Mode LP: 300 à 2 .900 Hz
Durée d’enregistrement:
Mode SP: Envir on 13 h 20 min
Mode LP: Envir on 74 h 40 min
Microphone intégré:
Microphon e Electret con densateur (mon auraux)
Haut-parleur:
Haut-parleur dynamique rond intégré ø 28mm
Sortie max. utile:
120 mW
Prise de l’éco uteur (mona uraux):
ø 3,5mm diamèt re, impèdance 8 Ω
Prise pou r micropho ne (monaura ux):
ø 3,5mm diamèt re, impèdance 2 k Ω
Source d’alimentation:
Deux piles AAA (LR03) ou deux batteries rechargeables
Ni-MH.
Durée d’ut ilisatio n continue d es piles:
Deux piles a lcalines: Env iron 39 heures
Deux batte ries rechar geables Ni - MH: Environ 2 2
heures
Dimensions:
102 (L) x 36 (P) x 20,5 (H) m m
Poids:
63 g (avec les pile s)
Accessoire s (vendus séparé ment)
Introduction
• Le contenu de ce d ocument peut ê tre modifi é par la suite sans préav is.
Veuillez con tacter notre ce ntre de service a près-vente pou r obtenir les
dernière s informa tions con cernant le s noms de pro duits et l es numéro s de
modèles.
• Le plus grand so in a été pris afi n d’assurer l’intégr ité du contenu de ce
document. Dans le cas peu probable où vous auriez un doute ou si vous
trouvez un e erreu r ou une om issio n,veuil lez con tact er notr e centre d e serv ice
après-vente.
• T o u t e r e s p o n s a bil it é p o u r dommag es pass ifs ou do mmages de q uelque
nature que ce s oit survenus à c ause d’une per te de données c ausée par un
défaut du pr oduit, r éparat ion eff ectuée p ar un tier s autre qu e Olympu s ou un
service a gréé par Ol ympus, ou t oute autr e raison es t exclue.
Pour un emplo i sûr et correc t
Avant d’utiliser votre nouvel enregistreur,lisez attentivement ce
manuel pour savoir comment l’utiliser de manière sûre et correcte.
Conservez ce manuel à un endroit facilement accessible pour toute
référence ultérieure.
• Les s ymbol es Avert isseme nt indiq uent des i nform ations i mport antes li ées à
la sécurit é. Pour vou s protég er vous- même et le s autre s contr e les bles sures
ou contre le s dégâts m atériel s, il est es sentiel q ue vous pre niez touj ours en
compte les avertissements et informations fournis.
Si vo u s av ez ré g lé l’ he u re et la d a te , les informations concernantl’enregistre
ment du fic hier son so nt automat iquemen t mémoris ées dans ce f ichier.
A la premiè re instal lation des p iles ou à cha que rempla cement
des piles, l ’indic ation de l ’heure c lignote ra.
Réglage ini tial (Fig.
4
)
Réglage du co mmuta teur HOLD sur la position [HOLD]. Toutes les touches
d’exploit ation sont invali dées. Cette ca ractéristi que est utile qua nd
l’enregistreur doit être transporté dans un sac ou une poche. N ’oubliez p as
de régler le co mmutate ur HOLD pour réuti liser l’enre gistre ur.
Remarques:
• L’alarme retentira à l’heure programmée même si l’enregistreur est
réglé sur [HOLD]. Il c ommencera à l ire le fi chier associé à l’alar me à
la pression d ’une touch e quelconq ue .
• L’enregistreur fonctionne comme suit avec le commutateur HOLD réglé sur
[HOLD]:
– Si l’enregistreur e st en cou rs de lec ture, l ’affi chage s’as sombr ira à la fi n
de la lectu re du fic hier act uel.
– Si l’enregistreur est en train d’enregistrer,l’affichage s’assombrira
quand l’enregistrement s’arrêtera automatiquement àl’épuisement
de la mémoire l ibre de l’en regist reur.
Comment uti liser la laniè re (Fig.
5
)
a Orifi ce de la lanière
• Sangl e non fourn ie. Utilis ez l’access oire en opt ion.
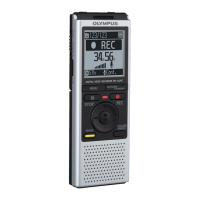
Enregistrement (Fig. 6)
1 Appuyez sur la tou che
MODE
pour choisir le
mode d'enregistrement souhaité.
•
Vouspouvez choisir le mode d’enregistrement parmi [SP] (enreg-
istrement standard), et [LP] (enregistrement longue durée).
SP LP
Environ 13 h 20 min Environ 74 h 40 mi n
1 Mode d’enregistrement actuel
• Le temps d’enreg istrement di sponible ind iqué ci-des sus est
celui pour un fi chier continu. Le temps d’enregistrement
disponible peut être plus court que spécifié si plusieurs
fichier s sont enr egistr és (Util isez le tem ps rest ant et le tem ps
d’enregist rement se ulement à ti tre de réfé rence).
2 Appuyez sur l a touche
REC (
s
)
pour
démarrer l’enregistrement.
Pause d’enregistrement
(Fig.
7
)
Pour faire une pause:
Quand l’enregistreur est en mode d’enregistrement, appuyez
sur la touche REC ( s).
• [PAUSE] s’affi che et le voyant d’enregistrement/lecture clignote.
Pour reprendre l’enregistrement:
Appuyez à nouveau sur la touche REC (s).
• L’enregistrement reprend à partir du point d’interruption.
Remarques à p ropos de l’enreg istrement
• Si [FULL] s’affi ch e, vo us ne po uv ez pa s e nr eg is tr er . Da n s ce ca s, eff ac ez
les fi chiers inutile s avant de com mencer l’enr egistre ment.
• Si l’enreg istr eur es t plac é dire ctem ent su r la tabl e pour l ’enreg istr emen t
d’une réunion, les vibrations de la table créeront un bruit de fond.
Placez un cahier ou un autre article entre la table et l’enregistreur
pour ne pas tr ansmett re les vibra tions de la ta ble et obten ir ainsi un
enregistrement plus net.
• Même si vous appuyez sur la touche DISPLAY, l’affi chage ne passera
pas au temps d’enregis trement actuel si le temps d’enregistrement
restant e st de 5 minute s ou moins.
• Lor sque l e temps d ’enregis treme nt rest ant es t infér ieur à 60 s econd es,
le témoin d’enregistrement/lecture commence à clignoter en rouge.
Lorsque le temps d’enregistrement atteint 30 ou 10 secondes, le
témoin clignote plus vite.
• L’enregis treur p asse en m ode d’arr êt s’il e st laiss é en paus e 60 minut es
ou plus.
• En cas de cond itions acous tiques diffi ciles ou si l’int ervenant a une
voix faible, l’enregistrement en mode [SP ] est recommandé; l’emplo i
d’un microphone extérieur (vendu séparément) peut aussi améliorer
la qualité des enregistrements
Vous pouvez brancher le microphone externe et d’autres disp ositifs
et enregistrer du son.
• L ors de la connexi on à un microphone, c hoisissez l’équ ipement
appropri é comme par exempl e un microphone a vec annulation du
bruit de fon d ou un micro phone Ele ctret con densate ur (en optio n).
• Pour connecter l’enregistreur à un dispositif externe, utilisez le cordon
de raccordement KA333 (en option) en option et la fi che intermédiaire
de conversi on stéréo /mono four nie avec le K A333.
•
Vous ne pouvez pas ajuster le niveau d’entrée sur cet enregistreur.
Lorsque vous connectez le dispositif externe, eff ectuez un test
d’enregistrement et ajustez le niveau de sortie du dispositif externe.
1 Ficheintermédiairedeconversion du KA333
2 Vers la prise de sortie audio des autres dispositifs
Informations de l’écran ACL
Vous pouvez sélectionner une option pour l’affichage de l’enregistreur. Si
vous appuyez sur la touche DISPLAY pendant l’arrê t ou la lec ture, l ’écran
ACL change et vous pouvez confirmer les informations du fichier ainsi que
les différents réglages de l’enregistreur.
Opération l’écran ACL
Quand l’enregistreur est en mode
d’arrêt, appuyez sur la touche
STOP (4 ) et ma intenez-la
enfoncée
Le nombre total de fichiers
enregistrés et la durée
d’enregistrement disponible
s’affichent
Quand l’enregistreur est en mode
d’enregist rement , appuy ez sur la
touche DISPLAY
L’affichage permute entre le
temps d’enregistrement actuel
et le temps d’enregistrement
restant
Quand l’enregistreur est en mode
d’arrêt ou en mode de lecture,
appuyez sur la touche DISPLAY
Temps d e lec ture ➔ Te mps
de lectur e restant ➔ Date
d’enregistrement du fichier
➔ Temps d’enregistrement du
fichier ➔ Temps de lec tur e…
1 App uyez sur la touche 9 ou 0 pour
sélecti onner le fich ier à lire.
2 Appuyez sur l a touche
PLAY
(`) p our
démarrer la lecture.
• Le voyant d’enregistrement/lecture devient vert, et la durée
de lectur e écoulée s ’affic he.
1 Numéro du fichier ac tuel
2 Temps de l ecture
3 A ppuyez sur les touc hes + ou – pour choisi r
le volume sono re qui convient.
• L’affichage montre le niveau du volume. Vous pouvez choisir
de [00] to [
30
].
Annulation de la lecture (Fig. p)
Pour arrêter :
Appuyez sur la t ouche
STOP
(4).
• L’enregist reur s’arrê te au milieu d u fi chier en c ours de lec ture.
Pour repren dre la lectu re:
Appuyez à nouveau sur la touche
PLAY
(`).
• La lec ture repr endra à par tir du poi nt d’inter ruption .
Avance rapi de et Retour rapi de (Fig. q)
Avance rapi de:
Quand l’enregistreur est en mode de lecture, maintenez la
touche 9 pressée.
• A la libérat ion de la to uche 9, l’enregistreur reprendra la lecture
normale.
Retour rapide:
Quand l’enregistreur est en mode de lecture, maintenez la
touche 0 pressée.
• A la libération de la touche 0, l’enregistreur reprendra la lecture
normale.
Localis ation du début d ’un fichier (Fig . w)
Si vous appuye z sur les touches 9 ou 0 ou 0lors de
la lecture ou de la lecture en mode lent/rapide, l’enregistreur
avance ou revi ent au début du f ichier suivan t ou du fichier e n
cours de lecture respectivement.
Changemen t de la vitesse de l ecture (Fig. e )
Quand l’enregistreur est en mode de lecture, appuyant sur
la touche PLAY (`).
En lecture
normale
Lecture lente
(25)
Lecture rapide
(50)
Remarques:
• Lorsque le m ode de lecture l ente est sélec tionné, [
J
] s’allume et,
pour le mode de lecture rapide, [
K
] s’allume à l’affi chage lors que
l’enregistreur lit.
• L’enregistreur arrête la lecture quand vou s appuy ez sur la to uche STOP
(4) en mo de de lectu re lente/rap ide ou quand il a tteint la fi n du fi
chier. Si vous ap puyez un e fois sur la t ouche STOP ( 4) et r edémar rez
la lectur e, l’ enregi streur li ra aussi les fi chiers à vit esse norm ale.
Ecoute avec des écouteurs (Fig.
r
)
Vous pouvez écouter des problémes d’audition. en raccordant des
écouteur s à la prise d’éc outeurs. S i un écouteu r est raccor dé, aucun so n
ne sort du hau tparleu r. Le son sera l u en monaura l.
• Afi n d’éviter toute irritation de l’oreille, introduisez l’écouteur après
avoir baiss é le volume.
Effacement
Vous pouvez f acilement eff acer des fichi ers inutiles. L es numéros de
fichiers séquentiels seront automatiquement réassignés.
Autres functions
Remettre l’enregistreur dans l’état initial [CLEAR]
(Fig.
u
)
Cette fonction remet le temps actuel et les autres réglages à leur état
initial. Ell e est pratiq ue si vous avez de s problèmes a vec l’enregis treur,
ou si vous souhaitez effacer toute sa mémoire.
1 Maintenez la touche
STOP
(4) pressée, e t
appuyez sur l a touche
ERASE
(s ) au moins
3 secondes.
• Si vous laisse z l’enregist reur sans so llicitati on 8 seconde s ou
plus avant d’ap puyer sur l a touche PLAY ( `) à l’éta pe 3, le
mode d’effacement sera annulé, et l’enregistreur passera en
mode d’arrêt.
2 App uyez sur la touche 9 ou 0 pour
sélectionner [
YES
].
Pour un emploi sûr et correct
Lisez atte ntivem ent ce mode d ’emploi po ur pouvoi r manipul er d’une man ière
correcte et sûre l’appareil. Conservezle à portée de la main pour toute
consultation ultérieure.
• Les s ymbole s Averti ssemen t indiqu ent des in format ions imp orta ntes lié es à
la sécurité. Pour vous protéger vousmême et les autres contre les blessures
ou contre le s dégâts m atériels , il est es sentiel q ue vous pre niez touj ours en
compte les avertissements et informations fournis.
Avertisse ment relati f aux perte s de données:
• Les données enregistrées dans la mémoire risquent d’être détruites ou
eff acées en cas d’erreur de procédure, d’anomalie de l’appareil, ou pendant
des travaux de réparation.
• Si l’enregistrement est important, nous vous conseillons de le conserver
ailleurs.
• Toute responsabilité pour dommages passifs ou dommages de quelque
nature que ce s oit surve nus à cause d’u ne perte de d onnées cau sée par un
défaut du pr oduit, répara tion eff ect uées par un tier s autre que Olymp us
ou un service agréé par Olympus, ou toute autre raison est exclue de la
responsabilité de Olympus.
Précautions générales
• Ne laissez pas le lecteur dans un endroit chaud, humide comme dans une
voiture fe rmée en ple in soleil ou s ur une plage e n été.
• Ne rang ez pas l’enreg istreur d ans un endro it trop exp osé à l’hum idité ou à
la poussière.
• N’utilisez pas de solvant organique, tel qu ’alcool ou diluant p our vernis,
pour nettoyer l’appareil.
• Ne placez pas l’enregistreur sur ou près d’un autre appareil électrique tel
que télévis eur ou réf rigérate ur.
• Evitez le sable ou la saleté. Ils peuvent causer des dommages irréparables.
• Evitez les vibrations ou chocs violents.
• Ne démontez pas, ne réparez pas et ne modifi ez pas cet appareil vous-
même.
• N’utilisez pas cet appareil pendant la conduite d’un véhicule (tel que
bicyclette, motocyclette ou poussette).
• Conservez l’appareil hors de portée des enfants.
Piles:
V
Avertiss ement:
• Les piles ne doivent jamais être exposées à une fl amme, chauff ées,
court-circuitées ou démontées.
• N’essayez pas de recharger des piles alcalines, au lithium ou autres piles
non-rechargeables.
• N’util isez jamai s une pile à cou vercle ex térieur é ventré ou fi ssuré.
• Conse rvez les pi les hors de p ortée de s enfants .
• S i vous no tez que lque ch ose d’ inhab itue l à l’uti lisat ion de ce p rodu it, par e xemp le
un bruit ano rmal, de la c haleur, de la f umée ou u ne odeur de b rûlé:
1 retirez immédi atement les piles e n prenant garde de ne p as vous
brûler, et ;
2 appelez votre revendeur ou le représentant Olympus local pour une
révision.
Chargeur de batteries rechargeables Ni-MH:
BU-400 (Europe uniquement)
Batterie Ni-MH rechargeable: BR401
Cordon de raccordement (Prise d’écouteur ↔ Prise de microphone):
KA333
Microphone réducteur de bruit: ME52
Microphone condensateur à électrets: ME15
Adaptate ur sur rép ondeur au tomatiq ue: TP7
Pour les clie nts Européen s
Effacement d’un fichier (Fig. t)
1 Appuyez sur l a touche
ERASE
(s ).
2 App uyez sur la touche 9 ou 0 pour
sélectionner [
YES
] à lire.
1 Fichier à effacer
3 Appuyez sur l a touche
PLAY
(`).
Effacem ent de tous les fi chiers (Fig. y)
1 Appuyez de ux fois sur la to uche
ERASE
(s ).
2 App uyez sur la touche 9 ou 0 pour
sélectionner [
YES
] à lire.
1 Tous le s fichie rs à effa cer
3 Appuyez sur l a touche
PLAY
(`).
Remarques:
• Un fi chier eff acé ne peut pas être récupéré.
• Si l’opération n’est pas eff ectuée dans les 8 secondes que dure le
réglage, il revient à l’état d’arrêt.
• L’eff ac ement peu t prendr e 10 seconde s. Ne fait es rien pen dant cet te
période c ar des donn ées pour raient êt re corro mpues. Le r etrait o u la
mise en place d es piles n’es t pas autor isé, qu’elle s soient ou n on dans
l’enregistreur.
1
21
3
8
p
1
2
3
1
2
4
5
1
2
3
+
9
PLAY (`)
5
1
4
6
REC (s)
MODE
STOP (4)
7
REC (s)
9
1
2
2
q
w
9
0
PLAY (`)
STOP (4)
e
PLAY (`)
r u
STOP (4)
0
9
ERASE (s )
3
t
y
0
9
PLAY (`)
ERASE (s )
t
-
2
0
–
0
+
9
PLAY (`)
–
You can selec t an option for th e display of the re corder. This wil l help
review and confirm different recorder settings and file information.
Operation Display
While the rec order is du ring sto p
mode, press and hold the STOP
(4) but ton
The total number of files
recorded in the folder and
remaining recording time
appears on t he display.
While the re corder is du ring
recording m ode, press t he
DISPLAY button
The display switches between
current recording time and
remaining recording time.
While the re corder is du ring
stop mode or playing back
mode, press the DISPLAY
button
Playing time ➔ Remaining
playing time ➔ Recording date
of the file ➔ Recording time of
the file ➔ Playing time …
Power Supply (Fig .
3
)
The HOLD switch fu nctions as a power b utton. When you do n ot
use the reco rder, set the HOLD switch to the [HOLD] position while
therecor der is stopped . This will power o ff the record er and minimize
the batter y drain.
Power on: Reset the
HOLD
switch.
Power off: Set the
HOLD
switch to the [
HOLD
] position.
Standby Mode a nd Display Shu t Off:
If the recorder is stopped or paused for 60 minutes or longer during
recordin g or play bac k, it goes i nto Stand by (power-s ave) mode, a ndthe
display shut s off. To exit Stan dby mode and turn o n the display,pre ss
any button.
1 Pr ess down o n the arrow a nd slide t he batter y
cover open.
1 Built-in speaker
2 Insert two size-AAA alkaline batteries,
observing the correct polarity.
3 Close the bat tery cover comp letely.
• Time and dat e screen ap pears.
• The hour indicator flashes, indicating the start of the time and
date setup process. (See “Setting Time and Date [TIME]” for
details).
An optional Ni-MH Rechargeable Battery (BR401) from Olympus
can be used f or the rec order.
Replacing Batteries:
When [
N
] appears on t he display, replace t he batteries as s oon
aspossib le. Size-AAA al kaline batter ies are recomm ended. When the
batterie s are depl eted, [
O
] appears on t he display, an d the reco rder
shuts off. I t is recommende d to set the HOLD switch to the [HOLD]
position b efore you repla ce batteries to m aintain the cur rentsetti ngs
(Time and da te, etc.). For you r convenience, t he recorder al so logs the
current se ttings i n nonvolati le memor y at hourly in tervals .
“CE” mark indicates that this product complies
with the European requirements for safety,
health, envi ronment and cus tomer prote ction.
This symbol [crossed-out wheeled bin WEEE
Annex IV] i ndicates s eparate co llecti on of waste
electrical and electronic equipment in the EU
countries. Please do not throw the equipment
into the domes tic refuse. Ple ase use the return
and collection systems available in your country
for the dispo sal of this prod uct.
Applicabl e Product : VN -100
This symbol [crossed-out wheeled bin
Directiv e 2006/66/ EC Annex II] in dicates
separate collection of waste batteries in the
EU countries.
Please do not th row the batteries into the
domestic refuse. Please use the return and
collectio n systems availabl e in your country
for the dispo sal of the waste bat teries.
Identifi cation of Par ts (Fig.
1
)
Getting Started
Recording from external Microphone
or other Devices (Fig. 8)
Inserti ng Batteries (Fi g.
2
)
Hold
1 Built-in Microphone
2 Microphone jack
3 HOLD switch
4 STOP (4) butto n
5 PLAY (`) button
6 0 (Rewind) button
7 Battery cover
8 MODE button
9 EAR (Earphone) jack
0 Display (LCD panel)
! Record/play indicator
light
@ REC (s) butt on
# + button
$ 9 (Fast Forward)
button
% – button
^ DISPLAY button
& ERASE (s) bu tton
Playback (Fig. 9)
Che ck if the di splay shows [ FULL] by pressin g the REC (s)
button.
Q4: The p layback spe ed is too fas t (slow).
A4: The recorder m ay be set to fas t (slow) Playba ck.
Specifications
Recording medium:
Built-in flash memory
Overall frequency:
SP mode: 300 t o 4,700 Hz
LP mode: 300 t o 2,900 Hz
Recording time:
SP mode: Approx. 13 hours 20 minutes
LP mode: App rox. 74 hours 40 minu tes
Microphone:
Electret Condenser Microphone (monaural)
Speaker:
Built-in ø 28mm round dynamic speaker
Maximum power:
120 mW
Earphone jack (monaural):
ø 3.5mm diame ter, impedance 8 Ω
Microphone jack (monaural):
ø 3.5mm diameter, impedance 2 kΩ
Power suppl y:
Two AAA (LR03) ba tteries or Two Ni- MH rechargea ble
batteries
Continuous battery:
Alkaline batteries: Approx. 39 hours
Ni-MH rechargeable batteries: Approx. 22 hours
Dimensions:102 (L) x 36 (W) x 20.5 ( T) mm
Weight: 63 g (including battery)
• Battery life is measured by Olympus. It varies greatly according to the type
of batter ies used an d the condit ions of use .
• Your recorded c ontents are for y our personal us e or pleasure only. I t is
prohibited to record copyrighted material without permission of the
copyright holders according to copyright law.
• Specific ations and design are subject to change without notice for
improvement of performance.
For customers in Europe
Accessories (Op tional)
Introduction
• The contents o f this document may b e changed in the fu ture without
advanced no tice. Contact ou r Customer Suppo rt Center for the la test
informat ion relati ng to produc t names an d model numb ers.
• The u tmos t care has b een ta ken to ensu re the in tegri ty of the c ontent s of this
document . In the unl ikely eve nt that a qu estio nable i tem, err or, or omis sion
is found, pl ease conta ct our Cus tomer Supp ort Cente r.
• Any liabili ty for passive d amages or damag e of any kind occur red due to
data loss inc urred by a d efect o f the produ ct, rep air perf ormed by t he third
party other than Olympus or an Olympus authorized service station, or any
other reas on is exclud ed.
Safe and Pro per Usage
Before using your new recorder, read this manual carefully to ensure
that you kno w how to op erate i t safel y and co rrec tly. Kee p this ma nual
in an easil y accessi ble loca tion for fu ture ref erence.
• The warning s ymbols indic ate importan t safety relate d informatio n. To
protect yourself and others from personal injury or damage to property, it
is essenti al that you alw ays read the w arnings a nd inform ation prov ided.
If you have set t he time an d date, inf ormat ion as to wh en a soun dfil e was
recorded is stored automatically with that file.
When you ins tall batter ies for the fir st time or each ti me you
replace t he batter ies, the “H our” in dicatio n will fl ash.
1 Press the
+
or
–
button to se t the “
Hour
”.
2 Press the
PLAY
(`) or 9 button to accept
the “
Minute
”.
• The “Minute˝ ind icator fl ashes.
• Pres sing the 0 button enables the “Hour” setting
again.
3 Press the
+
or
–
button to se t the “
Minute
”.
• Repea t steps 2 and 3 to continue to set the “Year”,
“Month” and “Date” in the s ame way.
4 Af ter setti ng the “
Date
”, press the
PLAY
( `)
or 9 button.
• This compl etes the ti me and date se tup proce dure.
5 Press the
+
or
–
button to set the beep
sound.
6 Press the
PLAY
(`) button to comfirm the
setting.
• Inf orms a button op eration or a wrong o peration of the
recorder by s ound. Syst em sounds may b e turned of f.
• This co mplete s the syst em sound s etup pro cedure.
Notes:
• When yo u change th e settin g for the tim e and date or s ystem sou nd,
remove the ba ttery and then r epeat the above st eps 1 through
6.
• You can sw itch the ti me indica tion bet ween the 12-ho ur syste m and
the 24-hour s ystem by press ing the DISPLAY button w hile you are
setting t he hour or min ute.
• You can change the o rder of the date ind ication by press ing the
DISPLAY button whil e you are set ting the ye ar, month, or da y.
Example: July 14, 2008
Initial Setup (Fig.
4
)
Set the HOLD switch to the [HOLD] position. All op eration butt ons
are disabl ed. This feat ure is usef ul when the re corder has to b e carried
in a handbag or p ocket. Rememb er to reset the HOLD switch before
attempting to use the recorder.
Notes:
• The alar m will sound at t he schedule d time even if th e recorder is s et to
[HOLD] position. The recorder will then begin to play the fi le associated
with the alar m once you p ress any bu tton.
• The r ecorde r func tions as f ollows wi th the HOLD swi tch set to t he [HOLD]
position:
– If the r ecorder is pl aying, the dis play goes dar k when playbac k of the
current f ile has com pleted .
– If the recorder is recording, the display goes dark when the recorder
stops reco rding au tomatic ally upo n running o ut of fre e memor y.
How to Use the Stra p (Fig.
5
)
a Strap hole
• Strap is n ot suppli ed. Use the op tional acc essory.
Recording (Fig. 6)
1 Press the
MODE
but ton to s ele ct the des ire d
recording mode.
• The recordi ng mode c an be cho sen fr om [SP] (sta ndard re cordi ng)
and [LP] (long-term r ecordi ng).
SP LP
Approx. 13 hou rs 20 minute s Approx. 74 hou rs 40 minu tes
1 Current recording mo de
• T he recording ti me shown above is fo r one continuou s file.
The availab le recording ti me may be shorter t han specifie d
if several f iles are record ed. (Use the remai ning time and
recorded time only as references.)
2 Press the
REC (
s
)
button to start record-
ing.
To Pause Recording
(Fig.
7
)
To Pau se:
While the rec order is during reco rding mode, press the REC
(s ) button.
• [PAUSE] appe ars on the disp lay and the recor d/play indic ator light
fl a s h e s .
To Resume Recording:
Press the REC (s) but ton again.
• Recor ding will re sume at the p oint of inter ruptio n.
Notes for Reco rding
• If [FULL] a ppears on the di splay, you cannot re cord in the sele cted
folder. In suc h a case, eras e unneces sary fi les.
• If the record er is plac ed dire ctly on a t able wh en recor ding a me eting,
it tends to pic k up table vibrat ions. Put a notebo ok or other item
between t he table an d the recor der so that t he vibra tion is not e asily
transmit ted for cl earer reco rding.
• Even if you press the DISPLAY but ton, the di splay will not c hange to
current recording time if the remaining recording time is 5 minutes
or less.
• When remaining recording time is less than 60 seconds, the record/
play indica tor light s tarts fl ashing in re d. When the re cording t ime is
decrease d to 30 or 10 seco nds, the lig ht fl a shes fast er.
• The record er will enter Stop m ode if it has been l eft paused f or 60
minutes or longer.
• In cas e of diffi c ult acoustic conditions or low speaker’s voice, recording
in [SP] is recommended. Also, usage of an external microphone (sold
separate ly) could imp rove the qua lity of re cordings .
The exter nal micropho ne and other dev ices can be conn ected and the
sound can be recorded.
• When using an external microphone, select adequate microphone,
such as a Noise-Cancellation microphone or Electret condenser
microphone (optional).
• To conn ect the r ecord er to an ex ternal d evice, us e the con necti ng cord
KA333 (optional), and the stereo/monaural converting plug adapter
supplied wi th KA333.
•
The input lev el cannot be ad justed on th is recorde r. When you conne ct the
recorder to an external device, execute a test recording and adjust the output
level of the external device.
1 Converting plug adapter of KA333
2 A audio input terminal o f other devi ces
LCD Display In formation
Cancelling playback (Fig. p)
To Sto p:
Press the
STOP
(4) bu tton.
• The rec order sto ps in the mid dle of the fi le being pl ayed.
To Res ume:
Press the
PLAY
(`) b utton again .
• Playba ck will res ume at the poi nt of interr uption.
Forwardi ng and Rewindin g (Fig. q)
Fast Fo rward :
While the reco rder is during playba ck mode, press and hold
the 9 button.
• When you rele ase the 9 button, the recorder will resume normal
playback.
Rewind:
While the reco rder is during playba ck mode, press and hold
the 0 button.
• When you rele ase the 0 button, the recorder will resume normal
playback.
Notes
• The end of t he fi le is lo cated by press ing and holdi ng the 9 button
during fas t for war ding. T he rec orde r will p ause a t the en d of the fi le. If you d o
not release t he 9 button, the recorder will continue to fast forward.
• The beginning of the fi le is loc ated b y pres sing an d hold ing th e 0 button
during rew indin g. The re corde r will pau se at the b eginn ing of th e fi le. If you
do not releas e the 0 button, the recorder will continue to rewinding.
Locating t he Beginning of t he File (Fig. w)
While the reco rder is during playbac k mode (playback or
playback in slo w/fast mo de), press th e 9 or 0 button
forward s or rewinds t o the begin ning of the ne xt fil e or the fil e
being played respectively.
Changing Pl ayback Speed (Fig. e )
While the recorder is during playback mode, pressing the
PLAY (`) b utton.
Normal speed
Slow playback
(-25 )
ast playback
(50)
Notes:
• When the slow pla yback mode is sel ected, the [
J
] appears an d,
for the fas t playback mod e, [
K
] appears on t he display whil e the
recorder is playback.
• The reco rder stops p layback wh en you press t he STOP (4) bu tton
while playb ack in the s low/fa st mode, or w hen it rea ches to th e end
of the fi le.
If you once press the STOP
(4)
button and start playback
again, the recorder will playback fi les in normal speed as well.
Listening with Earphone (Fig.
r
)
You can listen t o files by con necting e arphones t o the earpho ne jack. If
an earphon e is connecte d, the speaker d oesn’t emit so und. Sound wi ll
be played bac k monaural ly.
• To avoid i rrita tion to th e ear, inser t the ear phone af ter you t urn down
the volume level.
• When you list en with the ear phone during p layback, do not r aise
the volume too much. It may cause hearing impairment and loss in
hearing ability.
• Earph ones are not su pplied. You can u se any standa rd 3.5mm monaur al
earphone or headphone.
Erase
You can easily er ase unnecessa ry files. Seq uential file nu mbers are
reassigned automatically.
Other Functions
Resetting the Recor der [CLEAR] (Fig.
u
)
This func tion reset s the current t ime and other se ttings to th eir initial
status. It is useful if you are having problems with the recorder, or if you
want to erase t he entire m emory of t he recorde r.
1 Press and hold the
STOP
(4 ) button and the
ERASE
(s ) button for 3 seconds or longer.
• If you leave the rec order untouch ed for 8 seconds o r longer
before you press the PLAY (`) butto n in Step 3, Clear mode
will be canc eled, and th e recorde r will enter St op mode.
2 Press the 9 or 0 button to select
[
YES
].
3 Press the
PLAY
(`) b utton.
• The warning symbols indicate important safety related information. To
protect yourself and others from personal injury or damage to property, it
is essenti al that you al ways read th e warnings a nd inform ation pro vided.
Warning regarding data loss:
• Recorded content in memory may be destroyed or erased by operating
mistakes , unit malf unction , or during re pair work .
• F or impo rtant r ecord ed conte nt, we rec ommend yo u to writ e it down s ome wher e.
• Any liabili ty for passive d amages or damage o f any kind occur red due to
data loss inc urred by a d efect o f the produ ct, repa ir perf ormed by th e third
party other than Olympus or an Olympus authorized service station, or any
other reasons is excluded from Olympus’s liability.
For safe and correct Usage
• Be sure to stop the recorder before replacing the battery.
• Do not leave th e recorder in ho t, humid locati ons such as insi de a closed
automobil e under dir ect sunli ght or on the b each in the su mmer.
• Do not st ore the rec order in pla ces expos ed to exces sive moist ure or dust .
• Do n ot use org anic sol vents suc h as alcoh ol and lacq uer thin ner to cle an the uni t.
• Do not place the recorder on top of or near electric appliances such as TVs or
refrigerators.
• Avoid sa nd or dirt. T hese can c ause irre parable da mage.
• Avoid strong vibrations or shocks.
• Do not di sassemb le, repair o r modify t he unit your self.
• Do not operate th e unit while opera ting a vehicle (such a s a bicycle,
motorcycle, or go-cart).
• Keep the u nit out of th e reach of ch ildren.
Batteries:
V
Warning:
• Batteries should never be exposed to fl ame, heated, short-circuited or
disassembled.
• Do not att empt to recharg e alkaline, lit hium or any other n on-recharg eable
batteries.
• Never us e any batte ry with a to rn or crack ed outer cov er.
• Keep bat teries o ut of the rea ch of childr en.
• If you notice anything unusual when using this product such as abnormal noise,
heat, smoke, or a burning odor:
1 Qremove the bat teries immedi ately while bein g careful not to bu rn
yourself, and;
2 Wcall your dealer or local Olympus representative for servicing.
Troubleshooting
Q1: Nothing happens when a button is pressed.
A1: T he
HOLD
switch may be s et to [
HOLD
] position.
The batteries may be dep leted.
The batteries may be inserted incorrectly.
Q2: No sound or quiet sound is heard from the speaker while
playing back.
A2: The earphone p lug may be plu gged into th e recorder.
The volume may be set t o the minimum l evel.
Q3: Recording is not possible.
A3: By pressing the STOP (4) button repeatedly while the recorder
stops, chec k if the disp lay shows:
• The remaining recording time in the selected folder may have
reached [00:00].
• The number of files is 100.
Ni-MH Rechargeable Battery Charger:
BU-400 (Eur ope only)
Ni-MH Rechargeable Battery: BR401
Connecting cord (Earphone jack ↔ Microphone jack): KA333
Noise-Cancellation microphone: ME52
Electret condenser microphone: ME15
Telep hone pick up: TP7
Erasing On e File at a Time (Fig. t)
1 Press the
ERASE
(s ) button.
2 Press the 9 or 0 button to select
[
YES
].
1 File to be erased
3 Press the
PLAY
(`) b utton.
Erase All Files (Fig. y)
1 Press the
ERASE
(s ) button twice.
2 Press the 9 or 0 button to select
[
YES
].
1 All files to be erased
3 Press the
PLAY
(`) b utton.
Notes:
• An erased fi le cannot be restored.
• If operat ion is not exec uted for 8 seco nds during th e setting, i t will
return to th e stop sta tus.
• Complet ion of erasin g may take sever al seconds. D o not attempt t o
remove, rep lace batte ry or atte mpt any othe r functio ns on the voic e
recorder during this period because data may be corrupted.
2 Press the
PLAY
(`) bu tton to start play-
back.
• The Record /Play indic ator light tu rns green, an d the elapse d
playing time is indicated on the display.
1 Current file number
2 Playing time
3 Press the + or –
button to select the proper
sound volume.
• The displ ay shows the v olume leve l. You can choo se betwe en
[00] to [30].
General Precautions
Read this manual carefully to ensure that you know how to operate it
safely and correctly. Keep this manual in an easily accessible location for
future reference.
1 Press the 9 or 0 but ton to se lec t th e
file to playb ack.
• Th e recor d/play i ndicat or turns red, and recording starts.
2 Current file number
3 Recording level meter
4 Recording time
3 Press the
STOP
(4) button t o stop record-
ing.
• New recor dings are s aved as the las t file in th e folder.
5 Remaining recording time
For custome rs in North and S outh America
USA RFI:
This equipment has been tested and found to comply with
the limits fo r a Class B digita l device, pur suant to par t 15 of the
FCC Rules. These limits are designed to provide reasonable
protection against harmful interference in a residential instal-
lation. Thi s equipment gen erates, uses and c an radiate radio
frequency energy and, if not installed and used in accordance
with the instr uction s, may cause h armful int erfere nce to radio
communications. However, there is no guarantee that interfer-
ence will not o ccur in a par ticular i nstallat ion. If th is equipm ent
does cause harmful interference to radio or television recep-
tion, which can be determined by turning the equipment off
and on, the user is encouraged to try to correct the interference
by one or more of the following measures:
• R eorient or rel ocate the receiv ing antenna.
• Increa se the separation bet ween the equipment and
receiver.
• Connect the equipment into an outlet on a circuit
different from that to which the receiver is connected.
• Consult the dealer or an experienced radio/TV
technician f or help.
Canadian RFI:
This digita l apparatus does not ex ceed the Class B limits
for radio noise emissions from digital apparatus as set
out in the Radi o Interfere nce Regulatio ns of the Canadian
Department of Communications.
Cet appareil n umériq ue ne dépa sse pas les l imites de C atégori e
B pour les émis sions de bruit radi o émanant d’appareil s nu-
mériques, t el que prév u dans les Règlements sur l’Interférence
Radio du Dép artement Ca nadien des Com munications .
1 Microphone intégré
2 Prise
MIC
(microphone)
3 Commutateur HOLD
4 Touch e STOP ( 4)
(arrêt)
5 Touch e PLAY ( `)
(lecture)
6 Touch e 0
(retour rapide)
7 Couvercle du loge ment
piles
8 Touch e MODE
9 Prise EAR (écouteur)
0 Affich age (pa nneau
LCD)
! Voyant
d’enregistrement/
lecture
@ Touch e REC ( s)
(enregistre ment)
# Touch e +
$ Touche 9
(avance rapide)
% Touch e –
^ Touch e DISPLAY
& Touch e ERASE ( s)
1 Appuyez légèrement sur la flèche et faites
coulisse r le couvercle d es piles pour l ’ouvrir.
1 Haut-parleur intégré
2 Insérez deux piles alcalines AAA en respectant
les polarités.
3 Refermez correctement le couvercle du
logement des piles.
• Heure/da te apparai ssent à l’écr an.
• L’indication de l’heure clignote, indiquan t le début de la
procédur e de réglage de l’h eure/ date. (voir «Rég lage de
l’heure/ date[TIME]» pour les dé tails)
Vous pouvez a ussi utilise r une batterie (B R401) optionnel le
rechargeable Olympus pour l’enregistreur.
Remplacement des piles:
Quand [
N
] s’affiche, remplacez les piles le plus tôt possible. Des
piles alca lines AAA sont re commandées. Q uand les piles so nt usées,
[
O
] s’affic he et l’enregistre ur se coupe. Il est re commandé de
régler le commutateur HOLD sur [HOLD] avant de remplac er les piles
pour mainte nir les réglages a ctuels (heure /date etc.). Prati que, cet
enregistreur sauvegarde aussi les réglages actuels dans la mémoire
interne tou tes les heu res.
1 Appuyez sur la touc he
+
ou
–
pour régler les
heures.
2 Appu yez sur la touche
PLAY
(`) ou 9
pour accepter les minutes.
• L’indicateu r des minut es clignot e.
• Appu yez sur la touche 0 pour régler de nouveau
l’heure.
3 Appuyez sur la touc he
+
ou
–
pour régler les
minutes.
• Répéte z les éta pes 2 et 3 pour r égler le s minute s, l’anné e,
le mois et la dat e de la même mani ère.
4 Apr ès le réglage de la date, app uyez sur la
touche
PLAY
(`) o u 9.
• L a procéd ure d’imp lantati on de l’he ure/date e st mainte nant
terminée.
5 App uyez sur la touche
+
ou
–
pour régler la
tonalité du b ip sonore.
6 App uyez sur la tou che
PLAY
( `) pou r va lid er
le réglage.
• L’enregistreur émet des bips sonores pour vous signaler les
opératio ns de touche o u vous aver tir en cas d’er reur.
• La procédure d e réglage du son d u système est m aintenant
terminée.
Remarques:
• Quand vous ch angez le réglag e de l'heure, de la da te ou du son du
système, r etirez le s piles et rép étez les ét apes 1 à 6 ci-dessus.
• Vous pouv ez commute r l’indica tion de l’h eure entre l es système s 12
heures et 24 heures en appuyant sur la touche DISPLAY pendant le
réglage de s heures ou de s minutes .
•
Vo u s p o u v e z c h a n g e r l’o r d r e d’indica tion de l a date en ap puyan t sur
la touche DISPLAY pendant le rég lage de l’ann ée, du mois ou d u jour.
Exemple: 14 Juin 2008
• La du rée de vie e st est imée par O lympu s. Elle peu t varie r considé rable ment
selon le type de batteries et les conditions d’utilisation.
• Le cont enu de vos enr egistr ements e st unique ment dest iné à votre u sage ou
loisir per sonne l. Il es t interd it, d’ap rès la lo i sur le s droit s d’aute ur, d’enreg istr er
des fi chiers protégés sans la permission du propriétaire de ces droits.
• Les spéci fi catio ns et la concept ion peuvent c hanger sans pr éavis dans un
but d’amélioration des performances.
Shinjuku Monolith, 3-1 Nishi-Shinjuku 2-chome, Shinjyuku-ku, Tokyo 163-0914, Japan. Tel. 03-3340-2111
http://www.olympus.com
3500 Corporate Parkway, P.O. Box 610, Center Valley, PA 18034-0610, U.S.A. Tel. 1-888-553-4448
http://www.olympusamerica.com
(Premises/Goods delivery) Wendenstrasse 14-18, 20097 Hamburg, Germany. Tel. 040-237730
(Letters) Postfach 10 49 08. 20034 Hamburg, Germany.
http://www.olympus-europa.com
Vision House 19 Colonial Way Watford Herts WD24 4JL. Tel. +44(0) 1923 831000
http://www.olympus.co.uk