• Thank you for purchasing an
Olympus digital voice recorder.
Please read these instructions
for information about using the
product correctly and safely.
• To ensure successful recording,
we recommend that you test the
record function and volume before
use.
• If there are additions and/or
modifications of functions due to
firmware update, contents may
differ. For the latest information,
please visit with Olympus website.
• This manual is a basic version.
Please refer to the complete
advanced manual either from the
stored data in the [OL_MANUAL]
folder of the recorder or download
the data from the Olympus website.
This product is a voice recorder that
is easy to use for all age groups, from
children to senior citizens. It can be
used in a range of situations, such as
in business, or recording memos.
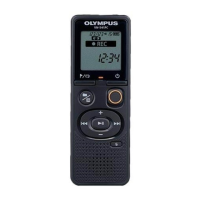
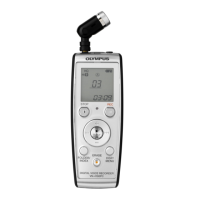
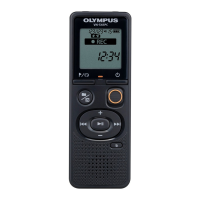
Names of parts
Recorder
1 Built-in microphone
2 m (microphone) jack
3 Display
4 USB connector
5 l (index/repeat) button
6 n (recording scene, folder/
noise cancel) button
7 p (playback, pause) button
8 0 button
9 Built-in speaker
0 q (earphone) jack
!
LED indicator light
@ o (power, hold) button
#
REC
(record) switch
$
+
button
% 9 button
^ k (erase) button
Introduction
EN
&
–
button
* Battery cover
( Strap hole
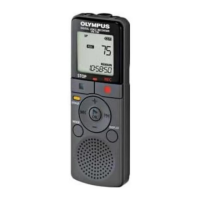
Display
1 Repeat
2 File lock
3 File number/Total number of
recorded files in folder, A/B repeat
4 Volume
5 Battery
6 Folder (recording scene)
7 Voice recorder status (recording,
playback, fast playback, slow
playback)
8 Time and date, Recording scene
9 Indicator display area (recording
date, time and date, remain, index/
temp mark, erase, noise cancel,
hold, format, beep)
Setup
After unpacking the voice recorder,
follow the steps below to have it
ready for use.
Getting started 1
Inserting the batteries.
Getting started 2
Turning the power ON.
Getting started 3
Setting the time/date.
Getting started 4
Setting the beeping sounds.
Inserting the batteries (Fig. 1)
Before using the voice recorder,
insert the batteries in the battery
compartment of the voice recorder.
1 Slide open the battery cover while
pressing down on it.
2 Insert the batteries, making sure
its positive and negative terminals
are placed correctly.
a Insert the battery’s negative
terminal first.
3 Slide the battery cover completely
closed.
• Do not close the battery cover
while the batteries are still
loose.
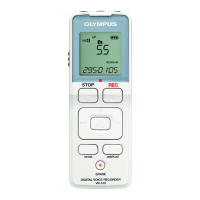
Turning the power ON (Fig. 2)
1 While the voice recorder is turned
off, press and hold the o button.
Setting the time/date (Fig. 3)
1 Press the 9 (p) or 0
button to select the desired setting
item.
2 Press the + or – button to change
the number.
• To change the setting of another
item, press the 9 or 0
button to move the blinking
cursor, then press the + or –
button to change the number.
3 Press the p button to finalize
the setting.
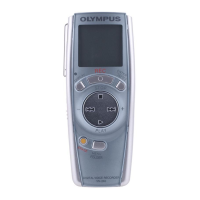
Setting the beeping sounds
(Fig. 4)
1 Press the 9 or 0 button to
select [
ON
] or [
OFF
].
[ON]:
Enables beeping sounds.
[OFF]:
Disables beeping sounds.
2 Press the p button to finalize
the setting.
Turning the power OFF
1 Press and hold the o button while
the voice recorder is in stop mode.
Power Save mode
When the voice recorder has been
stopped for at least 5 minutes after
power ON, the power turns off
automatically.
3
EN
 Loading...