EasyManua.ls Logo

Omega Carlink OMEGA-CARLINK User Manual

Omega Carlink OMEGA-CARLINK
8 pages
To Next Page IconTo Next Page
Page #1 background imageLoading...
Page #1 background image
Model:
OMEGA-CARLINK
Installation And Testing Guide
If you have not already, visit omegacarlink.com and register as a Carlink
dealer for access to install tesng and conguraon tools. Sooner is
beer since registraons are processed manually and are not instant.
Keep track of the SIM number located on the card included with this
system. It is needed to test / acvate the deivce later.
Choose a discreet yet ideal mounng locaon for the module. This
is a cellular device and performance is dependant on cellular signal
strength.
Route wiring from the mounng locaon and make all necessary wiring
connecons - SEE “CONNECTING THE DEVICE” ON PAGE 2.
Aer a few minutes, check the indicator lights to make sure the unit
has cellular service. Both the green and orange lights should be on
solid.
Login into your dealer account at omegacarlink.com to acvate the de-
vice, congure the installed opons, and perform the installaon test.
Be sure to have the SIM number available.
Complete the installaon by reassembling the vehicle’s interior.
IMPORTANT: Be sure to give the acvaon code and app info to the
vehicle’s owner. For more info, see the dealer portal guide by logging in
to your dealer account at omegacarlink.com.
Quick Reference Install Guide
1
2
3
4
5
6
7
8
SMARTPHONE INTERFACE
Detailed instructions continued on following pages ->
IM_OMEGA-CARLINK 10/20/11
Question and Answer IconNeed help?

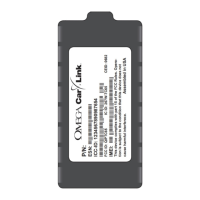
Do you have a question about the Omega Carlink OMEGA-CARLINK and is the answer not in the manual?

Omega Carlink OMEGA-CARLINK Specifications

General IconGeneral
Input Channels2
Sample RateUp to 192 kHz
Bit Depth24-bit
Headphone Output1 x 1/4" TRS
Phantom Power48V
Weight0.5 kg
Microphone Inputs2 XLR/TRS combo

Summary

Quick Reference Install Guide

Register and Access Tools

Register as a Carlink dealer on omegacarlink.com for installation and configuration tools.

SIM Card Management

Keep track of the SIM number for device testing and activation.

Mounting Location Selection

Choose a discreet location for the cellular device, considering signal strength.

Wiring Connections

Route wiring from the mounting location and make all necessary connections.

Indicator Light Check

Verify cellular service by checking solid green and orange indicator lights.

Activation and Testing

Login to your dealer account to activate, configure, and perform the installation test.

Final Assembly

Complete installation by reassembling the vehicle's interior.

Owner Information Transfer

Provide the activation code and app info to the vehicle owner.

Determine Mounting Location

Connect Device - DIGITAL

GREEN Auxiliary Output Wire

Optional negative pulse 250mA output, configurable for various applications.

YELLOW Auxiliary Output Wire

Optional negative pulse 250mA output, configurable for various applications.

GREEN 4-pin Data Connector

Connects to host system's data port for iDatalink protocol communication.

Omega CarLink Wiring Overview - DIGITAL

Connect Device - ANALOG

BLACK Ground Wire

Provides chassis ground connection to the device.

GREEN Auxiliary Output Wire

Optional negative pulse 250mA output, configurable for various applications.

YELLOW Auxiliary Output Wire

Optional negative pulse 250mA output, configurable for various applications.

BROWN Auxiliary Output Wire

Optional negative pulse 250mA output, configurable for various applications.

RED Constant Power Wire

Required power supply connection to a fused constant +12V source.

Omega CarLink Wiring Overview - ANALOG

Check Indicator Lights

Test Installation and Activation

Complete the Installation

Related product manuals