Page - 32
Feature #19 Remote Activated Anti-Carjacking Protection
Factory Default Setting Off (press “disarm/unlock” button to program)
Option: On (press “arm/lock” button to program)
This form of Anti-Carjacking is initiated by a signal from the controller or
transmitter. The Anti-Carjacking protection, including the three ways to initiate it
are described on page 21.
Feature #20 Open Door Warning Upon Arming
Factory Default Setting Off (press “disarm/unlock” button to program)
Option: On (press “arm/lock” button to program)
When this feature is turned on, if one of the vehicle's doors is open at the time that
the system is armed via the controller or transmitter, the siren will chirp 3 times and
the parking lights will flash 3 times instead of once.
Feature #21 “III” Button Operation
Factory Default Setting Panic
(press “arm/lock” button to program)
Options:
3rd Channel (press “disarm/unlock” button to program)
4th Channel (press “II” button to program)
5th Channel (press “III” button to program)
This feature changes how the controller’s or transmitter’s “III” button operates.
Normal operation, or the default setting, has the “III” button operate the Panic
feature. This feature allows changing it to instead operate the 3rd channel or either
of the two other optional channel outputs. Panic can still be operated, by the
alternative methods of pressing either the “arm/lock” and “disarm/unlock” button
for 3 seconds. This feature can also assign the 4th and 5th channels to the “III”
button, in the same manner as the 3rd channel.
Feature #18 Door Activated Anti-Carjacking Protection
Factory Default Setting Off (press “disarm/unlock” button to program)
Option: On (press “arm/lock” button to program)
This form of Anti-Carjacking is initiated by a door being opened. The Anti-
Carjacking protection, including the three ways to initiate it are described on page
21.
• Pressing the “arm/lock” and “disarm/unlock” buttons together activates the
3rd channel output, which can be used to operate optional functions or devices.
“disarm/unlock”
• Pressing and releasing the “disarm/unlock” button disarms the system and
unlocks the doors unless the alarm is triggered, in which case it will disarm the
activated alarm, but not unlock the doors unless the button is pressed again.
• Pressing and holding this button for three seconds will first disarm, and then
activate the Panic feature,
unlocking the doors.
• The unlock operation may be optionally configured during the system’s
installation so that pressing this button once disarms the system and unlocks
only the driver's door, and pressing a second time unlocks all of the doors.
Page - 5
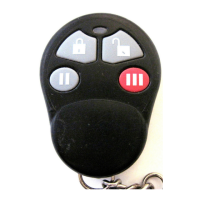
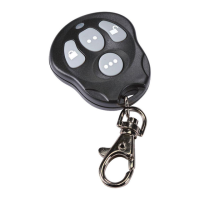
The 1-Way Transmitter
“III” button
“II” button
“disarm/unlock”
button
“arm/lock”
button
“arm/lock”
• Pressing and releasing the “arm/lock” button arms the security system and
locks the doors.
• Pressing and holding this button for three seconds will first arm, and then
activate the Panic feature, locking the doors.
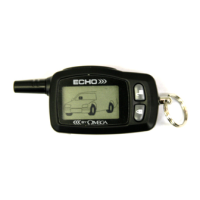
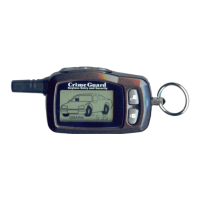
The 2-Way Controller
“III” button
“II” button
“P”rogram
button
“arm/lock”
button
“disarm/unlock”
button
 Loading...