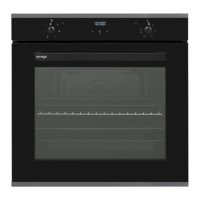
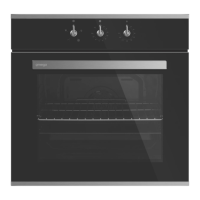
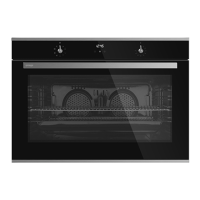
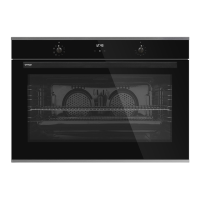
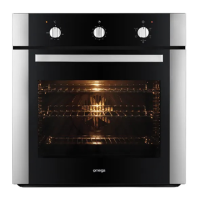
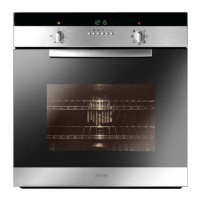
This document is an instruction manual for the OMEGA OVEN, model OBO669X2, a built-in electric oven designed for domestic use.
Function Description
The Omega OBO669X2 oven offers a variety of cooking functions to cater to diverse culinary needs. These functions are selected using a "Function Selector" knob and temperature is set via a "Thermostat Control" knob. The oven also features a digital timer with various time adjustment functions.
Core Cooking Functions:
- Oven Lamp: Provides illumination inside the oven cavity, remaining on for the duration of cooking.
- Defrost: Utilizes the fan to circulate air at room temperature, accelerating the defrosting process of food. This function is suitable for defrosting delicate foods like pastries or bread.
- Fan Forced: This function uses a turbo heater and fan to distribute heat evenly throughout the oven, making it ideal for cooking multiple dishes on various oven shelves simultaneously. The thermostat control knob adjusts the temperature, and preheating is recommended for about 10 minutes.
- Conventional (Bake): Employs both the lower and upper heating elements for static cooking, emitting heat for baking pastries, cakes, bread, lasagna, and pizza. Preheating for 10 minutes is recommended.
- Fan Assist (Fan Bake): Combines the upper and lower heating elements with the fan to provide even heat distribution, suitable for baking pastries. The fan pre-circulates heated air to create a slightly grilled effect.
- Pizza Function: Utilizes the upper and lower heating elements along with the ring heater to ensure even baking, particularly for pizza. The lower heating element disperses heat from the oven base.
- Grill (Half Grill): Uses the grill heating element on the upper part of the oven for grilling and toasting. It is recommended to place food on the wire grid in the center of the grid. Preheating for about 10 minutes is recommended.
- Full Grill: Similar to Half Grill but uses the full grill heating element for a larger surface area.
- Full Grill with Fan: Combines the full grill heating element with the fan for faster grilling and more uniform cooking, especially for thicker food. The fan helps to distribute heat evenly, reducing the need to turn food.
Digital Timer Functions:
The oven is equipped with a digital timer that offers several modes:
- Auto cooking: Allows for automatic cooking.
- Manual cooking: For manual operation of the oven.
- Key Lock: Locks the timer buttons to prevent accidental changes.
- Minute minder: Sets a countdown timer for a specific duration.
- Mode function: Selects different timer modes.
- Decrease timer: Reduces the set time.
- Increase timer: Increases the set time.
- Timer display: Shows the current time or countdown.
The timer can be set for various durations, including:
- Time Adjustment: Sets the current time of day.
- Audible Warning Time Adjustment: Sets a countdown timer that triggers an audible warning when it reaches zero.
- Semi-automatic Time Adjustment (Cooking Period): Sets a cooking duration (up to 10 hours) after which the oven will automatically turn off.
- Semi-automatic Time Adjustment (Finishing Time): Sets a specific time for the oven to finish cooking.
- Full-automatic Programming: Combines cooking period and finishing time, allowing the oven to start cooking after a certain period and finish at a set time (up to 23 hours and 59 minutes).
Important Technical Specifications
- Model: OBO669X2
- Voltage Rating: 220-240V ~50Hz
- Power Rating: 3100W
- Oven Lamp Type: E14
- Oven Lamp Voltage Rating: 220-240V
- Oven Lamp Power Rating: 15-25W
- Oven Lamp Temperature Rating: 300°C
Installation Dimensions (for built-in installation):
| Dimension |
Value (mm) |
Min/Max F (mm) |
560/580 |
| A |
557 |
Min G (mm) |
555 |
| B |
550 |
Min H/I (mm) |
600/590 |
| C |
595 |
Min J/K (mm) |
5/10 |
| D |
575 |
|
|
| E |
576 |
|
|
The oven requires a 220-240V 50Hz power supply and must be earthed. Electrical connection must be made by a licensed electrician. The appliance is designed for domestic household use only and should not be used in a commercial environment or outdoors.
Usage Features
Controls:
The oven features two main control knobs:
- Function Selector: Used to choose between different cooking functions (e.g., Defrost, Fan Forced, Conventional, Grill).
- Thermostat Control: Used to set the desired cooking temperature, ranging from 50°C to 270°C.
Accessories:
The oven comes with several accessories to enhance cooking versatility:
- Easy Fix Side Rack: Allows for easy insertion and removal of accessories. The racks can be positioned on levels 1 to 8.
- Level 1 & 2: Recommended for double level cooking with telescopic rails.
- Level 3: Recommended for single level cooking.
- Level 4: Recommended for double level cooking.
- Level 5 & 6: Recommended for single level cooking with telescopic rails.
- Level 7 & 8: Recommended for single level cooking.
- Grill Insert: A wire grid placed within a deep tray, recommended for grilling steaks, meatballs, and similar food.
- Baking Tray: A shallow tray best used for baking pastries.
- Wire Shelf: A wire grid used for grilling or processing food in oven-friendly containers.
- Water Collector: Used to collect condensation that may appear on the inner glass of the oven door, especially during cooking.
Cooking Table:
The manual provides a cooking table with recommended temperatures and cooking times for various dishes and functions:
| Function |
Dishes |
Levels |
Temp (°C) |
Min. |
| Turbo |
Puff Pastry |
1 - 2 - 3 |
170-190 |
35-45 |
|
Cake |
1 - 2 - 3 |
150-170 |
30-40 |
|
Cookie |
1 - 2 - 3 |
150-170 |
25-35 |
|
Stew |
2 |
175-200 |
40-50 |
|
Two-tray cake |
1 - 4 |
160-180 |
30-40 |
|
Two-tray pastry |
1 - 4 |
170-190 |
35-45 |
| Grilling |
Grilled meatballs |
4 |
200 |
10-15 |
|
Chicken |
* |
190 |
50-60 |
|
Chop |
3 - 4 |
200 |
15-25 |
|
Beefsteak |
4 |
200 |
15-25 |
Note: For chicken, if available, cook with a roast chicken skewer.
Energy Saving:
To save energy, users are advised to choose cookware of an appropriate size, use a lid to reduce cooking times, minimize the amount of liquid or fat, and avoid opening the oven door frequently during cooking.
Maintenance Features
General Instructions:
- Always check that cleaning materials are appropriate and recommended by the manufacturer.
- Avoid using caustic (corrosive) creams, abrasive cleaning powders, rough wire wool, or hard tools as they may damage cooker surfaces.
- Do not use cleaners that contain particles that may scratch painted parts.
- Avoid using steam cleaners.
Cleaning the Inside of the Oven:
- The inside of enameled ovens is easier to clean when the oven is warm.
- Wipe the oven with a soft cloth soaked in soapy water after each use.
- For stubborn dirt, use a liquid cleaning material specifically designed for ovens.
Cleaning the Glass Parts:
- Clean the glass parts of the appliance on a regular basis.
- Use a glass cleaner to clean the inside and outside of the glass parts. Then, rinse and dry them thoroughly with a dry cloth.
Cleaning the Stainless-Steel Parts:
- Clean stainless-steel parts of the appliance on a regular basis.
- Wipe with a soft cloth soaked in only water. Then, dry thoroughly with a dry cloth.
- Do not clean stainless-steel parts while they are still hot from cooking.
- Do not use vinegar, coffee, milk, salt, water, lemon or tomato juice on the stainless steel for a long time.
Removal of the Inner Glass:
To clean the inner glass, it can be removed by pushing the glass in the direction of B and releasing it from the location bracket (x), then pulling it out in the direction of A. For the third glass layer, push it towards and under the location bracket (y), then pull it out in the direction of B. For the outermost glass, place it under the location bracket (x) in the direction of C.
Removal of the Oven Door:
To remove the oven door for cleaning:
- Open the oven door.
- Open the locking catch (a) with the aid of a screwdriver up to the end position.
- Close the door until it almost reaches the fully closed position and remove the door by pulling it towards you.
Removal of the Side Rack:
To remove the side rack, pull it as shown in the figure. After releasing it from the clips (a), lift it up.
Replacing the Oven Lamp:
- The appliance must be disconnected from the power outlet or turned off at the isolation switch before replacing the lamp.
- Remove the glass lens, then remove the bulb.
- Replace it with another high-temperature lamp with the following characteristics: Type E14, Voltage Rating 220-240V, Power Rating 15-25W, Temperature Rating 300°C.
- Remount the glass cover and reconnect the appliance to the power supply.