14
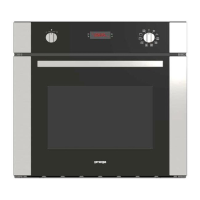
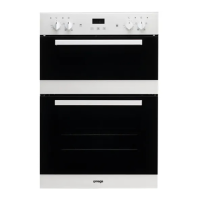
USING THE DIGITAL TIMER
Time of Day Adjustment:
The time must be adjusted before starting to use the oven. Following the
connection of the power supply to the oven, the display will begin to
flash. Leave the oven function control at “off” and then press either the
“+” or “-“ button (set to manual mode). Press the “+” or “-“ buttons to
set the correct time. Once correct, leave for 5 seconds to set.
As the displayed time will be reset in the event of a power failure or
power loss, the time adjustment operation will have to be performed
again before the oven will work.
Note: that the time can only be reset after the power has been reset.
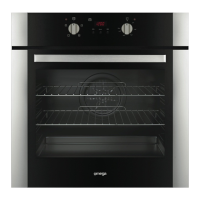
Minute Minder:
This function can be used to receive an audible warning after a pre-set time. It is used as a reminder and does
not affect the cooking functions.
Press the MODE button under the display. The symbol and 0:00 will appear on the screen. Adjust the
desired time period (HH:MM – up to 23.59) for the warning by using “+” or “-“ buttons. Shortly after the
completion of the adjustment, the current days’ time will be displayed confirming, the minute minder has
been set. The time can be adjusted if needed later by pressing the mode button again, and then with the
“+” and “-“ buttons.
When the set time is up, the timer gives an audible warning and the symbol turns off. Pressing either the
“+” or “-“ button will stop the audible warning.
The oven will not be turned off with this audible warning function.
There are 3 different auditable warning levels available. To choose between them, start with the timer
showing the time of day. Press the MODE button 3 times while the function select knob is off until ”L3” is
displayed. Press the “-“ or “+” buttons to adjust the sound level, and release to set. This needs to be reset in
the event of a power failure.
Semi-Automatic Time Adjustment According to Cooking Time:
This function is used to cook for a set duration. The food to be cooked is put into the oven and the oven is
adjusted with the control knobs to the desired cooking function and temperature depending on the food/dish
to be cooked (the manual operation symbol will be lit). Press the MODE button twice, until “dur”
appears on the timer screen and wait 5 seconds for the time display to appear – and the symbol (A) will begin
to flash. Adjust the cooking period or time for the food you wish to cook by using the “+” or “-“ buttons
while the timer is in this position. Five seconds after the adjustment operation is completed, the current day’s
time will appear again on the screen and the symbol “A” will continue to be lit on the screen. The oven will
then continue to operate on your chosen function. To cancel and return the oven to manual operation,
repeat the above and set the time to zero.
A cooking period/time between 0 and 10 hours can be set. At the completion of the programmed cooking
time, the timer will stop the oven operation and give an audible warning and “A” will turn off. Pressing any
button of the timer will end the audible warning and the oven will return to manual use (the manual
operation symbol will be lit). This function is perfect for setting a cooking time remaining for food that is
already cooking in the oven (e.g. – 30 minutes) prior to leaving the house or going into the garden as
examples. When this time is up, the oven will stop operating and the internal oven light will go out. Only
after adjusting the oven function and thermostat control knobs to their off (0) positions will the oven be fully
turned off.
14
 Loading...