EasyManua.ls Logo

Omnimount Wishbone Series

Omnimount Wishbone Series
4 pages
To Next Page IconTo Next Page
Loading...
8
Fig. 20
Fig. 21
Maintaining the CL-X
The arm assembly and wall plate may be cleaned with a soft sponge and mild solution of soap and water.
Caution: Be careful not to get water on the electrical connections or the display.
If the Roll Control mechanism becomes loose, use a 10 mm open ended wrench to
tighten the lock nuts on the back of the Mounting Head. Do not overt-tighten, or the
roll control will no longer function. See Fig 20 for lock nut locations.
If the Arm Assembly becomes loose and won’t
maintain it’s position, you can tighten the Arms
at several points. Use the 5 mm (7b) Hex
Wrench as indicated in Fig. 21.
CAUTION: WHEN REMOVING THE DISPLAY MAKE SURE THE HEAD IS
LOCKED IN THE NEGATIVE TILT POSITION, OTHERWISE INJURY COULD
OCCUR.
Negative Tilt
Specifications are subject to change without prior notice.
Every effort has been made to provide accurate and error-free assembly and installation. OmniMount Systems disclaims liability for any diffi-
culties arising from the interpretation of information contained in these instructions. If OmniMount products are used for purposes other than
their original intent, OmniMount, its distributors and retailers shall not be held responsible or liable for injuries or property damage, direct,
indirect, or consequential, which may arise from the inability to use this product safely, properly, and in the manner for which it has been de-
signed and manufactured. Warranty does not apply to products which have been lost, damaged by misuse, abuse, or accident.
Thank you for purchasing an OmniMount product.
PN:1002783—Rev B 7/2005
OmniMount Systems, Inc.
8201 South 48th Street • Phoenix, AZ 85044-5355
1-800-MOUNT-IT • www.omnimount.com
Wishbone Series™
CL-X: Extra-Large Cantilever Mount*
Installation Instructions
Questions? Call 1-800-MOUNT-IT (USA only)
Designed for 42” - 63” Flat Panel TV’s
Maximum Weight Capacity: 200 lbs. (91 Kg)
Heavy Duty Double Arm Design
Installation Template Included
Integrated Cable management
Lift N’ Lock Installation
*Mount Only—Additional Adapter Plate Required
Question and Answer IconNeed help?

Do you have a question about the Omnimount Wishbone Series and is the answer not in the manual?

Omnimount Wishbone Series Specifications

General IconGeneral
BrandOmnimount
ModelWishbone Series
CategoryTV Mount
LanguageEnglish

Summary

Maintaining the CL-X

Negative Tilt Caution

Caution regarding locking the head in negative tilt position to prevent injury during removal.

Cleaning and Maintenance

Instructions for cleaning the arm assembly and wall plate, and tightening loose components.

Important Installation Guidelines

Installation Prerequisites

Recommendations for reviewing instructions, professional installation, and wall support verification.

Mounting Limitations

Warnings against mounting to metal studs and exceeding maximum load capacity.

Adjusting the Flat Panel Display

Tilt Adjustment

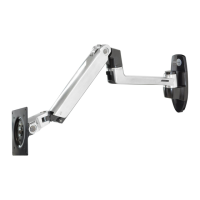
Procedure for adjusting the tilt angle and tightening tilt levers securely.

Swivel and Panning

Instructions for adjusting swivel for off-center viewing and panning for room-wide viewing.

Stowing the Display

Method for pushing the display straight back towards the wall into the stowed position.

Step 7 - Using Cable Management

Removing Cable Covers

Steps to remove cable covers using a Phillips screwdriver and retaining nuts.

Routing Cables

Instructions for routing cables along the inner and outer arm assemblies.

Step 1 & 2 - Installation Planning

Determine Mounting Location

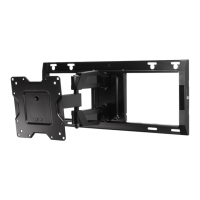
Guidance on selecting a mounting location considering viewing flexibility and display dimensions.

The Installation Template

Using the template for accurate wall plate installation and locating electrical boxes.

Step 3 - Mounting to the Wall

Mounting to Wooden Studs

Procedure for mounting to two wooden studs, including locating centers and drilling pilot holes.

Mounting to ConcreteMasonry

Instructions for mounting to concrete/masonry walls using anchors and a template.

Mounting to Cinder Block

Steps for mounting to cinder block walls, emphasizing solid sections and avoiding mortar joints.

Step 4 - Mounting the Wall Plate

Removing Cover Panels

Instructions to remove cover panels from the wall plate using a flat bladed screwdriver.

Attaching Wall Plate

Securing the wall plate to the wall with supplied spacers and lag bolts.

Step 5 - Adjusting Lateral Arm Position

Lateral Arm Adjustment

Adjusting the arm assembly's lateral position by loosening and tightening shoulder screws.

Step 6 - Attaching the Display

Display Attachment

Instructions for attaching a flat panel display using an optional adaptor plate.

Related product manuals