EasyManua.ls Logo

Omnimount PLAY40

Omnimount PLAY40
24 pages
To Next Page IconTo Next Page
Loading...
PN:888-45-222-W-02: 45-284-026: OM1100549
INSTRUCTION MANUAL
MANUAL DE INSTRUCCIONES
MANUEL D’INSTRUCTIONS
BENUTZERHANDBUCH
INSTRUCTIEHANDLEIDING
MANUALE DI ISTRUZIONI
INSTRUKCJA OBSŁUGI
NÁVOD K OBSLUZE
KEZELÉSI KÉZIKÖNYV
ΕΓΧΕΙΡΙΔΙΟ ΟΔΗΓΙΩΝ
MANUAL DE INSTRUÇÕES
BRUGERVEJLEDNING
ASENNUSOPAS
MONTERINGSANVISNING
MANUAL CU
NAVODILA
РУКОВОДСТВО ПО ЭКСПЛУАТАЦИИ
TALİMAT KILAVUZU
BRUKSANVISNING
说明手册
取扱説明書
PLAY40
INTERACTIVE TV MOUNT
VERSION F
Reduce.Reuse.Recycle
CAUTION!
MAXIMUM SCREEN SIZE
CAUTION!
MAXIMUM WEIGHT CAPACITY
40 LBS
18.1 KG
60”
Question and Answer IconNeed help?

Do you have a question about the Omnimount PLAY40 and is the answer not in the manual?

Omnimount PLAY40 Specifications

General IconGeneral
Mounting typeWall
Maximum VESA mount600 x 400 mm
Minimum VESA mount200 x 100 mm
Maximum screen size55 \
Minimum screen size30 \
Maximum weight capacity18.2 kg
Pan range0 - 180 °
Tilt angle range-15 - 10 °
Product colorAluminium, Black
ManualYes

Summary

Safety Information and Disclaimers

General Disclaimer and Warnings

Legal disclaimer and critical warnings for product installation and use.

Tools and Preparation

Required Tools List

List of tools necessary for the installation process.

Mounting and Installation Guide

Step 1: Wood Stud Installation

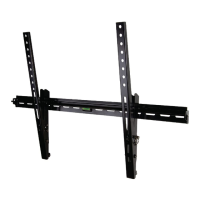
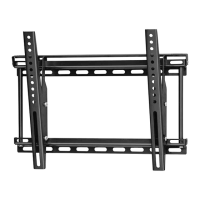
Instructions for mounting the TV bracket on wood stud walls.

Step 1: Solid Wall Installation

Instructions for mounting the TV bracket on solid walls.

Step 3: Bracket Assembly

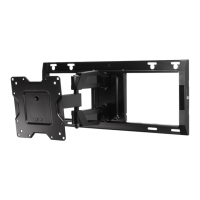
Detailed steps for assembling bracket components.

Step 4: VESA Pattern Compatibility

Diagrams showing VESA mounting hole patterns.

Step 5-A: Monitor Attachment

Attaching the monitor to the bracket.

Step 5-B,C,D: Adapter & Monitor Installation

Installing adapters and attaching monitor for various patterns.

Step 6: Final Connections and Management

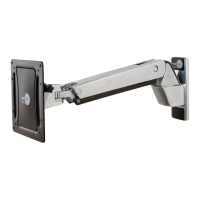
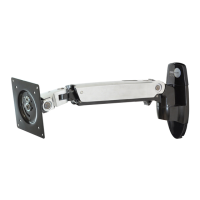
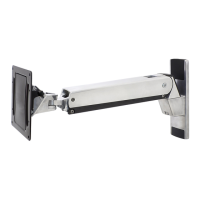
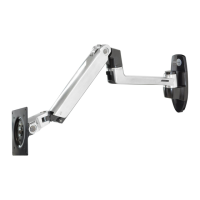
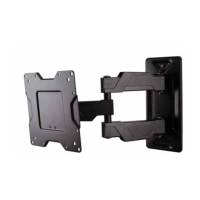
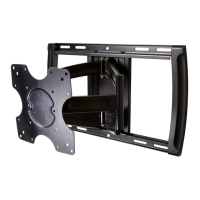
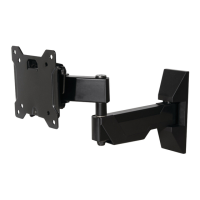
Connecting the arm, cable management.

Step 7: Movement Adjustments Overview

Demonstrating lift and tilt adjustments overview.

Step 8: Lift Adjustment Procedure

Procedure for adjusting the vertical lift of the arm.

Step 9: Tilt Adjustment Procedure

Procedure for adjusting the tilt angle of the arm.

Step 10: Bottom Nut Adjustment Caution

Warning regarding bottom nut adjustment during arm setup.

Step 11: Final Tilt Adjustment

Final adjustments for forward and backward tilt.

Product Operation and Adjustments

Adjusting for Equipment Weight

How to adjust the mount based on equipment weight for safe operation.

Warranty and Customer Support

Warranty Coverage and Terms

Information on product warranty coverage and terms.

International Service Contact

Guidance for warranty service outside the United States.

Customer Assistance Information

Contact details for product support and inquiries.

Related product manuals