Thoroughly clean and inspect the c:ank%aft and
blow out all oil passages with compressed air. Check
all journals for out-of-round, taper, grooving or
ridges. Pay particular attention to ridges or grooves
on either side
of
the oil hole areas which indicate
neglect of oil cleanliness.
If the journal dimensions are not within the limk, or
the journals are scored,
machine the crankshaft.
Crankshaft machining requires a trained and ex-
perienced operator and suitable equipment.
Undersize bearings and connecting rods are available
to
rework the shaft to
.010”,
.020”
and
.030”
under-
size.
If main bearing clearances are greater than the limits
or the bearings are worn, grooved or broken, replace
them. Precision replacement bearing inserts and
thrust washers are available for all main bearings.
Do
not ream the precision type bearings. Refer to
Diiiiensiotis
arid Clrararices
for cran ksh af t tolerances.
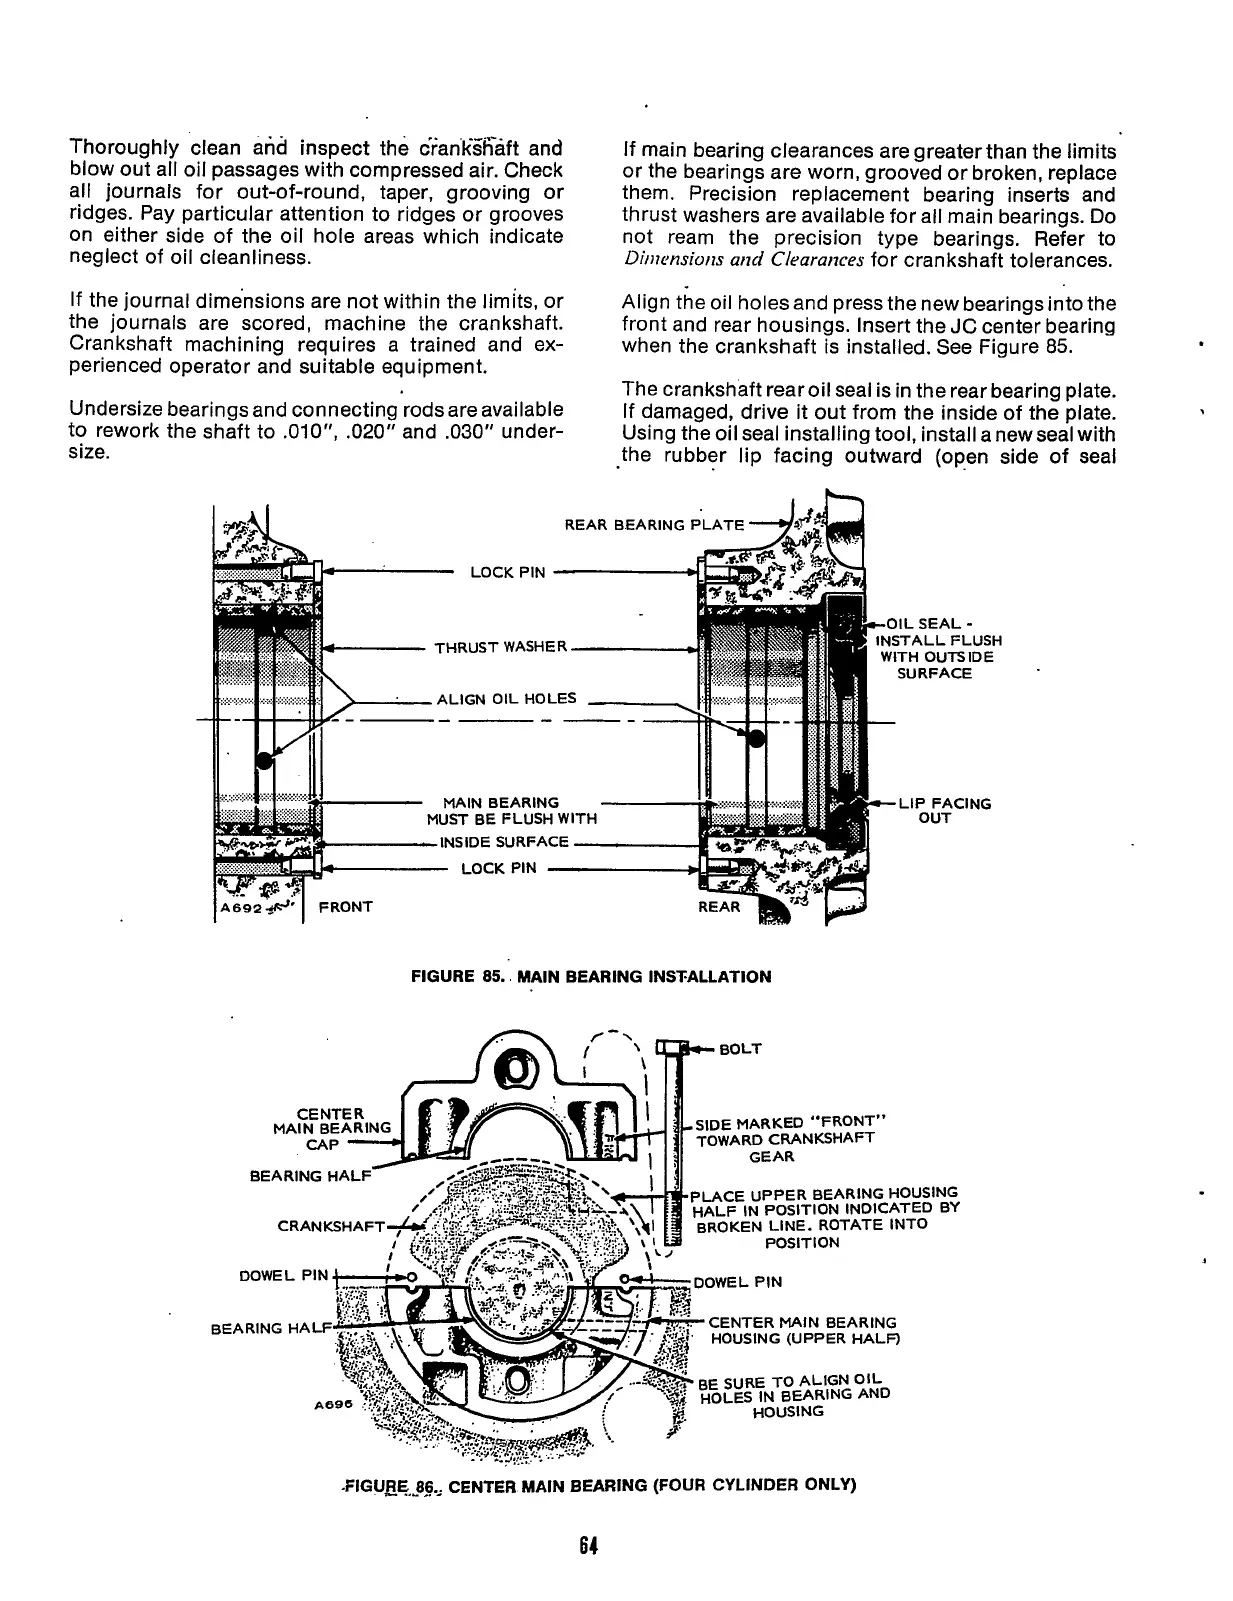
Align the oil holesand press the new bearings into the
front and rear housings. Insert the
JC
center bearing
when the crankshaft is installed. See Figure
85.
The crankshaft rearoil seal is in the rear bearing plate.
If damaged, drive it out from the inside of the plate.
Using the oil seal installing tool, install anew seal with
the rubber lip facing outward (open side of seal
THRUST WASHER
ALIGN
OIL
HOLES
MAIN BEARING
INSIDE SURFACE
MUST BE FLUSH WITH
FIGURE
85.,
MAIN BEARING INSTALLATION
SIDE MARKED “FRONT”
TOWARD CRANKSHAFT
BEARING HALF
PLACE UPPER BEARING HOUSING
HALF IN POSITION INDICATED BY
CRANKSHAFT BROKEN LINE. ROTATE INTO
POSITION
BEARING HALF CENTER MAIN BEARING
HOUSING (UPPER HALF)
BE
SURE TO ALIGN OIL
HOLES
IN
BEARING AND
,
*FIGuRE,j6, CENTER MAIN BEARING (FOUR CYLINDER ONLY)
64
Redistribution or publication of this document,
by any means, is strictly prohibited.
 Loading...


