Press on solenoid core to shift the pinion into full
mesh and measure the clearance between pinion and
pinion stop, Figure 60. This should be between
0.07-
inch and 0.12-inch
(3.05
mm) (as near to 0.070-inch
[I
.78
mm] as possible.) Adjust the link screw on the
end of the solenoid plunger for proper clearance.
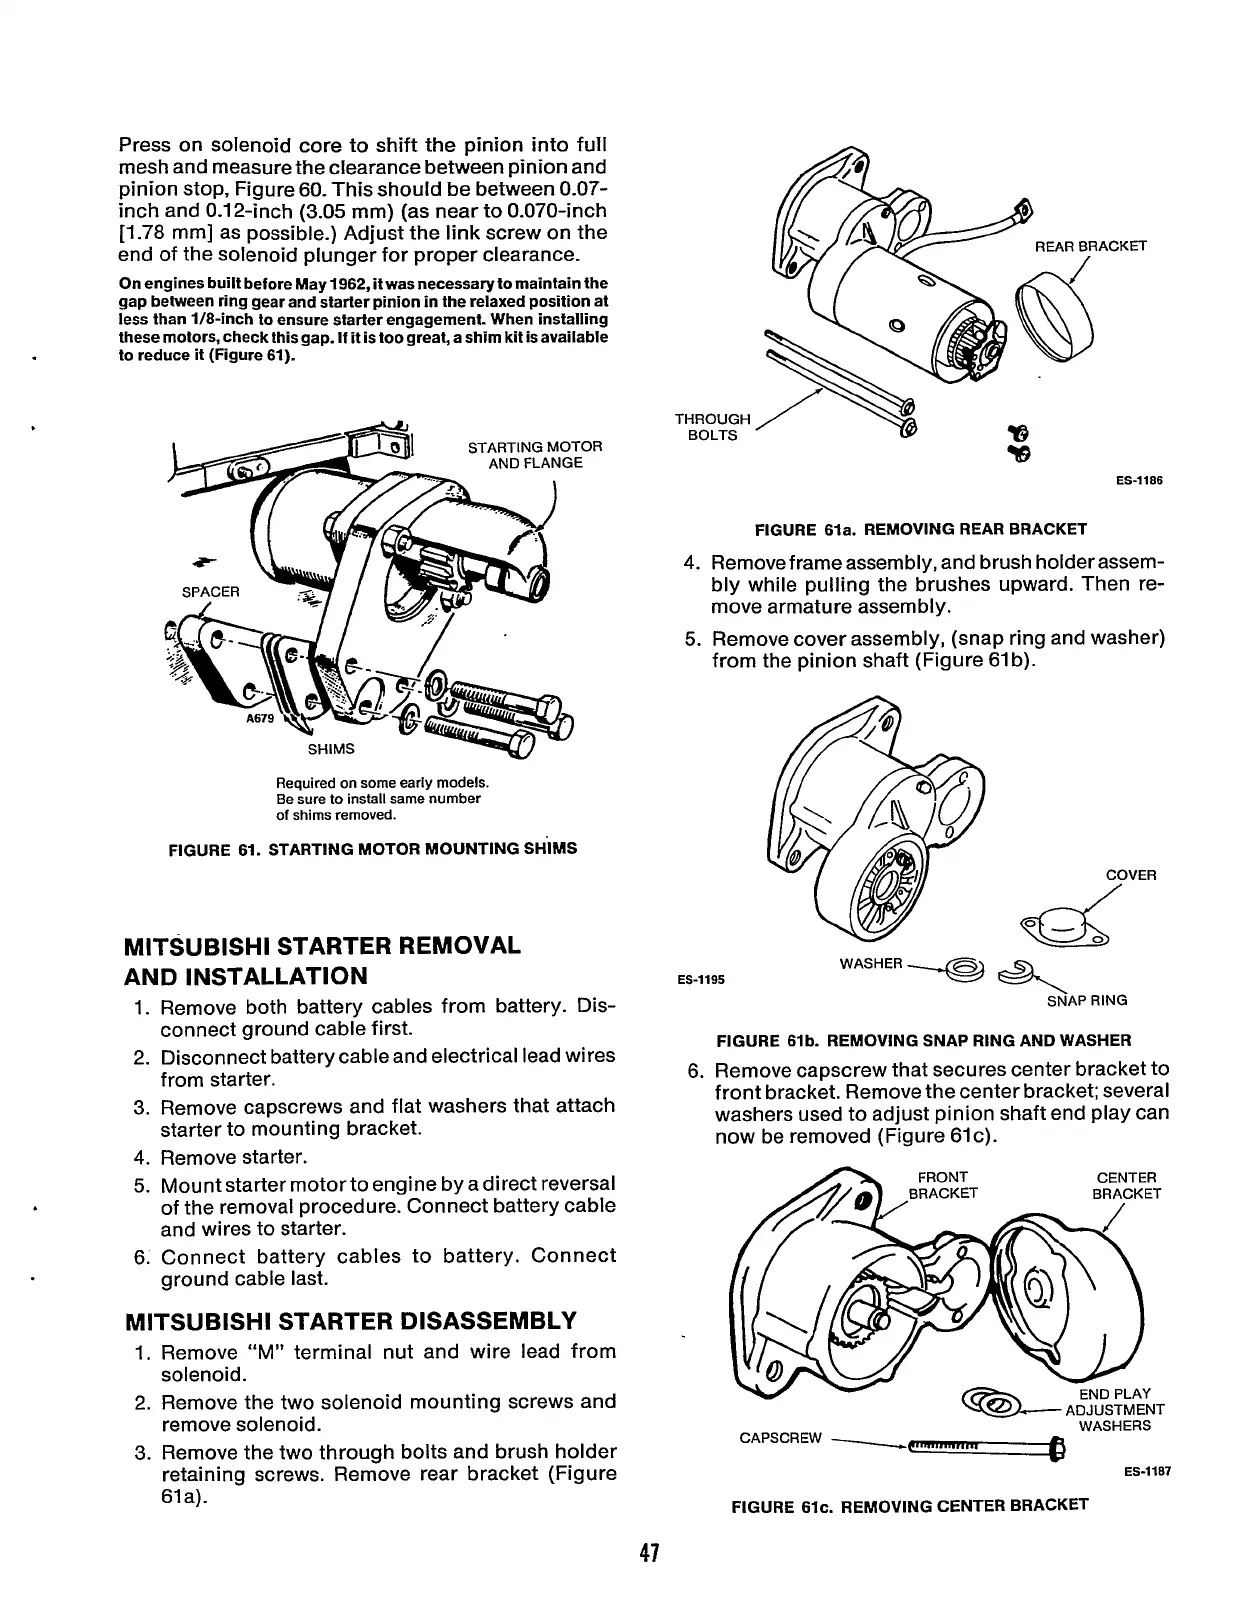
On engines built before May 1962, it was necessary to maintain the
gap between ring gear and starter pinion in the relaxed position at
less than 1/8-inch to ensure starter engagement. When installing
these motors, check this gap.
If
it
is
too great, a shim kit
is
available
to reduce it (Figure 61).
R
Required on some early models.
Be sure to install same number
of
shims removed.
FIGURE 61. STARTING MOTOR MOUNTING
SHIMS
MlTSUBlSHl STARTER REMOVAL
AND INSTALLATION
1.
Remove both battery cables from battery. Dis-
2.
Disconnect battery cable and electrical lead wires
3.
Remove capscrews and flat washers that attach
4.
Remove starter.
5.
Mount starter motor to engine by a direct reversal
of the removal procedure. Connect battery cable
and wires to starter.
6. Connect battery cables to battery. Connect
ground cable last.
MlTSU B ISH
I
STARTER DISASSEMBLY
connect ground cable first.
from starter.
starter to mounting bracket.
1.
Remove
“M”
terminal nut and wire lead from
solenoid.
2.
Remove the two solenoid mounting screws and
remove solenoid.
3.
Remove the two through bolts and brush holder
retaining screws. Remove rear bracket (Figure
61a).
THROUGH
BOLTS
REAR BRACKET
ES-1186
FIGURE 61a. REMOVING REAR BRACKET
4.
Remove frame assembly, and brush holder assem-
bly while pulling the brushes upward. Then re-
move armature assembly.
5.
Remove cover assembly, (snap ring and washer)
from the pinion shaft (Figure 61 b).
COVER
d
ES-1195 WASHER-@
*
SGAP RING
6.
FIGURE 61b. REMOVING SNAP RING AND WASHER
Remove capscrew that secures center bracket to
front bracket. Remove the center bracket; several
washers used to adjust pinion shaft end play can
now be removed (Figure 61 c).
ADJUSTMENT
WASHERS
CAPSCREW
ES-1187
FIGURE 61c. REMOVING CENTER BRACKET
47
Redistribution or publication of this document,
by any means, is strictly prohibited.