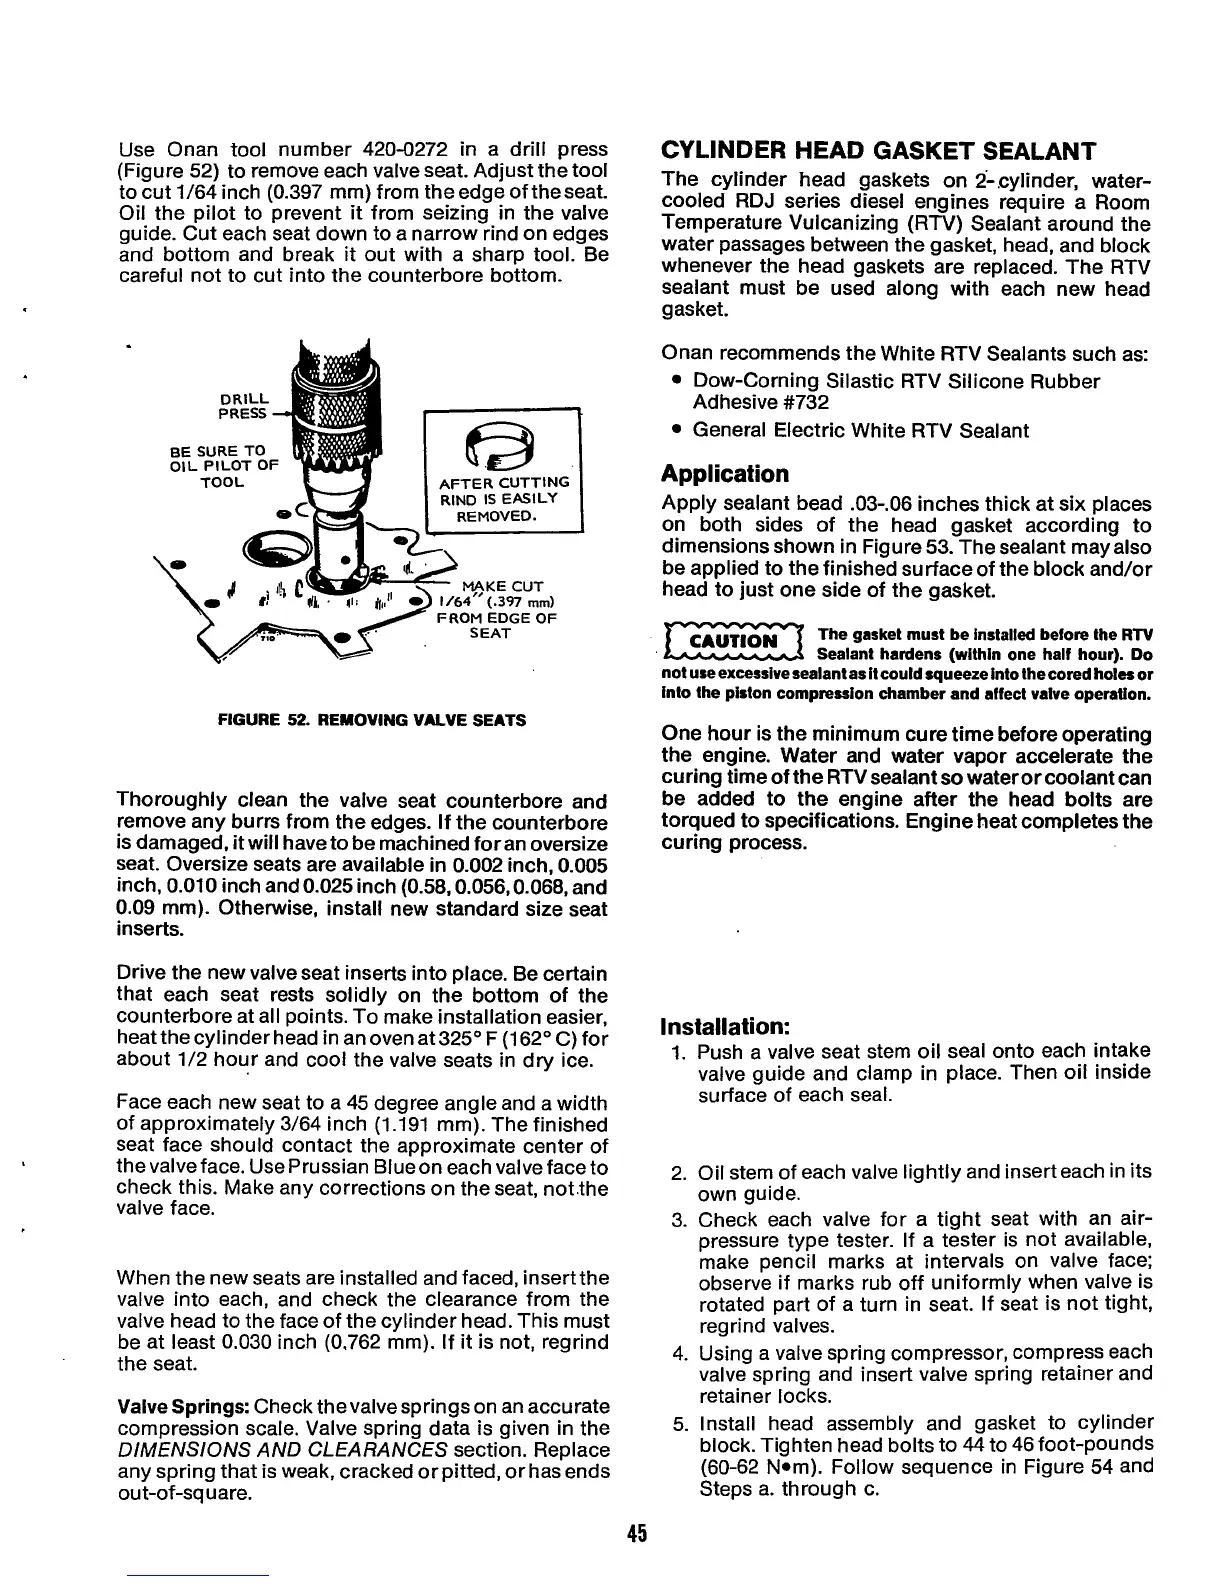
Use Onan tool number 420-0272
in
a drill press
(Figure 52) to remove each valve seat. Adjust the tool
to cut 1/64 inch (0.397 mm) from the edge of theseat.
Oil the pilot to prevent
it
from seizing in the valve
guide. Cut each seat down to a narrow rind on edges
and bottom and break
it
out with a sharp tool. Be
careful not to cut into the counterbore bottom.
DRILL
PRESS
BE
SURE
TO
OIL PILOT OF
TOOL
AFTER CUTTING
RIND
IS
EASILY
REMOVED.
I
MAKE CUT
FROM
EDGE
OF
FIGURE
52.
REMOVING VALVE SEATS
Thoroughly clean the valve seat counterbore and
remove any burrs from the edges. If the counterbore
is damaged,
it
will have to be machined for an oversize
seat. Oversize seats are available
in
0.002
inch,
0.005
inch,
0.010
inch and 0.025 inch
(0.58,0.056,0.068,
and
0.09
mm). Otherwise, install new standard size seat
inserts.
Drive the new valve seat inserts into place. Be certain
that each seat rests solidly on the bottom of the
counterbore at all points. To make installation easier,
heatthecylinderhead in anovenat325'F (162"C)for
about 1/2 hour and cool the valve seats in dry ice.
Face each new seat to a 45 degree angle and a width
of approximately 3/64 inch (1.191 mm). The finished
seat face should contact the approximate center of
thevalve face. Use Prussian Blueon each valve face to
check this. Make any corrections on the seat, notlhe
valve face.
When the new seats are installed and faced, insertthe
valve into each, and check the clearance from the
valve head to the face of the cylinder head. This must
be at least
0.030
inch (0.762 mm).
If
it is not, regrind
the seat.
Valve
Springs:
Check thevalvesprings on an accurate
compression scale. Valve spring data is given in the
DIMENSIONS AND CLEARANCES
section. Replace
any spring that is weak, cracked orpitted, orhas ends
ou t-of-square.
CYLINDER HEAD GASKET SEALANT
The cylinder head gaskets on 2-,cylinder, water-
cooled RDJ series diesel engines require a Room
Temperature Vulcanizing
(RTV)
Sealant around the
water passages between the gasket, head, and block
whenever the head gaskets are replaced. The RTV
sealant must be used along with each new head
gasket.
Onan recommends the White RTV Sealants such as:
Dow-Corning Silastic RTV Silicone Rubber
General Electric White RTV Sealant
Adhesive #732
Application
Apply sealant bead .03-.06 inches thick at six places
on both sides of the head gasket according to
dimensions shown in Figure 53. The sealant may also
be applied to the finished surfaceof the block and/or
head to just one side of the gasket.
The gasket must be installed before the
RTV
KZx
Sealant hardens (within one half hour).
Do
not useexcessivesealantas it couldsqueezeinto thecored holesor
into the piston compression chamber and affect valve operation.
One
hour
is the minimum cure time before operating
the engine. Water and water vapor accelerate the
curing time of the RTV sealant
so
wateror coolant can
be added to the engine after the head bolts are
torqued to specifications. Engine heat completes the
curing process.
Installation:
1. Push a valve seat stem oil seal onto each intake
valve guide and clamp in place. Then oil inside
surface of each seal.
2. Oil stem
of
each valve lightly and insert each in its
own guide.
3.
Check each valve for a tight seat with an air-
pressure type tester.
If
a tester is not available,
make pencil marks at intervals on valve face;
observe if marks rub off uniformly when valve is
rotated part of a turn in seat. If seat is not tight,
regrind valves.
4. Using a valve spring compressor, compress each
valve spring and insert valve spring retainer and
retainer locks.
5.
Install head assembly and gasket to cylinder
block. Tighten head bolts to 44 to 46 foot-pounds
(60-62 Nom). Follow sequence in Figure 54 and
Steps a. through c.
45
 Loading...
