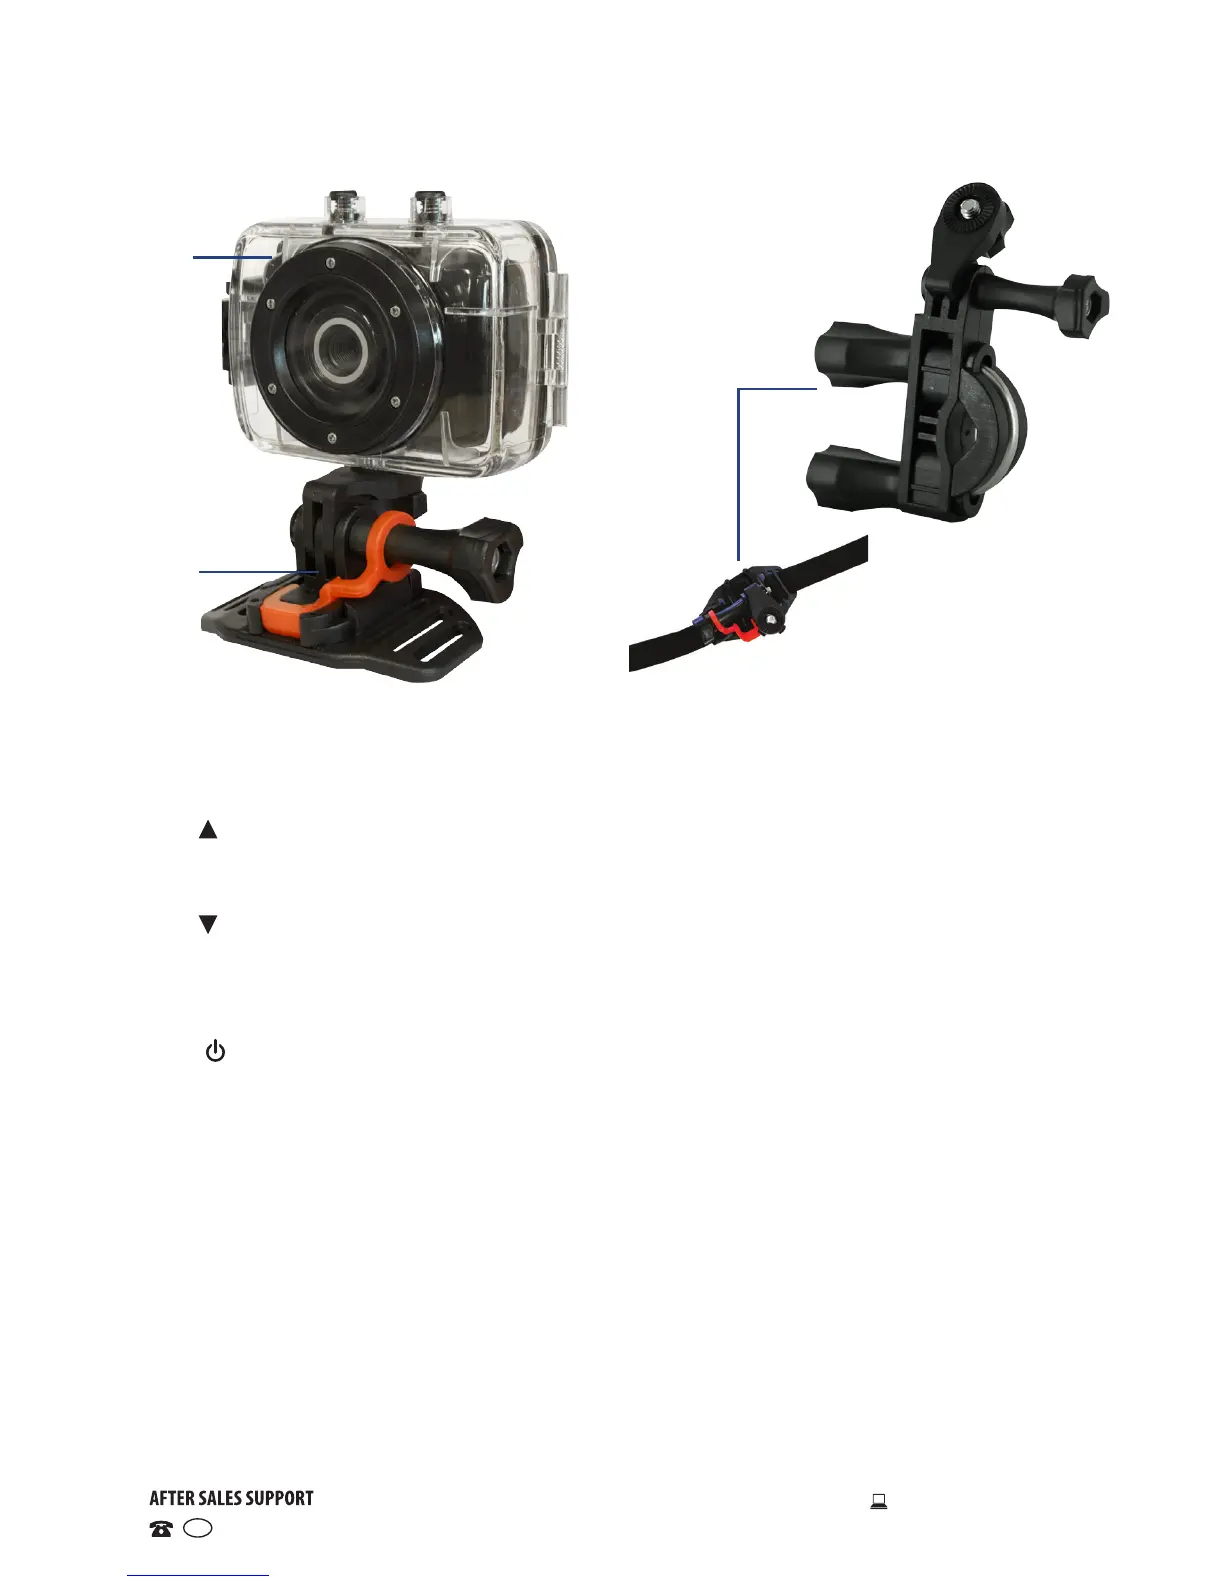
Product Overview (Cont.)
14
15
1 Mounting shield: affix to the front of the camera
2 Lens: aim at the image/scene to be captured/recorded
3 Charging/Operation indicator: see page 11 for details
4 UP button: zoom in (video & picture-taking modes); menu selection;
pause/play (playback mode)
5 OK button: open/exit from menu; stop playback (playback mode)
6 DOWN button: zoom out (video & picture-taking modes); menu selection
7 LCD display: displays the parameters relevant to the current mode
8 Lanyard through-holes: attach a wrist strap (not supplied)
9 MODE switch: select video recording, picture taking or playback mode
10 ON/OFF switch: power on/off; switch between tabs in setup menu
(menu operation)
11 SHUTTER button: start/stop (video recording mode); take a still picture;
play the video (playback mode)
12 SD card slot: insert a micro SD card (see page 9 for details)
13 Mini USB port: attach the USB cable for connection to a computer
14 Waterproof housing: see page 11 for details
15 Helmet mount: use the helmet mount (or mounting strap) to fix the
camera on a ventilated helmet
16 Bicycle mount, mounting strap, mini USB cable (not pictured): use the
bicycle mount to fix the camera securely onto a handlebar, and the USB
cable for connection of the camera to a computer for file transfer or use
as a web cam
16