HOBO 4-Channel Analog Data Logger (UX120-006M) Manual
Specifications (continued)
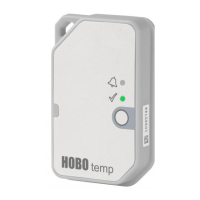
Plot A: Time Accuracy
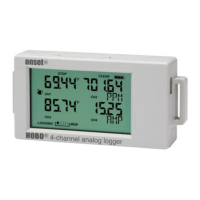
Logger Components and Operation
Start/Stop Button: Press this button for 3 seconds to start or
stop logging data, or to resume logging. This requires
configuring the logger in HOBOware with a push button start or
stop, and with “Resume logging on next button push” selected
(see Setting up the Logger). You can also press this button for
1 second to record an internal event (see Recording Internal
Logger Events) or to turn the LCD screen on if the option to turn
off the LCD has been enabled (see Setting up the Logger).
Alarm/Stats Button: Use this button to clear a tripped alarm
(see Setting up Alarms) or to switch between statistics, alarm
readings, and the current sensor reading.
Mounting Loops: Use the two mounting loops (only one visible
in the diagram) to mount the logger with the hook-and-loop
strap (see Mounting the Logger).
External Inputs: Use these 2.5 mm jacks (not visible in the
diagram) to connect up to 4 sensors (see Connecting External
Sensors).
USB Port: Use this port to connect the logger to the computer
or the HOBO U-Shuttle via USB cable (see Setting up the Logger
and Reading Out the Logger).
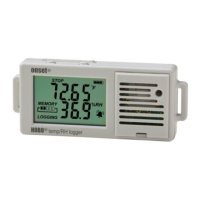
LCD Screen: This logger is equipped with an LCD screen that
displays details about the current status. This example shows all
symbols illuminated on the LCD screen followed by definitions
of each symbol in the table.
LCD Symbol Description
The logger is waiting to be launched. Press and
hold the Start/Stop button for 3 seconds to launch
the logger.
The logger has been launched with push button
stop enabled; press and hold the Start/Stop
button for 3 seconds to stop the logger.
Note
: If
you also launched the logger with a push button
start, this symbol will not appear on the display for
30 seconds.
An alarm is ready to be cleared. This will only
appear if “Cleared with button press” was selected
in the HOBOware alarm settings. Press the
Alarm/Stats button for 3 seconds to clear the
alarm.
The battery indicator shows the approximate
battery power remaining.
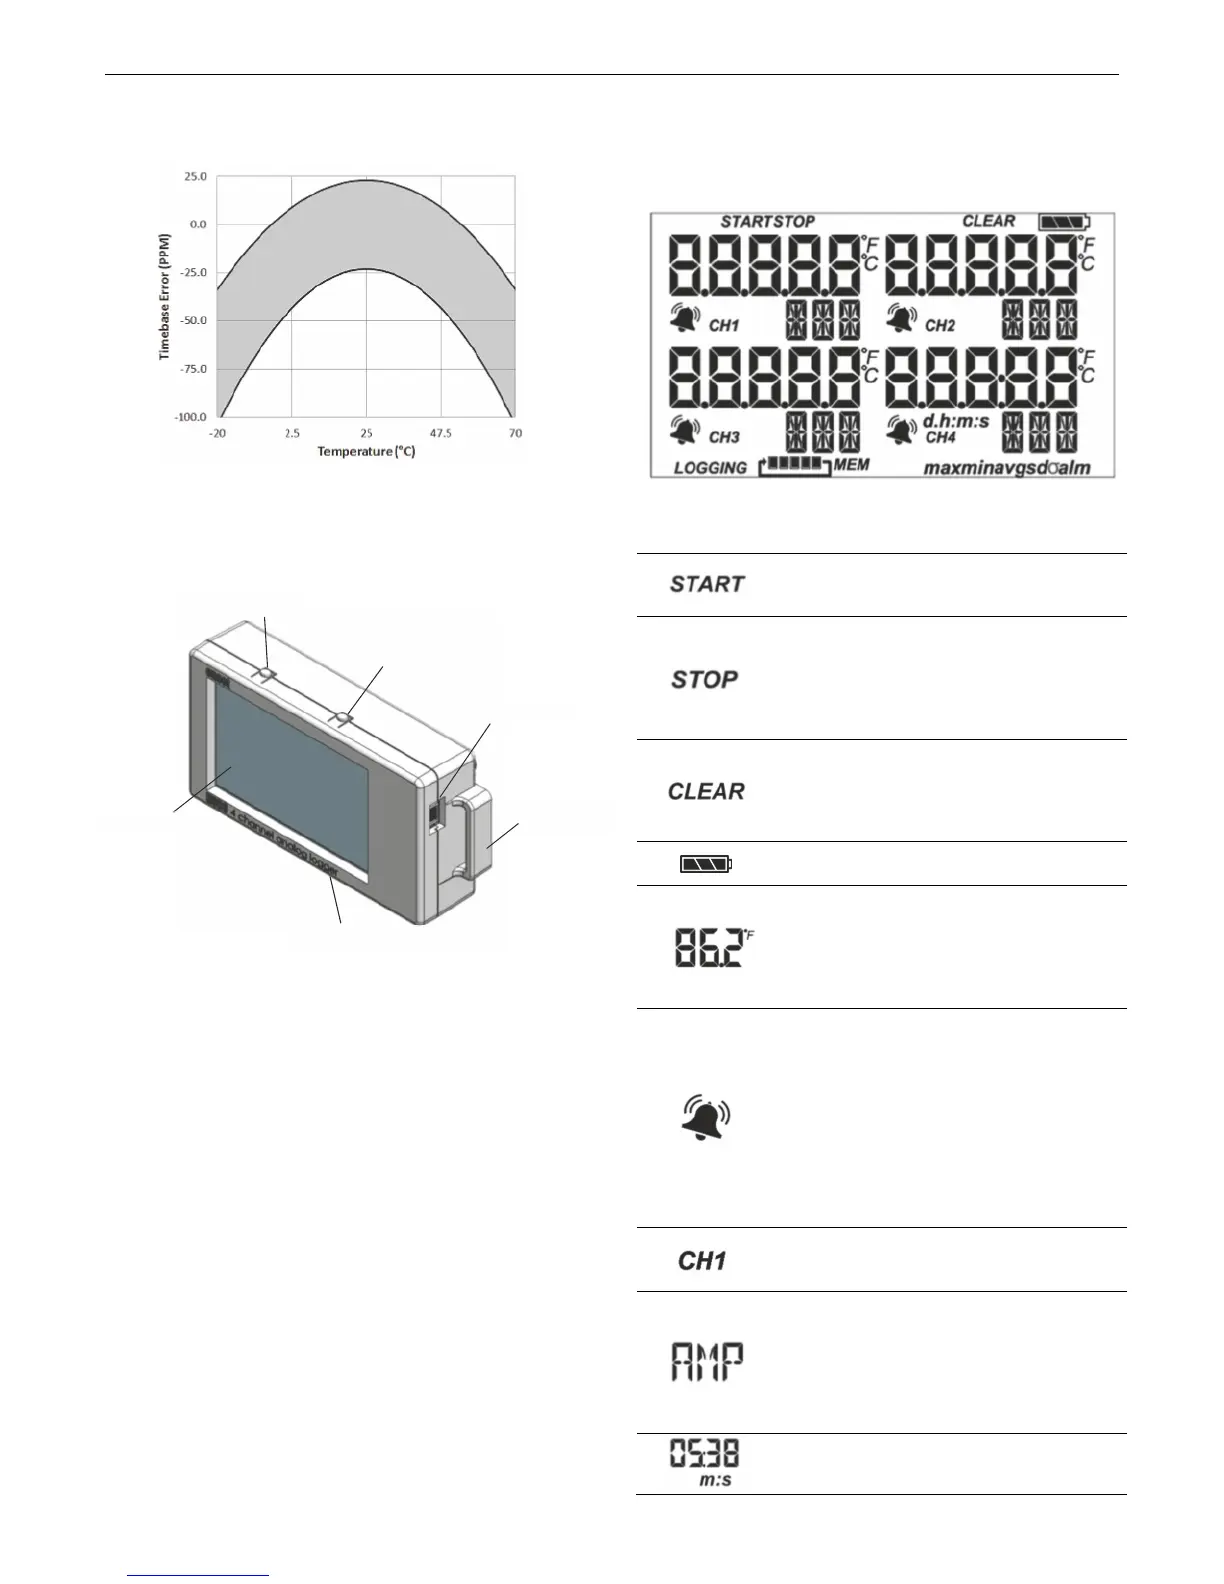
This is an example of a temperature reading from
a temperature sensor. Temperature units are
determined by the settings in HOBOware. To
switch between Celsius and Fahrenheit, change
the Display Preferences in HOBOware before
launching the logger.
A sensor reading is above or below the high or low
alarm that you configured. Press and release the
Alarm/Stats button until the “alm” symbol
(described later in this chart) is displayed on the
screen. This symbol at left will clear depending on
how alarms were configured in HOBOware. If the
alarm was configured to clear when the logger is
relaunched, this symbol will remain on the LCD.
Otherwise, it will clear when the sensor reading is
back within the alarm limits or by pressing the
Alarm/Stats button for 3 seconds.
This is the channel number associated with the
sensor reading (channel 1 for this example). Up to
four channels are visible at one time.
This is an example of the units entered for the
sensor, which appears to the right of the channel
number. The unit type is determined by what was
entered in the LCD Units field for that sensor in
HOBOware. See Setting up the Logger for more
details. Note that units for temperature sensors
are displayed as °F or °C only.
The logger has been configured to start logging on
a particular date/time. The display will count down
in days, hours, minutes, and seconds until logging
Alarm/Stats Button
Start/Stop Button
USB Port
Mounting Loop
LCD Screen
External Inputs
 Loading...