EasyManua.ls Logo

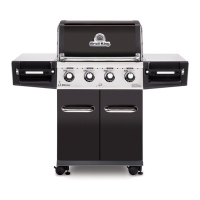
Onward Broil King REGAL 420 User Manual

Onward Broil King REGAL 420
20 pages
To Next Page IconTo Next Page
Page #1 background imageLoading...
Page #1 background image
REDDI-BILT BARBECUES
ASSEMBLY MANUAL & PARTS LIST MANUEL DE MONTAGE & LISTE DE PIECES
RETAIN FOR FUTURE REFERENCE VEUILLEZ CONSERVER POUR REFERENCE ULTERIEURE
REGAL 420
9561-54
9561-57
REGAL 440 REGAL 440 PRO
9561-64 9565-64
9561-67 9565-67
1-800-265-2150 info@omcbbq.com
20084-E77 REV B 11/12
REGAL 490 REGAL 490 PRO
9561-84 9565-84
9561-87 9565-87

Table of Contents

Question and Answer IconNeed help?

Do you have a question about the Onward Broil King REGAL 420 and is the answer not in the manual?

Onward Broil King REGAL 420 Specifications

General IconGeneral
BrandOnward
ModelBroil King REGAL 420
CategoryGrill
LanguageEnglish

Summary

Barbecue Assembly Instructions

Step 1: Base and Initial Component Assembly

Instructions for assembling the base unit and attaching the first components.

Steps 2-3: Frame and Side Panel Installation

Assembling the main frame and connecting side panels.

Steps 4-5: Securing Grill Components

Instructions for attaching various components to the grill frame.

Steps 6-7: Internal Structure and Supports

Installing internal supports and connecting components.

Steps 8-9: Top Section and Lid Attachment

Positioning and securing the main barbecue top and lid.

Step 10: Door Hinge and Cabinet Assembly

Detailed steps for installing the cabinet doors and hinges.

Steps 11-12: Shelving and Cabinet Parts

Installing side shelves and internal cabinet components.

Step 13: Gas Line Connection Procedure

Detailed steps for connecting the gas supply lines to the burners.

Step 14: Final Assembly Checks

Performing final checks and adjustments to the assembled grill.

Step 15: Grate and Burner Installation

Installing the cooking grates and burner assembly.

Steps 16-17: Accessory and Finishing Touches

Attaching remaining accessories and finishing elements.

Step 18: Propane Tank Mounting

Securing the propane tank within the barbecue cabinet.

Step 19: Propane Tank Securing and Cabinet Closure

Final steps for securing the propane tank and closing the cabinet.

Step 20: Rotisserie Kit Installation

Instructions for assembling and attaching the rotisserie kit.

Barbecue Parts List and Identification

Comprehensive Parts Catalog

Detailed list of all components with item numbers and quantities for each model.

Related product manuals