Do you have a question about the Optika B-350 and is the answer not in the manual?
Important information and warnings regarding safety about installation, use and maintenance of the microscope.
Ensure mains voltage matches instrument, switch is OFF before connecting the power cord.
Symbols used to alert users to safety aspects and potential hazards during operation.
Specifies temperature and relative humidity requirements for microscope operation.
Instructions to check contents, note accessories for future orders, and keep original packaging.
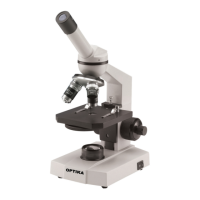
Steps to attach the optical head, insert eyepieces, and remove protective film from the stage.
Guidance on connecting the power cord into the socket at the base of the instrument.
Loosen the lock-screw, position the head comfortably, and relock the screw.
Lock the slide with the clamp and centre the specimen over the stage opening.
Read safety, plug in cable, turn on switch, and adjust brightness for observation.
Adjust head parts until a single circle of light is visible through the eyepieces.
Adjust the coarse focus knob tension clockwise to increase it as needed.
Align the ring on the right eyepiece, then focus for both eyes using coarse/fine knobs.
Raise/lower condenser for illumination, centre using screws and diaphragm.
Adjust iris diaphragm opening to control contrast and image resolution.
For phase contrast models, centre phase rings using a centering telescope.
Instructions to insert blue, yellow, or frosted filters in the holder beneath the condenser.
Use in a clean, dry, shock-free environment with controlled temperature and humidity.
Handle carefully, keep vertical, cover after use, and store in a dry, clean place.
Check voltage, avoid rapid on/off switching, and observe all regional safety regulations.
Use compressed air, lint-free cloth with water/detergent, or ethanol/ether mix.
| Type | Biological Microscope |
|---|---|
| Optical System | Finite Optical System |
| Magnification | 40x - 1000x |
| Eyepiece | WF10x/18mm |
| Objective Lenses | 4x, 10x, 40x, 100x |
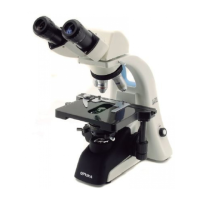
| Head | Binocular, 360° rotating, 30° inclined |
| Nosepiece | Quadruple |
| Focusing | Coaxial coarse and fine focusing |
| Stage | Double layer mechanical stage 125x115mm, X-Y movement range 70x30mm |
| Illumination | LED |
| Condenser | Abbe condenser N.A. 1.25 with iris diaphragm |
| Power Supply | 100-240Vac, 50-60Hz, external power supply |