Description of the connection
OPTIMUM
MASCHINEN - GERMANY
29 / 11 / 2006
Page
8
Description of the connection CNC Controller III and VI ; Version 2.0.1
© 2006
GB
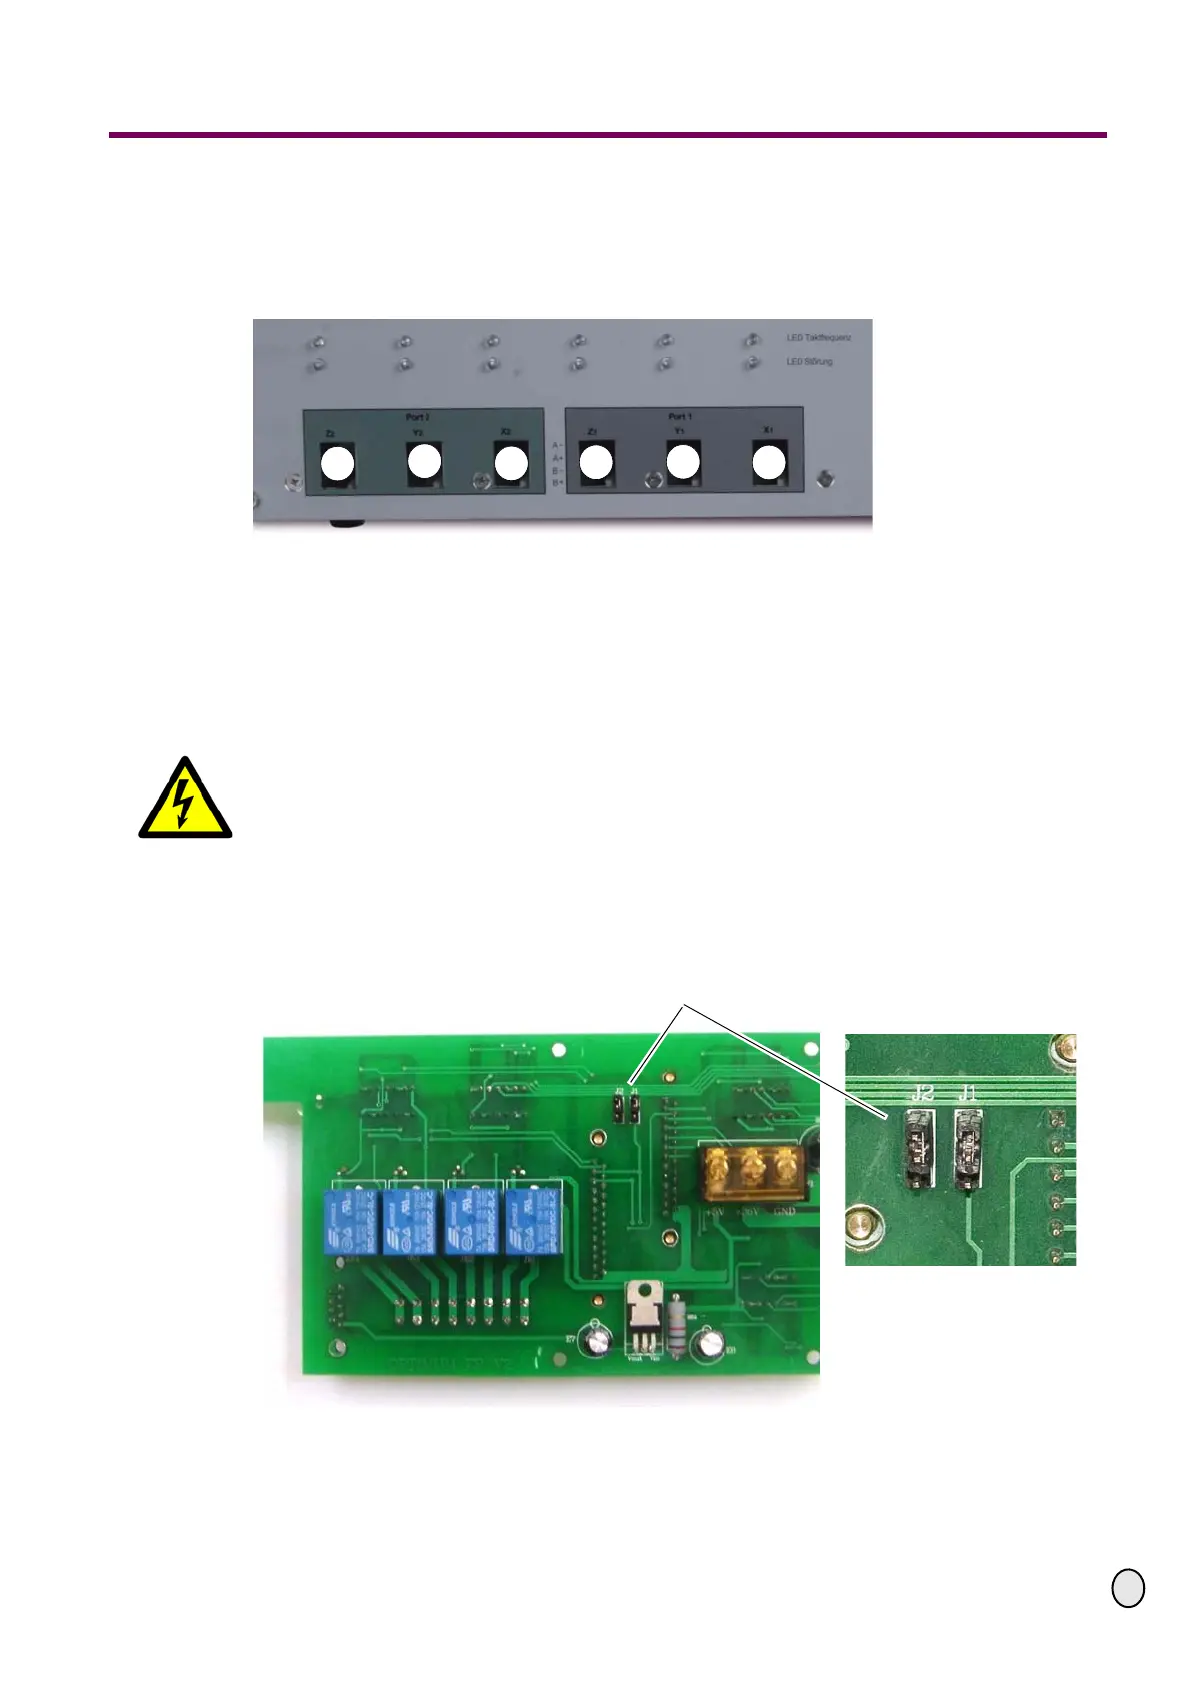
6.1.5 Optional 4th axis on parallel port 1
The main board is equipped with two jumpers. By resetting the jumper the 4th axis at the
connection X 2 is being activated (position 6). The control board at this position has to be set as
master!
“Setting the jumper“ on page 12
Fig.6-2: Front view CNC controller VI - version 2
CAUTION !
When the 4th axis is activated only parallel port 1 can be used. The parallel port 2 is
switched off and can therefore not be used.
6.1.6 Activating the 4th axis
CAUTION!
Unplug the mains plug and wait at least 3 minutes before opening the CNC controller.
This time period is required in order to make sure that all condensers are being
discharged.
Disassemble the upper part of the housing.
In the shown jumper setting the 4th axis is being deactivated. Set both jumpers (J1 and J2) to
the bottom position in order to activate the 4th axis.
Fig.6-3: Main board CNC Controller
2
3
4
5
6
1
Jumper