37
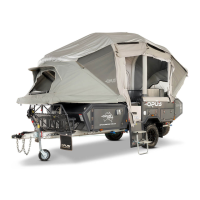
Once your annex has inflated, you may find that the position of the AIR poles needs adjusting so that the annex is fully tensioned. There are black straps between the
floor-ends of the beams on the main tent section, which will help to ensure the optimal placement of the beams. You can then peg the corners and guide ropes of the
AIR annex to the ground to secure your position.
Lay your optional ground sheet and attach this to the main tent using the zippers provided. There are zip-open sections of your ground sheet to allow the kitchen and
fridge to slide out. You can also then zip on your side walls. Attach velcro seals between canopy and annex.
AIR Canopy & Annex Set-Up Tips:
• AIR OPUS® TIP: You may find that the AIR canopy is easier to shape with the side walls and front doors zipped closed, as this
helps to create more structure to prevent the annex poles from distorting by over-extension when inflating.
• AIR OPUS® TIP: If your canopy takes longer than usual to inflate check that your quick-release valves are all fully closed and
that none of the AIR poles are pinched, preventing AIR moving through. If this happens, you can easily move the air pole to
allow AIR flow through and allow the pole to inflate.
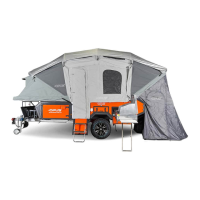
Once located, connect the Cross Filling Tube to the receiving valve on the side of the annex. Take care to ensure that the spring is inside the grey tube to help protect
the hose from getting kinked. Install the tube to the receiving valve in the same way as in step (2) except you will need to thread the top of the valve on to the Cross
Filling Tube before you push the tube on to the valve. Twist the top of the valve on, to secure the tube in place.
Open the valve on the annex-side. Finish zipping the annex to the side of the OPUS and fold the Velcro flap over the zip.
Ensure all 7 quick-release valves are closed on the annex and all 5 on your OPUS main tent then press the AIR compressor button on the control panel and wait for
the annex to inflate.
Keep an eye out for obstructions and when the annex is starting to form, feel free to help guide the air beams to assist in easy flowof air through them and form final
annex structure.
STEP 6
STEP 7
STEP 8
STEP 9
STEP 10
STEP 11
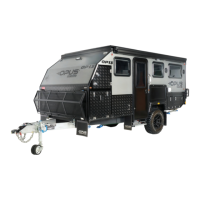
With your OPUS® annex fully inflated, you’re ready to assemble the annex, and the first step is to attach the wall skirt:
STEP 1 - Position the OPUS® wall skirt along the entry side wall of your OPUS® Camper.
STEP 2 - Attach the skirt with the Velcro strips and zips around the edges.
STEP 3 - Peg the skirt to the ground with the five D-rings along the bottom edge.
to attach the wall skirt
37