tions where they could be damaged by digging or trenching in the
future.
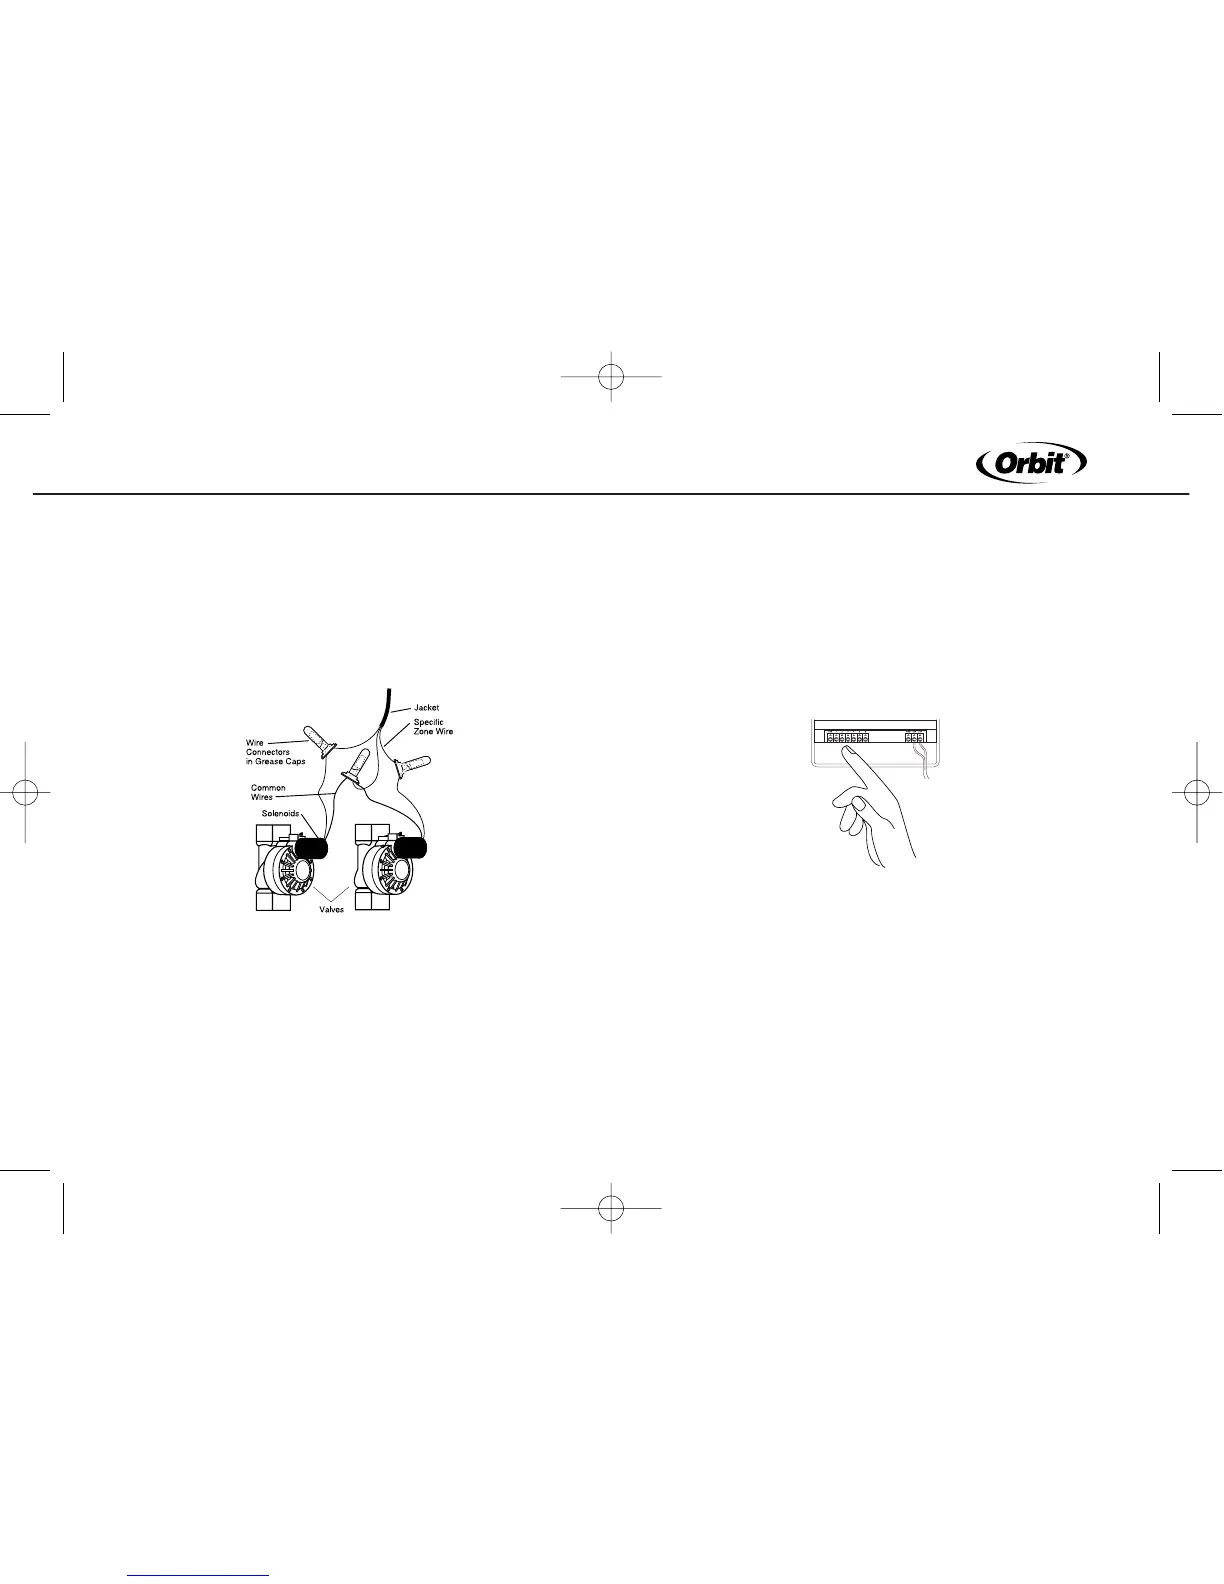
• Each valve has two wires. One wire is to be connected as the com-
mon. The common wires for all the valves can be connected togeth-
er to one common wire going to the timer. The other valve wire is to
be connected to the specific station wire that will control that valve
[See Figure 19].
Figure 19: Wiring Valves
• All wires should be joined together using wire nuts, solder, or vinyl
tape. For additional protection to waterproof connections a
WaterMaster
®
grease cap can be used.
• To avoid electrical hazards, only one valve should be connected to
each station.
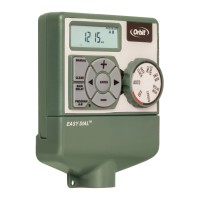
Connecting Valve Wires to the Timer
• Remove cover by sliding it down.
• Determine which valve you want to connect to which station.
Connect each valve wire to its station terminal (labeled 1-6 or 1-12)
by inserting the bare wire.
• It may be necessary to “open” the terminal to allow for wire insertion
or removal. To do this, simply take a Phillips screwdriver and turn the
screw two to three turns counter clockwise. After inserting wire turn
the screw clockwise. Do not over tighten.
• Connect the common wire to the terminal labeled “com” [See Figure 20].
Figure 20: Connecting Valve Wires
13
t
-