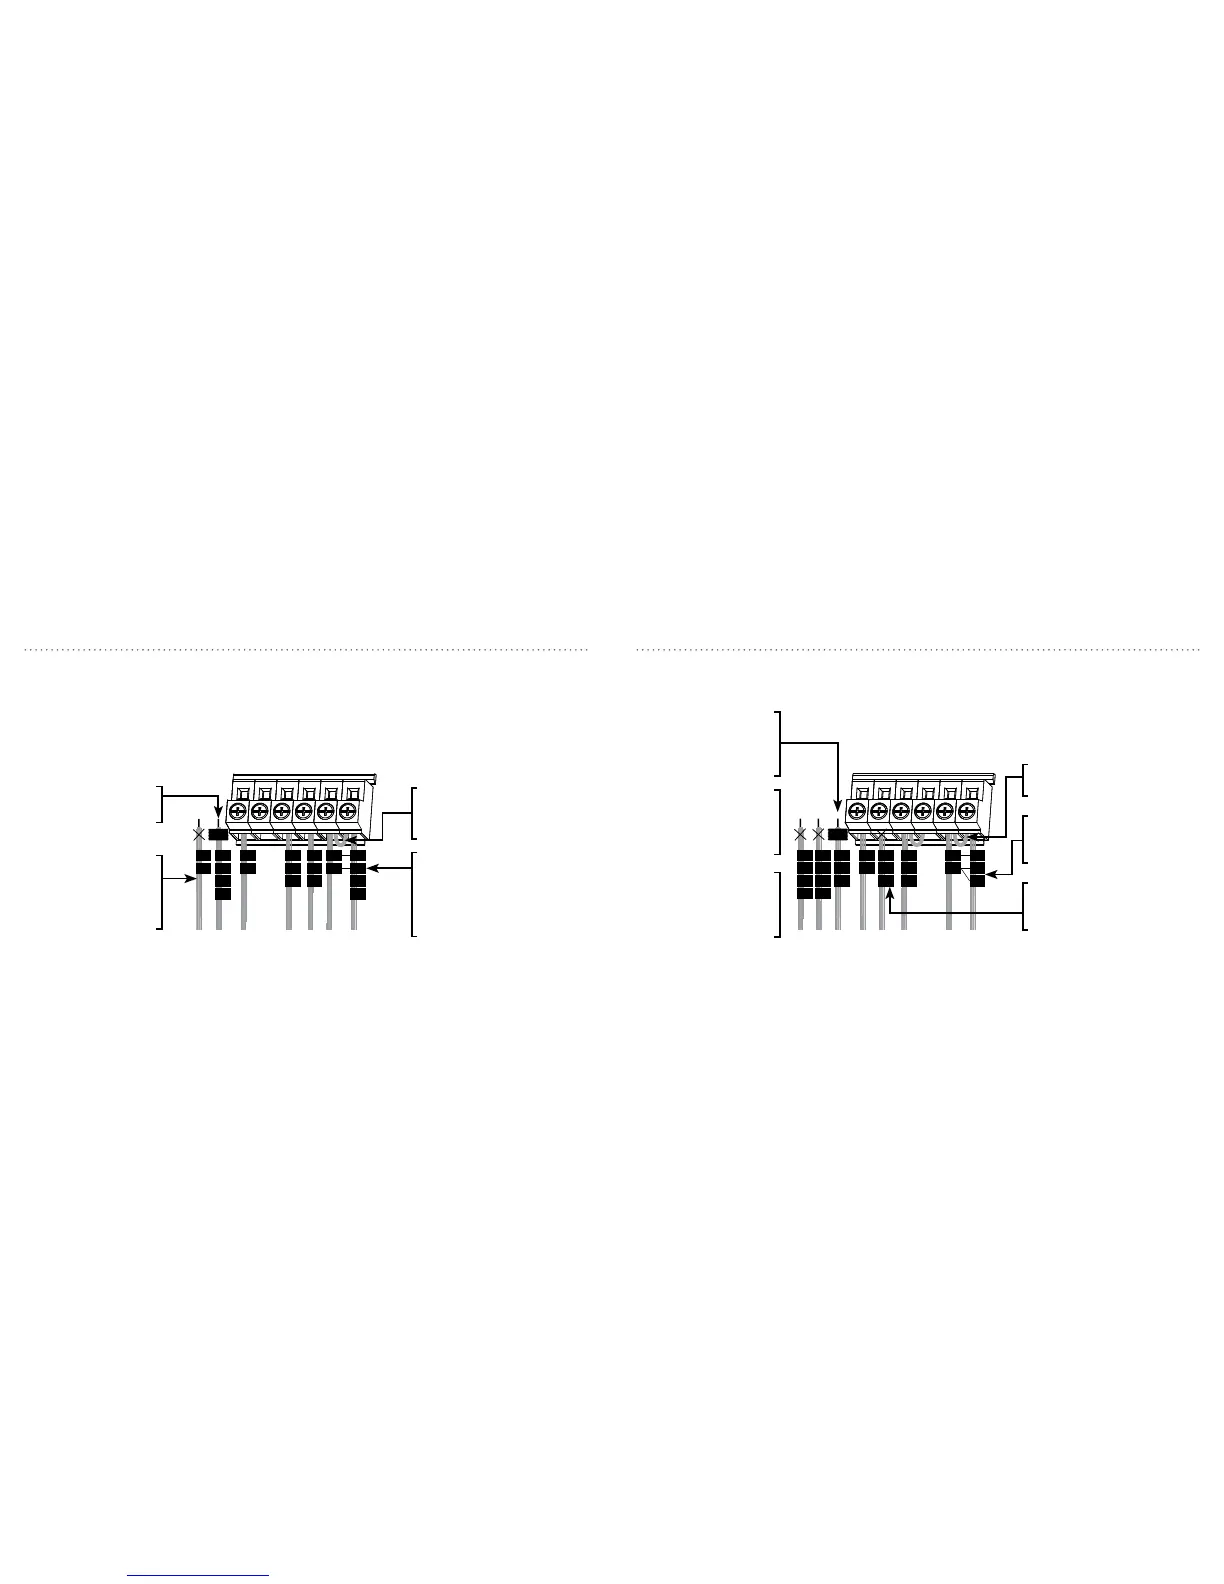
R
R
RC
RC
W
W
Y
Y
G
G
O/B
O/B
Note: Most systems can be wired using the
wiring diagrams and instructions on pages 10
& 11. If your thermostat wiring does not match
those wiring configurations, use the diagrams
and instructions on pages 12 & 13.
Note: Most systems can be wired using the
wiring diagrams and instructions on pages 10
& 11. If your thermostat wiring does not match
those wiring configurations, use the diagrams
and instructions on pages 12 & 13.
If Y2 or W2 wires are
present, the Orbit
thermostat is not
compatible with your
system.
If your existing thermostat
has V1, W1, and W2 wires,
stop now and contact a
qualified HVAC technician
for assistance.
If your existing thermostat
has L, F, E, or Aux wires,
the Orbit thermostat is
not compatible with your
system.
Remove metal jumper
connecting R & Rc terminals
only if your system requires
both R & Rc wires.
Leave the metal jumper
in place, connecting the
R & Rc terminals.
If your existing thermostat has
both V and VR wires, stop now
and contact a qualified HVAC
technician for assistance.
If your existing thermostat has
a separate O and B wire, stop
now and contact a qualified
HVAC technician for assistance.
If your existing thermostat has
both R & Rh wires, remove
metal jumper between the R
& Rc terminals. Connect the R
wire to the Rc terminal and the
Rh wire to the R terminal.
Wrap all C, C1 B or X
wires with electrical tape.
Do not connect them.
If your existing thermostat
has a C wire, it should be
wrapped with electrical
tape and not connected to
your new thermostat.