EasyManua.ls Logo

Oregon CS1200 User Manual

Oregon CS1200
2 pages
To Next Page IconTo Next Page
Page #1 background imageLoading...
Page #1 background image
CS1200 CHAINSAW
Quick Start Instructions
ASSEMBLING THE GUIDE BAR AND
SAW CHAIN
STEP 2: Loosen the chain tensioning
dial (A) as far as it will go. Then fully
loosen the side cover release knob (B)
and remove the side cover.
2
A
RED
B
This sheet is meant to be a suppliment, not a replacement for your operator’s manual.
Whats in the box?
The chainsaw requires some
assembly before use. These items
are included in the box.
1) Powerhead
2) Guide Bar
3) Saw Chain
4) Blade Cover
5) Side Cover
6) Instruction Manual
IMPORTANT SAFETY NOTICE
Wear protective gloves when handling chainsaw chain.
4
2
3
1
5
6
After removing the chainsaw from the box, inspect it
carefully to ensure no damage has occurred during
shipping and that no parts are missing. If any parts
are damaged or missing, do not use the chainsaw.
Contact Oregon® to obtain replacement parts. For
country-specic telephone numbers, see “Customer
Service by Country”.
ATTENTION! SAFETY NOTICE
Unplug the chainsaw
FILLING THE BAR AND CHAIN OIL
RESERVOIR
STEP 1: Place the chainsaw on a firm,
flat surface, so that the oil cap (A) is
on top.
Clean any debris from the cap area.
Remove the cap.
Carefully pour 100 ml of bar and
chain oil into the reservoir.
A
If the reservoir is totally full on
initial startup, it can slow down
the prime. We suggest 90% full.
1
STEP 3: Loop the
saw chain onto
the bar and drive
sprocket so that the
cutters are facing in
the correct direction.
3
All manuals and user guides at all-guides.com
all-guides.com
Question and Answer IconNeed help?

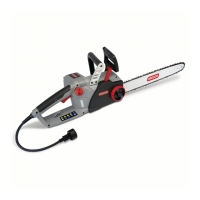
Do you have a question about the Oregon CS1200 and is the answer not in the manual?

Oregon CS1200 Specifications

General IconGeneral
BrandOregon
ModelCS1200
CategoryChainsaw
LanguageEnglish

Summary

What's in the Box

Filling the Bar and Chain Oil Reservoir

Step 1: Fill Oil Reservoir

Place chainsaw on a flat surface, clean debris, remove cap, and pour 100 ml of bar and chain oil.

Assembling the Guide Bar and Saw Chain

Step 2: Loosen Chain Tensioning Dial

Loosen the chain tensioning dial and remove the side cover.

Step 3: Mount Saw Chain on Bar

Loop the saw chain onto the bar and drive sprocket with cutters facing correctly.

Tensioning the Saw Chain

Step 4: Mount Guide Bar

Slide guide bar over alignment flange, with mounting stud through the bar slot.

Step 5: Install Side Cover

Install side cover, ensuring tabs are seated, and lightly tighten side cover knob.

Step 6: Adjust Chain Tensioning Dial

Adjust chain tensioning dial and fully tighten the side cover knob.

Step 8: Loosen Side Cover Release

Slightly loosen the side cover release knob, but do not remove the cover.

Step 9: Turn Chain Tensioning Ring

Hold nose of guide bar and turn chain tensioning ring clockwise.

Step 10: Tighten Tensioning Ring

Tighten ring until lowest cutters contact the bar solidly.

Step 11: Check Chain Tension

Pull chain; it should snap back after being pulled 3 mm from the guide bar.

Step 12: Periodic Tension Check

After use, allow chain to cool, unplug, and check tension periodically.

Related product manuals