Initialization and Programming
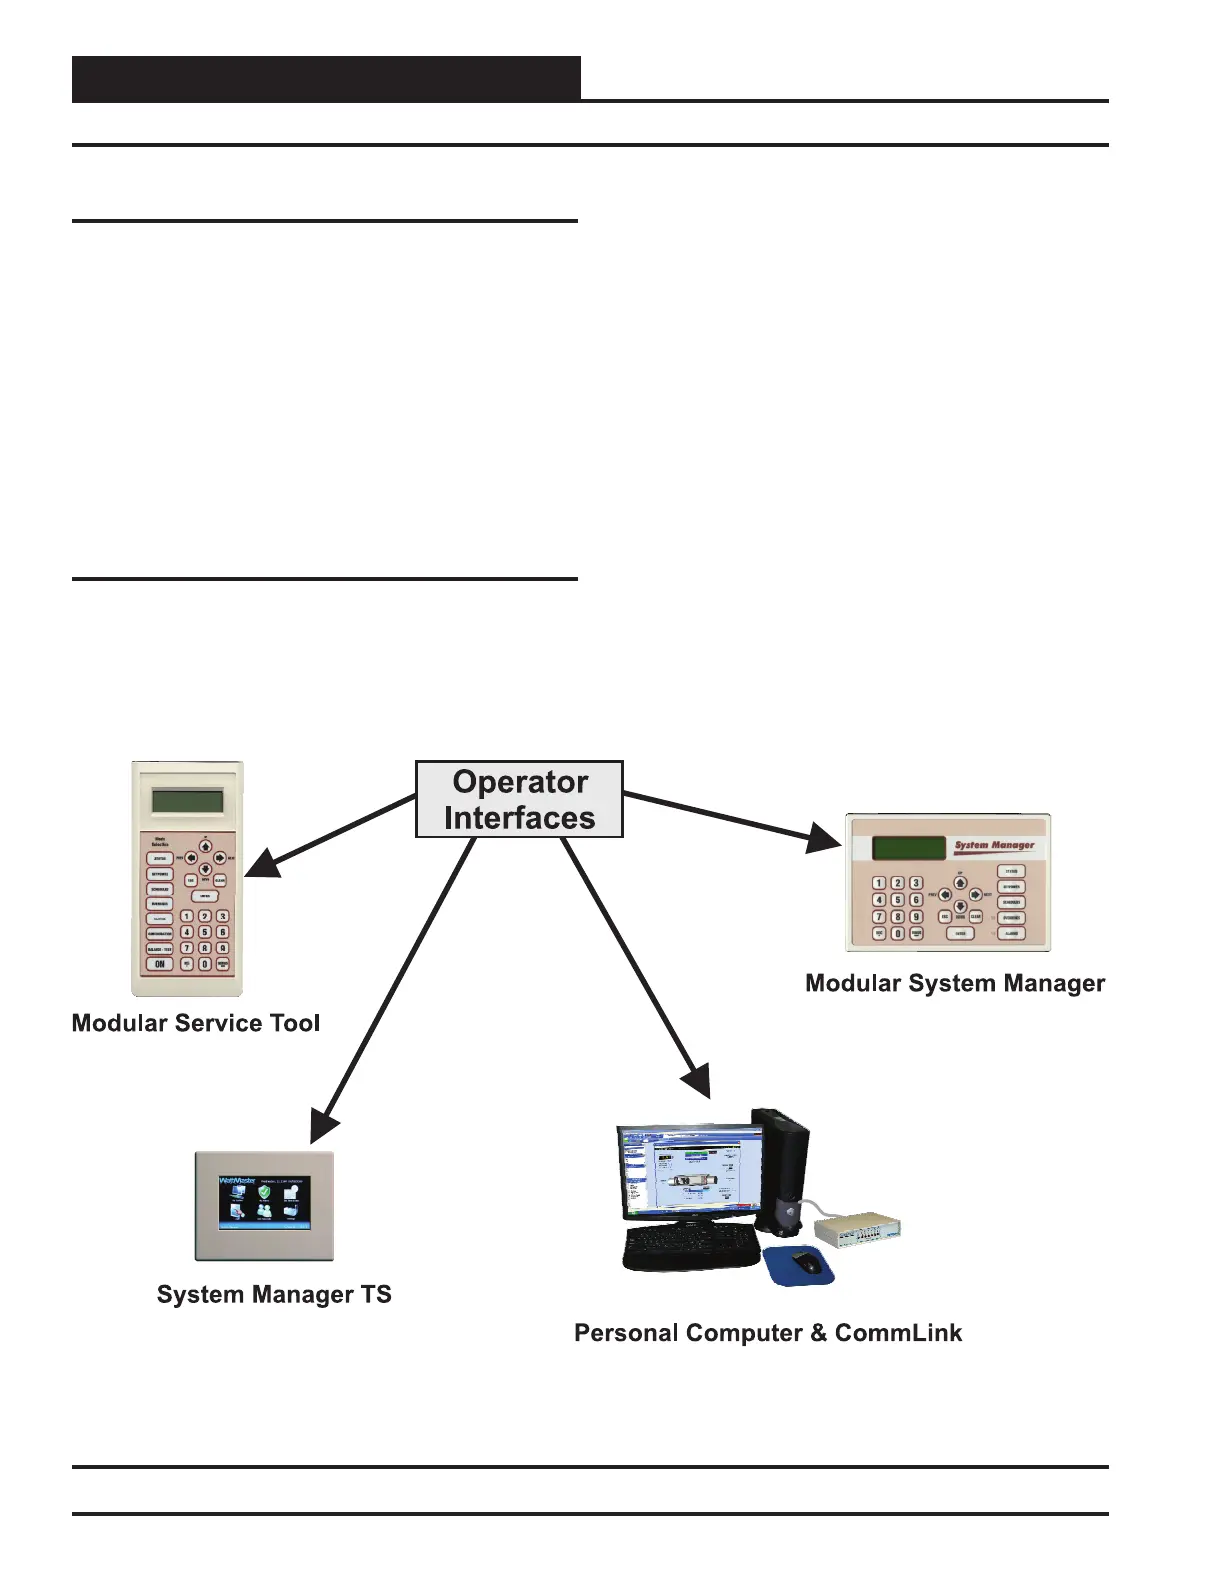
Figure 18: Operator Interfaces
Initialization
On system power-up, the “STAT” LED is extinguished for a few seconds
and then the controller “ashes” its address switch setting. If the address
switch were set to 7, you would see 7 ashes. After the address is n-
ished, the LED will extinguish for another 5 seconds. At the conclusion
of this 5-second delay, the LED will begin a continuous ashing while
the Damper Feedback limits are calibrated. If the Damper is driving
open, the LED will blink slowly. If the Damper is driving closed, the
LED will blink fast. When the calibration is completed, the normal di-
agnostic ashes will begin. These diagnostic ashes are described in the
Troubleshooting section of this guide. In addition, during the rst few
seconds of power-up, all default setpoints are initialized and all outputs
are turned off. There is also a 30 second start-up delay to protect the
fan and other components from short cycling during intermittent power
conditions. If all inputs are operating correctly, the LED will blink once
every ten seconds.
Programming the Controller
The next step is programming the controller for your specic require-
ments. In order to congure and program the Non-Modular VAV/Zone
Controller Actuator Package, you must have a central operator interface
or a personal computer with the Prism computer front end software
installed. Different operator interfaces are available for programming
of the VAV/Zone Controller. You may use the Modular Service Tool,
Modular System Manager, Tactio SI Touch Screen, System Manager
TS, or a personal computer with Prism software installed to access the
status and setpoints of any Non-Modular VAV/Zone Controller Actuator
Package or VCM-X controller on the system’s communications loop.
See the Modular Service Tool and System Manager Operator Interface
Technical Guide, the System Manager TS Technical Guide, or the Prism
Computer Front-End Technical Guide for complete VAV/Zone Controller
programming information. No matter which operator interface you use,
it is recommended that you proceed with the programming and setup of
the controller in the order that follows:
1. Congure The Controller For Your Application.
2. Program The Controller Setpoints.
3. Review Controller Status Screens To Verify System
Operation And Correct Controller Congurations
18
Non-Modular ZCAP Technical Guide
Start-Up & Commissioning
 Loading...