9
view of the finder scope, assuming the equatorial mount is
accurately polar aligned. Use the slow-motion controls to
center the object in the finder scope, and it should appear
in the telescope’s field of view.
The setting circles must be re-calibrated every time you
wish to locate a new object. Do so by calibrating the set-
ting circles for the centered object before moving on to the
next one.
Confused About Pointing the Telescope?
Beginners occasionally experience some confusion about
how to point the telescope overhead or in other directions.
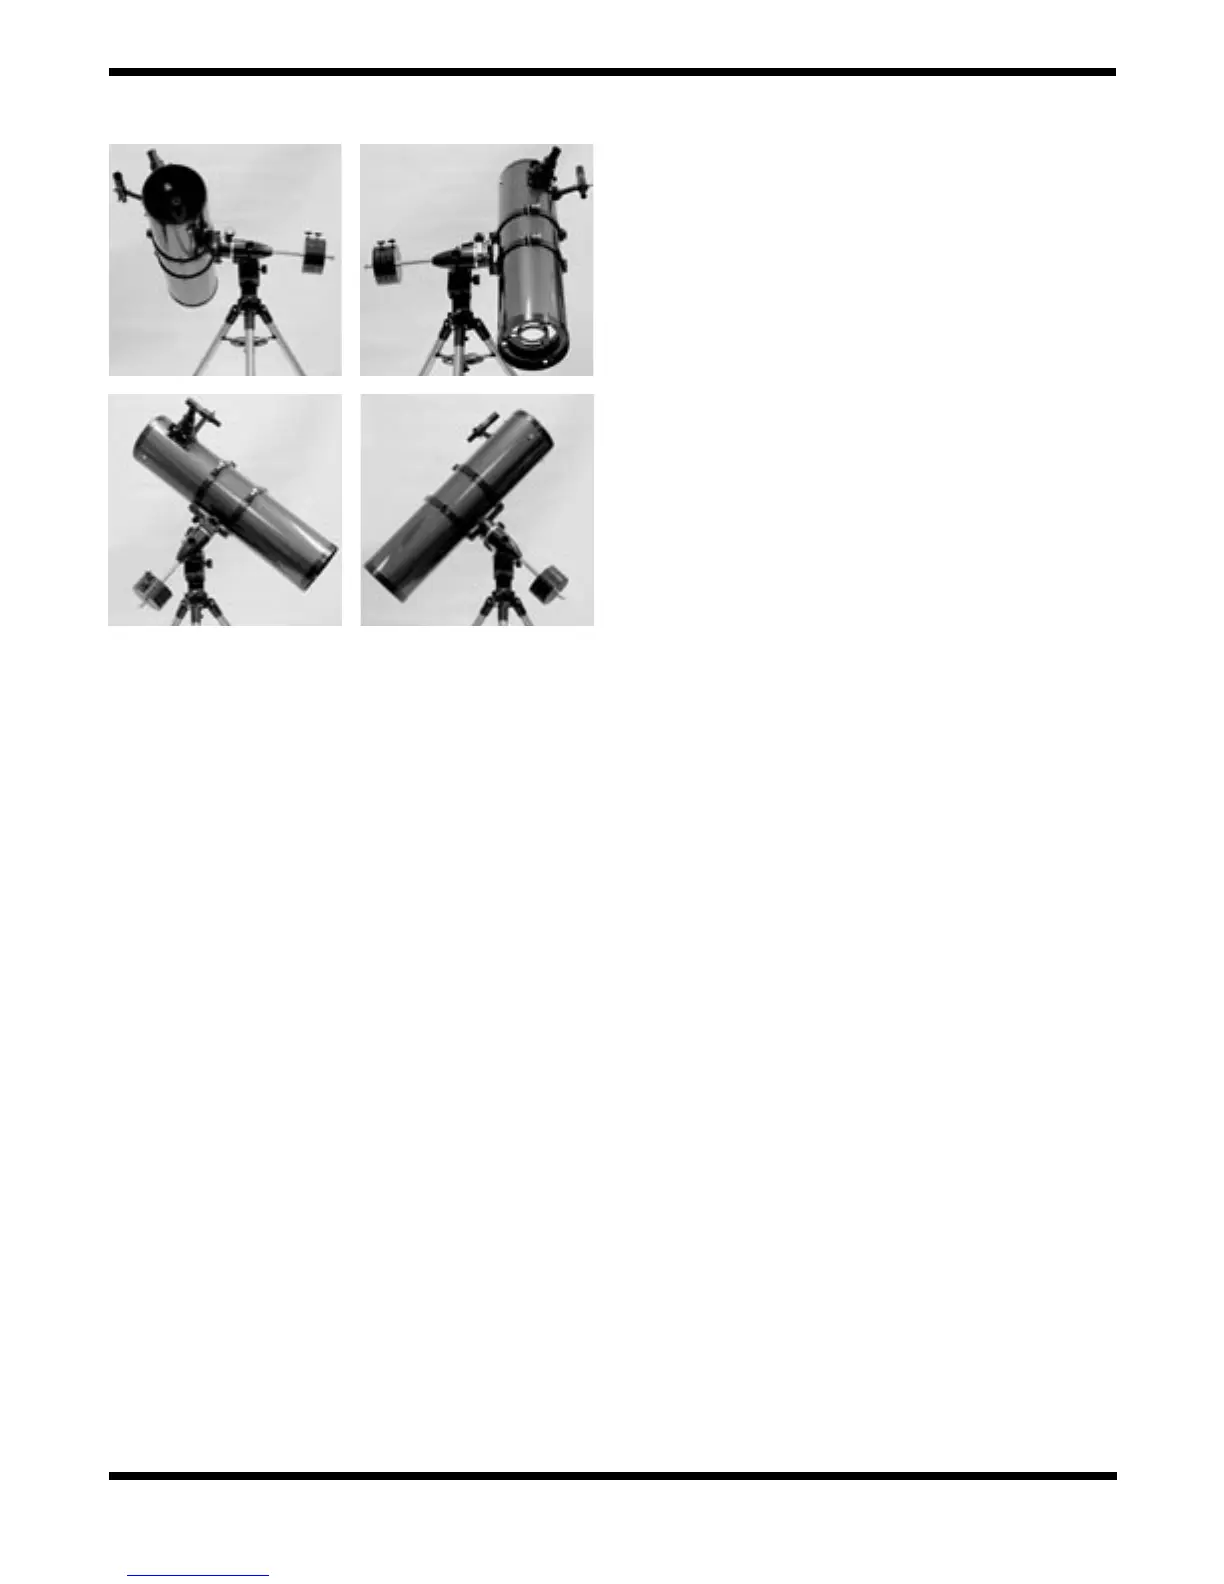
In Figure 1 the telescope is pointed north as it would be
during polar alignment. The counterweight shaft is oriented
downward. But it will not look like that when the telescope
is pointed in other directions. Let’s say you want to view
an object that is directly overhead, at the zenith. How do
you do it?
DO NOT make any adjustment to the latitude adjustment L-
bolts. That will spoil the mount’s polar alignment. Remem-
ber, once the mount is polar aligned, the telescope should
be moved only on the R.A. and Dec. axes. To point the
scope overhead, first loosen the R.A. lock lever and rotate
the telescope on the right ascension axis until the coun-
terweight shaft is horizontal (parallel to the ground). Then
loosen the Dec. lock lever and rotate the telescope until it
is pointing straight overhead. The counterweight shaft is
still horizontal. Then retighten both lock levers.
What if you need to aim the telescope directly north, but
at an object that is nearer to the horizon than Polaris? You
can’t do it with the counterweights down as pictured in
Figure 1. Again, you have to rotate the scope in right ascen-
sion so that the counterweight shaft is positioned horizon-
tally. Then rotate the scope in declination so it points to
where you want it near the horizon.
To point the telescope directly south, the counterweight
shaft should again be horizontal. Then you simply rotate
the scope on the declination axis until it points in the south
direction.
To point the telescope to the east or west, or in other direc-
tions, you rotate the telescope on its right ascension and
declination axes. Depending on the altitude of the object
you want to observe, the counterweight shaft will be ori-
ented somewhere between vertical and horizontal.
Figure 10 illustrates how the telescope will look when
pointed at the four cardinal directions: north, south, east
and west.
The key things to remember when pointing the telescope
are that a) you only move it in right ascension and declina-
tion, not in azimuth or latitude (altitude), and b) the counter-
weight and shaft will not always appear as it does in Figure
1. In fact it almost never will!
7. Specifications
Mount: German equatorial
Tripod: Aluminum
Weight: 29 lbs. 8 oz.
Counterweight: Large, 7 lbs. 9 oz. ; Small 4 lbs.
Slow-motion adjustment: R.A. and Dec. axes
Setting circles: R.A. scaled in 10 min. increments, Dec.
scaled in 2° increments for N or S hemisphere
Polar axis latitude adjustment: 5° to 75°
Polar axis finder scope: Optional
Motor drives: Optional
Figure 10. This illustration show the telescope pointed in the
the four cardinal directions (a) north, (b) south, (c) east, (d) west.
Note that the tripod and mount have ot been moved; only the
telescope tube has been moved on the R.A. and Dec. axes.
a.
b.
c. d.
 Loading...