3
4. Point the mount in the direction of the North Celestial Pole (for Northern
Hemisphere observing) or South Celestial Pole (for Southern Hemisphere
observing). Set the R.A. axis’s elevation to the local latitude. (Refer to Section
3.3 of the Sirius Pro mount manual.)
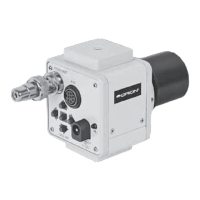
5. Rotate the battery cap clockwise to turn on the power of the polar scope
illuminator. You may need to rotate the smaller brightness dial in the same
direction to see the red LED illuminate.
6. Verify that the polar scope is aligned with the mount’s R.A. axis (Refer to
section 3.4 Calibrating the Polar Scope).
Once the polar scope is illuminated, when you look into the polar scope you should
see the reticle pattern shown in Figure 3. If the image appears blurry, rotate the
knurled ring of the polar scope’s eyepiece to focus.
The reticle allows accurate polar alignment from either hemisphere.
1. For observing in the Northern Hemisphere: The circle with ne
graduations in the center of the reticle is for polar alignment in the northern
hemisphere. Find the star Polaris (the brightest star near the North Celestial
Pole, or NCP) in the polar scope; then use the spring loaded elevation
adjustment handle and the two azimuth adjustment knobs on the mount
(Figure 4) to move Polaris to the proper position in that graduated circle
(Refer to the upcoming section “The Orientation of Polaris in Polar Scope”).
Polaris’s orbit around the NCP—which is represented by the intersection
of the two perpendicular crosshairs—changes gradually. The three central
circles in the polar scope reticle are the orbits for the years 2012, 2020, and
2032. Users should refer to these circles and the current year to put Polaris
at the proper radius.
Figure 2. The illuminator ts on the front
of the polar scope.
Figure 3. The reticle pattern of the polar
scope
Brightness dial
Polaris
Battery cap
Illuminator