5
When you’re observing an astronomical object, it will drift across
the eyepiece’s eld of view over time due to the Earth’s rota-
tion. Before it drifts out of the eld of view, just grasp the front of
the telescope and give it a gentle pull or nudge to re-center the
object in the eyepiece.
The altitude axis rotation tension is adjustable with the altitude
tension adjustment knob (Figure 7). You want sufficient friction
of motion to keep the telescope from rotating too freely, which
can make it difficult to land on and stay aimed at an object you
wish to view. However, if you apply too much tension the tele-
scope will be difficult to move smoothly and in small increments
needed to center an object in the eyepiece for viewing. Turn the
tension adjustment knob to set the right amount of friction.
The rotation tension of the azimuth axis is set at the factory and
should allow smooth, easy rotation of the base to the left or right.
Focusing the Telescope
The StarBlast 6 comes equipped with a 2" rack-and-pinion
focuser (Figure 4). The large 2" format focuser allows use of
2" or 1.25" eyepieces. To insert a 1.25" eyepiece, rst remove
the cap from the 1.25" adapter. Loosen the thumbscrew on the
1.25" adapter, then insert the eyepiece into the adapter and
secure it by tightening the thumbscrew.
To insert an optional 2" eyepiece, rst loosen the three thumb-
screws on the 2" accessory collar and remove the 1.25" adapt-
er from the collar (Figure 8). Then insert the 2" eyepiece barrel
into the 2" collar all the way. Retighten the three thumbscrews.
To focus, move the telescope so the front (open) end is point-
ing in the general direction of an object at least 1/4-mile away.
Now, with your ngers, slowly rotate one of the focusing knobs
(see Figure 8) until the object comes into sharp focus. Go a
little bit beyond sharp focus until the image just starts to blur
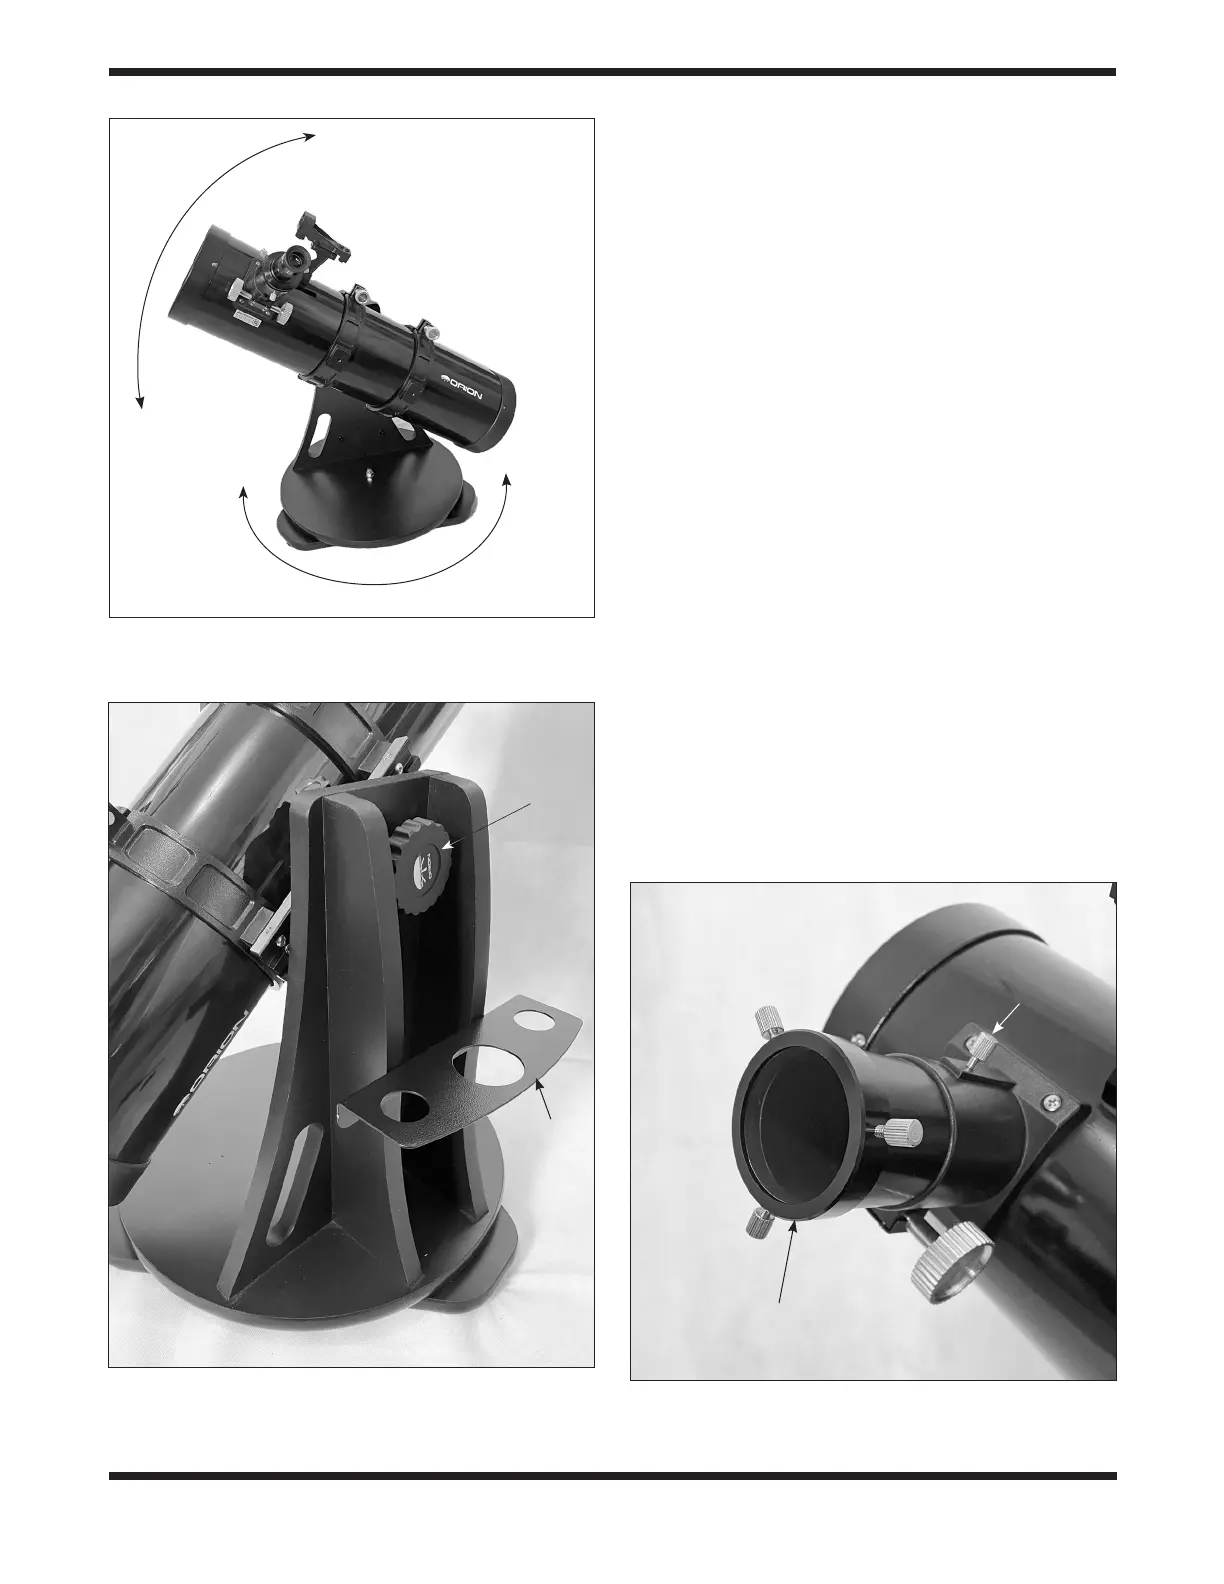
Figure 6. The StarBlast 6 has two axes of motion: altitude (up/
down) and azimuth (left/right).
Figure 7. Set the desired amount of tension for vertical rotation of
the optical tube by tightening or loosening the altitude tension knob.
Figure 8. To use an optional 2" eyepiece or 2" barlow lens, remove
the 1.25" adapter by loosening the three thumbscrews on the 2" collar.
This picture shows the 2" collar with the 1.25" adapter removed.
Altitude
Azimuth
Eyepiece
rack
2" collar
Drawtube lock
thumbscrew
Altitude
tension
knob
 Loading...