7
Using the 10mm Plossl eyepiece provides higher magnication:
750mm
= 75X
10mm
Other telescope eyepieces of different focal lengths can be pur-
chased to achieve higher or lower powers as desired. It is quite
common for an observer to own ve or more eyepieces to access
a wide range of magnications.
We recommend starting a viewing session by inserting your low-
est-power (longest focal length) eyepiece to locate and center the
target object. Low magnication yields a wide eld of view, which
shows a larger area of sky in the eyepiece. This makes nding
and centering an object much easier. Trying to nd and center
objects with a high power (narrow eld of view) eyepiece is like
trying to nd a needle in a haystack! Once you’ve centered the
object in the eyepiece, you can switch to a higher magnication
(shorter focal length) eyepiece, if you wish. This is recommended
for small and bright objects, like planets and double stars. The
Moon also takes higher magnications well. The best rule of
thumb with eyepiece selection is to start with a low power, wide-
eld eyepiece, and then work your way up in magnication. If the
object looks better, try an even higher magnication eyepiece. If
the object looks worse, then back off the magnication a little by
using a lower-power eyepiece.
Magnification Limits
Every telescope has a useful magnication limit of about 2x per
millimeter of aperture. This translates to a limit of 304x for the
StarBlast 6 (152mm aperture). Some telescope manufacturers
will use misleading claims of ultra-high magnications: “See dis-
tant galaxies at 640X!" While such magnications are technically
possible, the actual image at that magnication would be a dim,
indistinct blur. Low and moderate magnications are what give
the best views. A small but bright and crisply detailed image is
always better than a dim, blurry, over-magnied one.
Image Orientation
The image in the eyepiece will appear rotated (upside down) in the
StarBlast 6. This is normal for reector telescopes. But this is also
why reector telescopes are not recommended for daytime ter-
restrial use. For astronomical viewing the orientation of the image
matters little, as there is no “right side up" in space!
On or Off the Ground? Your Choice
One of the great qualities of the StarBlast 6 is its conveniently com-
pact, portable size. The cutouts in the side panel make a perfect
carrying handle for taking the StarBlast wherever you want to go.
You may nd that the most comfortable way to use the telescope is
while sitting down or kneeling on the ground next to it. If you wish to
raise the telescope off the ground a bit so that it can be used while
standing or sitting in a chair, then setting it on a platform such as
a picnic table, a milk crate, or sturdy camping table might be just
the ticket.
IV. Astronomical Observing
Choosing an Observing Site
When selecting a location for observing, get as far away as pos-
sible from direct articial light such as street lights, porch lights,
and automobile headlights. The glare from these lights will greatly
impair your dark-adapted night vision. Avoid viewing over roof-
tops and chimneys, as they often have warm air currents rising
from them. Similarly, avoid observing from indoors through an
open (or closed) window, because the temperature difference
between the indoor and outdoor air will cause image blurring and
distortion.
If at all possible, escape the light-polluted city sky and head for
darker country skies. You’ll be amazed at how many more stars
and deep-sky objects are visible in a dark sky!
Cooling the Telescope
All optical instruments need time to reach “thermal equilibri-
um." The bigger the instrument and the larger the temperature
change, the more time is needed. Allow at least 20 minutes for
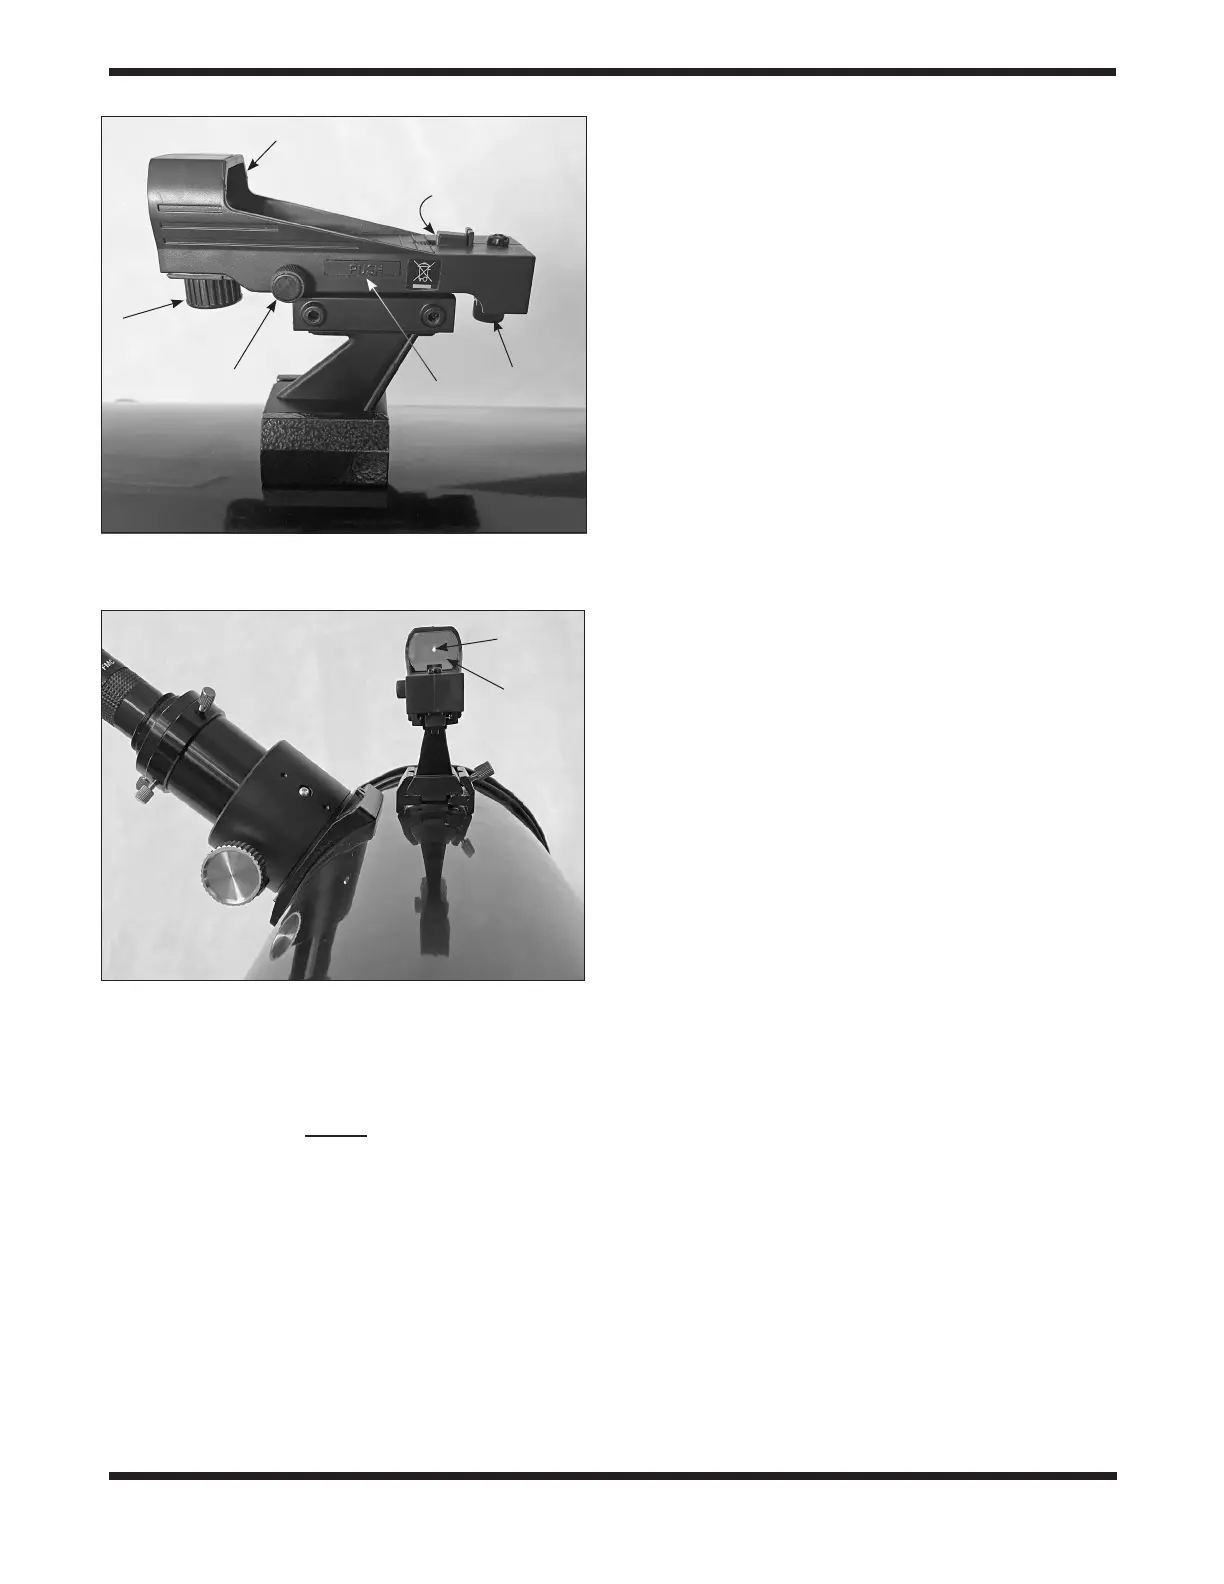
Red dot
Window
Figure 10. The red dot scope projects a small red dot on a
viewing window, showing exactly where the main telescope is
pointing.
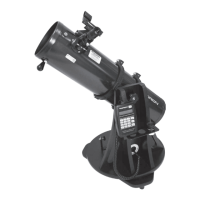
Figure 9. The red dot scope should be aligned with the main
telescope using the horizontal and vertical adjustments knobs.
Power
knob
Battery
tray
Window
Vertical
adjustment
knob
Horizontal
adjustment
knob
LED
 Loading...