10
adversely affects the optical performance of the telescope
or the image quality. That might seem counterintuitive,
but it’s true!
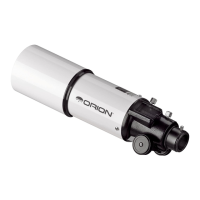
Aligning the Secondary Mirror
With the collimation cap in place, look through the hole in the
cap at the secondary (diagonal) mirror. Ignore the reflections
for the time being. The secondary mirror itself should be cen-
tered in the focuser drawtube, in the direction parallel to the
length of the telescope. If it isn’t, as in Figure 10b, it must be
adjusted. This adjustment will rarely, if ever need to be done.
It helps to adjust the secondary mirror in a brightly lit room with
the telescope pointed towards a bright surface, such as white
paper or wall. Also placing a piece of white paper in the tele-
scope tube opposite the focuser (in other words, on the other
side of the secondary mirror) will also be helpful in collimating
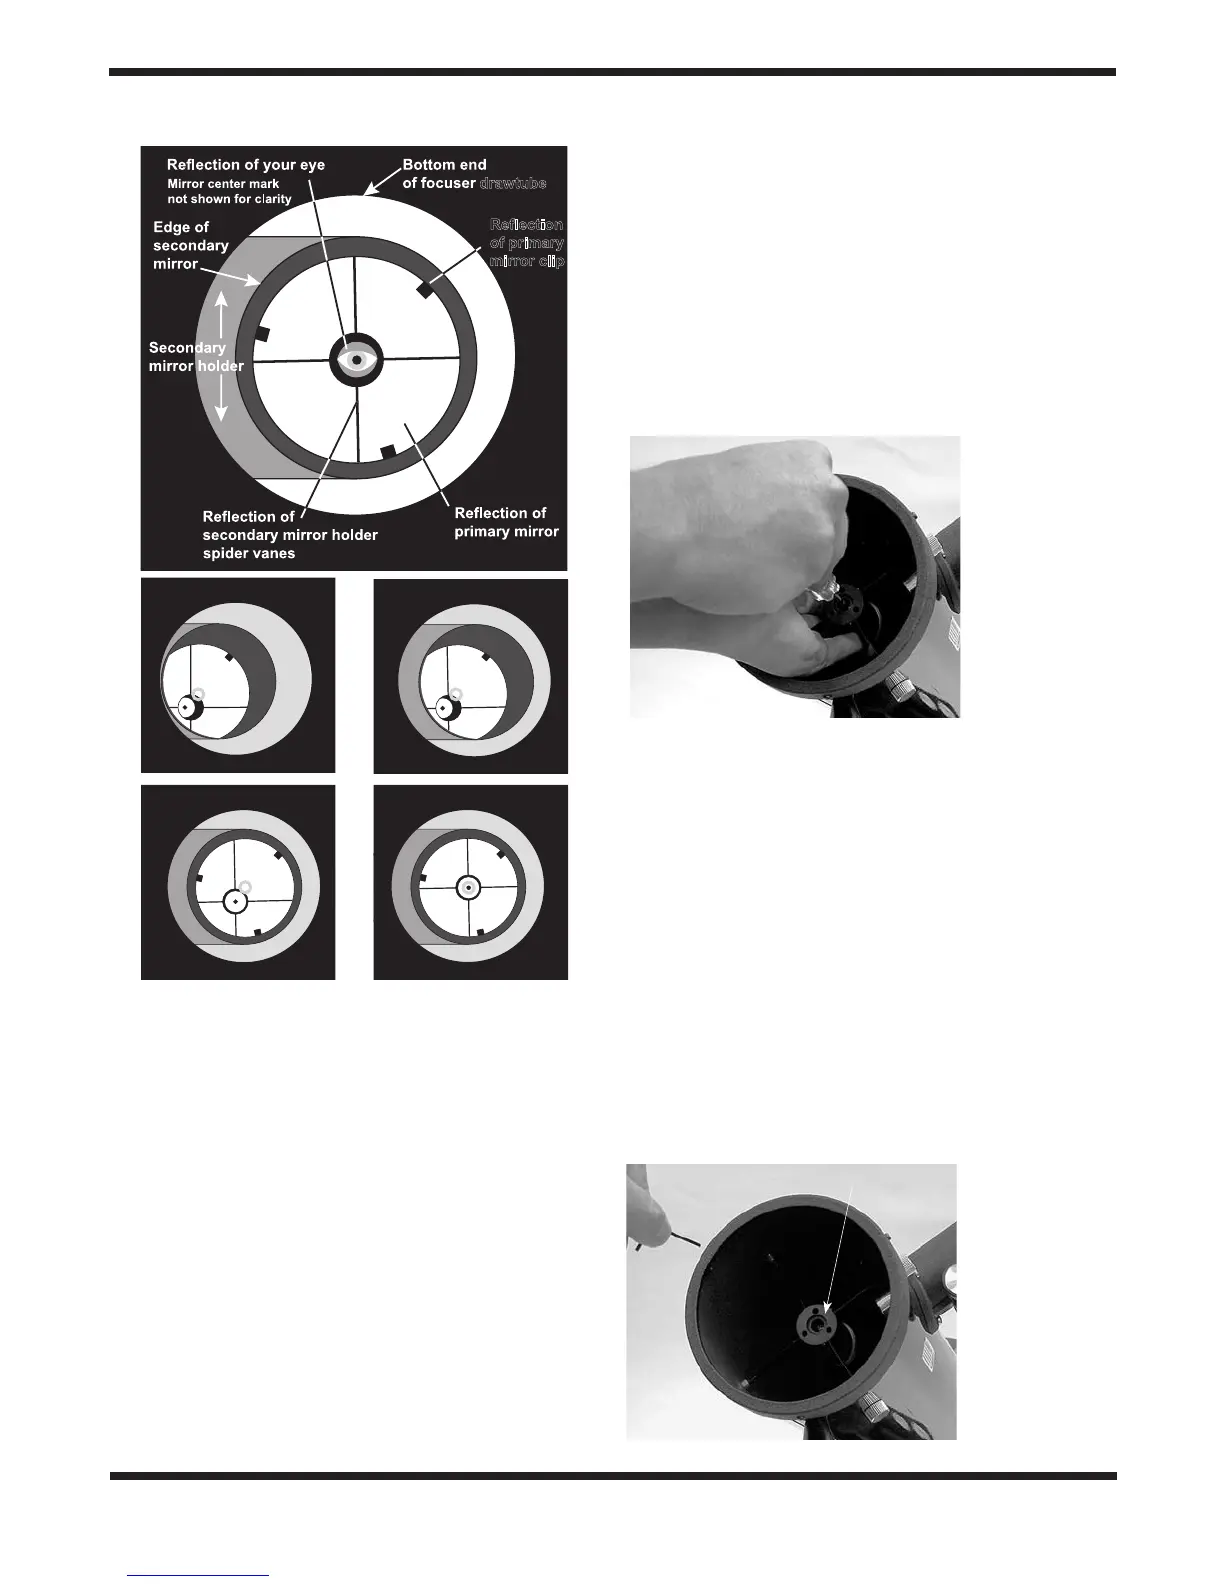
the secondary mirror. Using a 2mm hex key, loosen the three
small alignment set screws in the center hub of the 4-vaned
spider several turns. Now hold the secondary mirror holder
stationary (be careful not to touch the surface of the second-
ary mirror), while turning the center screw with a Phillips head
screwdriver (See Figure 11). Turning the screw clockwise will
move the secondary mirror toward the front opening of the opti-
cal tube, while turning the screw counter-clockwise will move
the secondary mirror toward the primary mirror.
Note: When making these adjustments, be careful not to
stress the spider vanes or they may bend.
When the secondary mirror is centered in the focuser draw-
tube, rotate the secondary mirror holder until the reflection of
the primary mirror is as centered in the secondary mirror as
possible. It may not be perfectly centered, but that is OK. Now
tighten the three small alignment screws equally to secure the
secondary mirror in that position.
If the entire primary mirror reflection is not visible in the sec-
ondary mirror, as in Figure 10c; you will need to adjust the
tilt of the second-
drawtube
Reflection
of primary
mirror clip
a.
b.
c.
d.
e.
Figure 10. Collimating the optics. (a) When the mirrors
are properly aligned, the view down the focuser drawtube
should look like this. (b) With the collimation cap in place, if
the optics are out of alignment, the view might look something
like this. (c) Here, the secondary mirror is centered under the
focuser, but it needs to be adjusted (tilted) so that the entire
primary mirror is visible. (d) The secondary mirror is correctly
aligned, but the primary mirror still needs adjustment. When
the primary mirror is correctly aligned, the “dot” will be
centered, as in (e).
Figure 12.
Adjust the tilt of
the secondary
mirror by
loosening or
tightening the
three alignment
set screws with a
2mm hex key.
Alignment set screws (3)
Figure 11.
To center the
secondary
mirror under the
focuser, hold the
secondary mirror
holder in place
with your fingers
while adjusting
the center screw
with the Phillips
head screwdriver.
Do not touch the
mirror’s surface.

 Loading...