Technical Note • May 4, 2021
Page 13
Figure 7: Bottom card with standoffs installed
f.
Insert option card into the slot above the existing card, lining up the screw holes with the standoffs.
g.
Using the supplied M3 screws, screw the board into the standoffs, and the option plate into the chassis,
applying a torque of 0.9Nm/8in-lbs.
h.
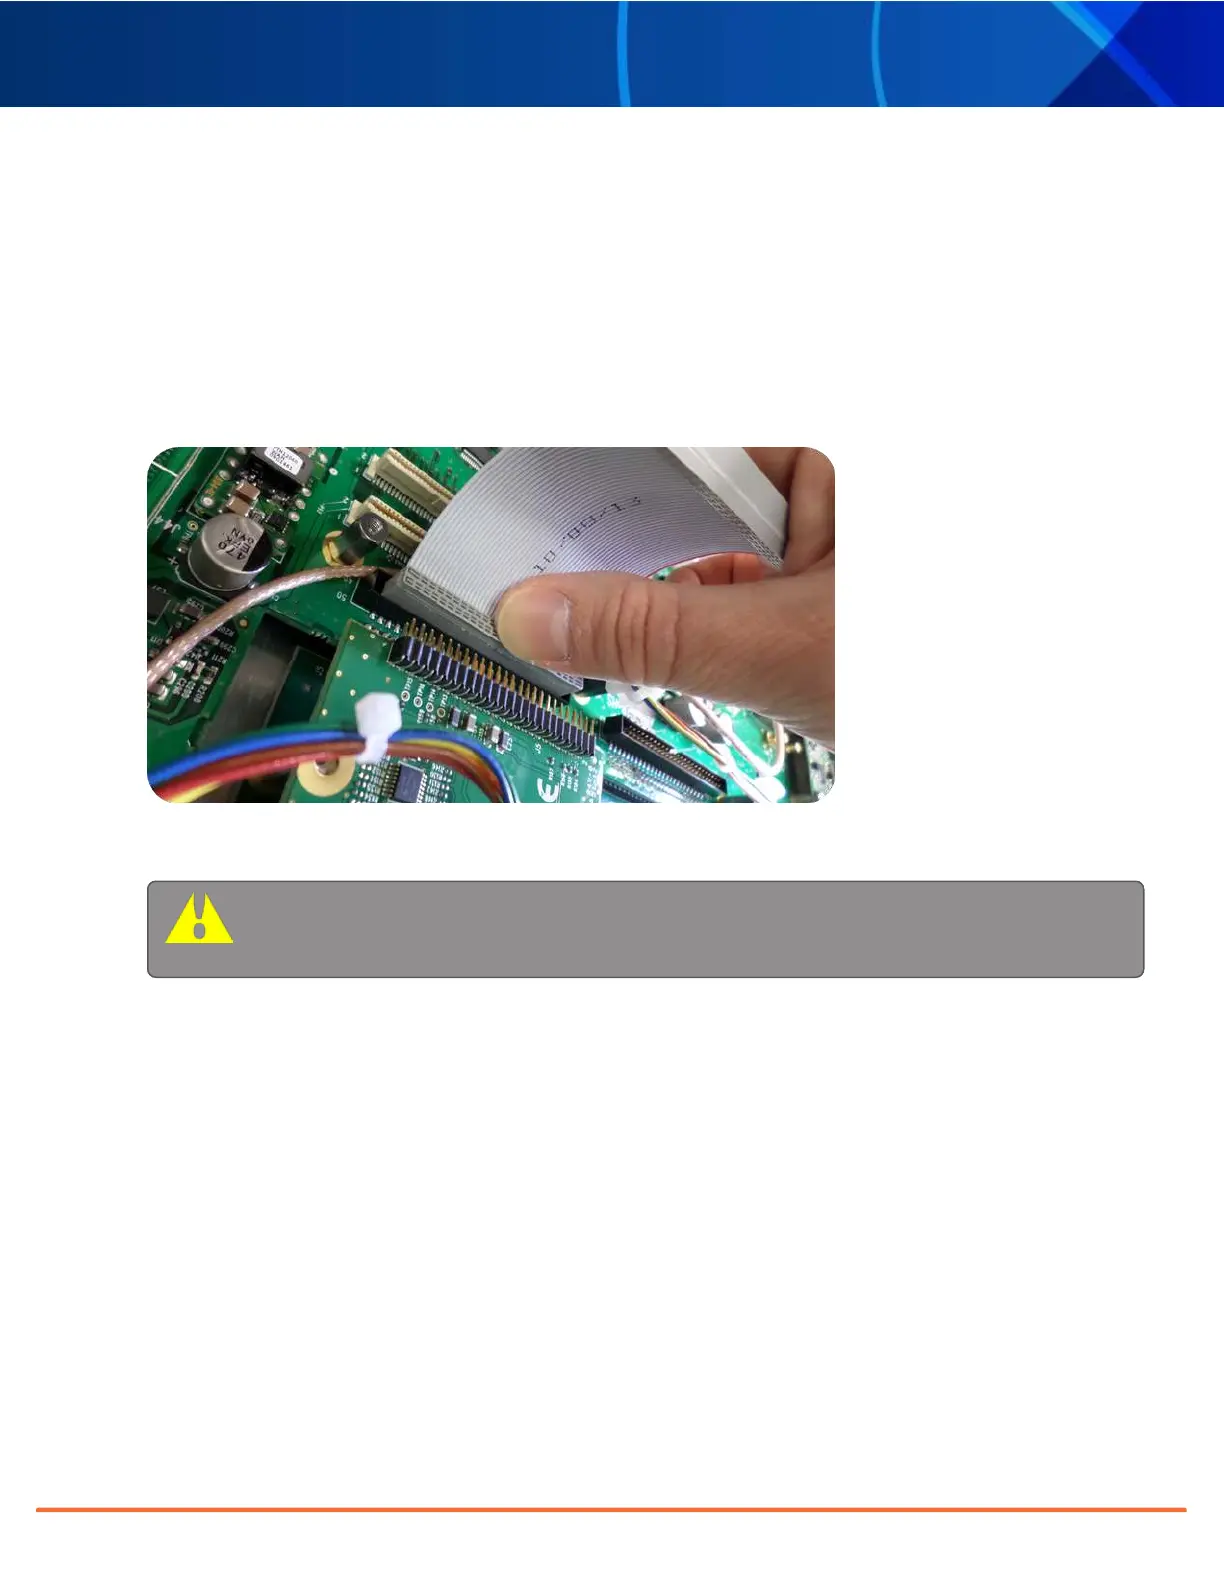
Take the supplied 50-pin ribbon cable and carefully press it into the connector on the extension board (lin-
ing up the ribbon cable with PIN 1 on the board with PIN 1 on the card), then into the connector on the
option card (see Figurebelow).
Figure 8: Ribbon cable installation
Caution: Ensure that the ribbon cable is aligned and fastened properly to all pins on the con-
nector of the card. Otherwise, damage to equipment may result during power up.
SecureSync 2400 Option Card Field Installation Guide