6. Emergency power off function connector (EPO)
7. USB communication port
8. RS-232 communication port
9. SNMP intelligent slot
10. External battery connection (only available for L model)
11. Input terminal
12. Output circuit breaker
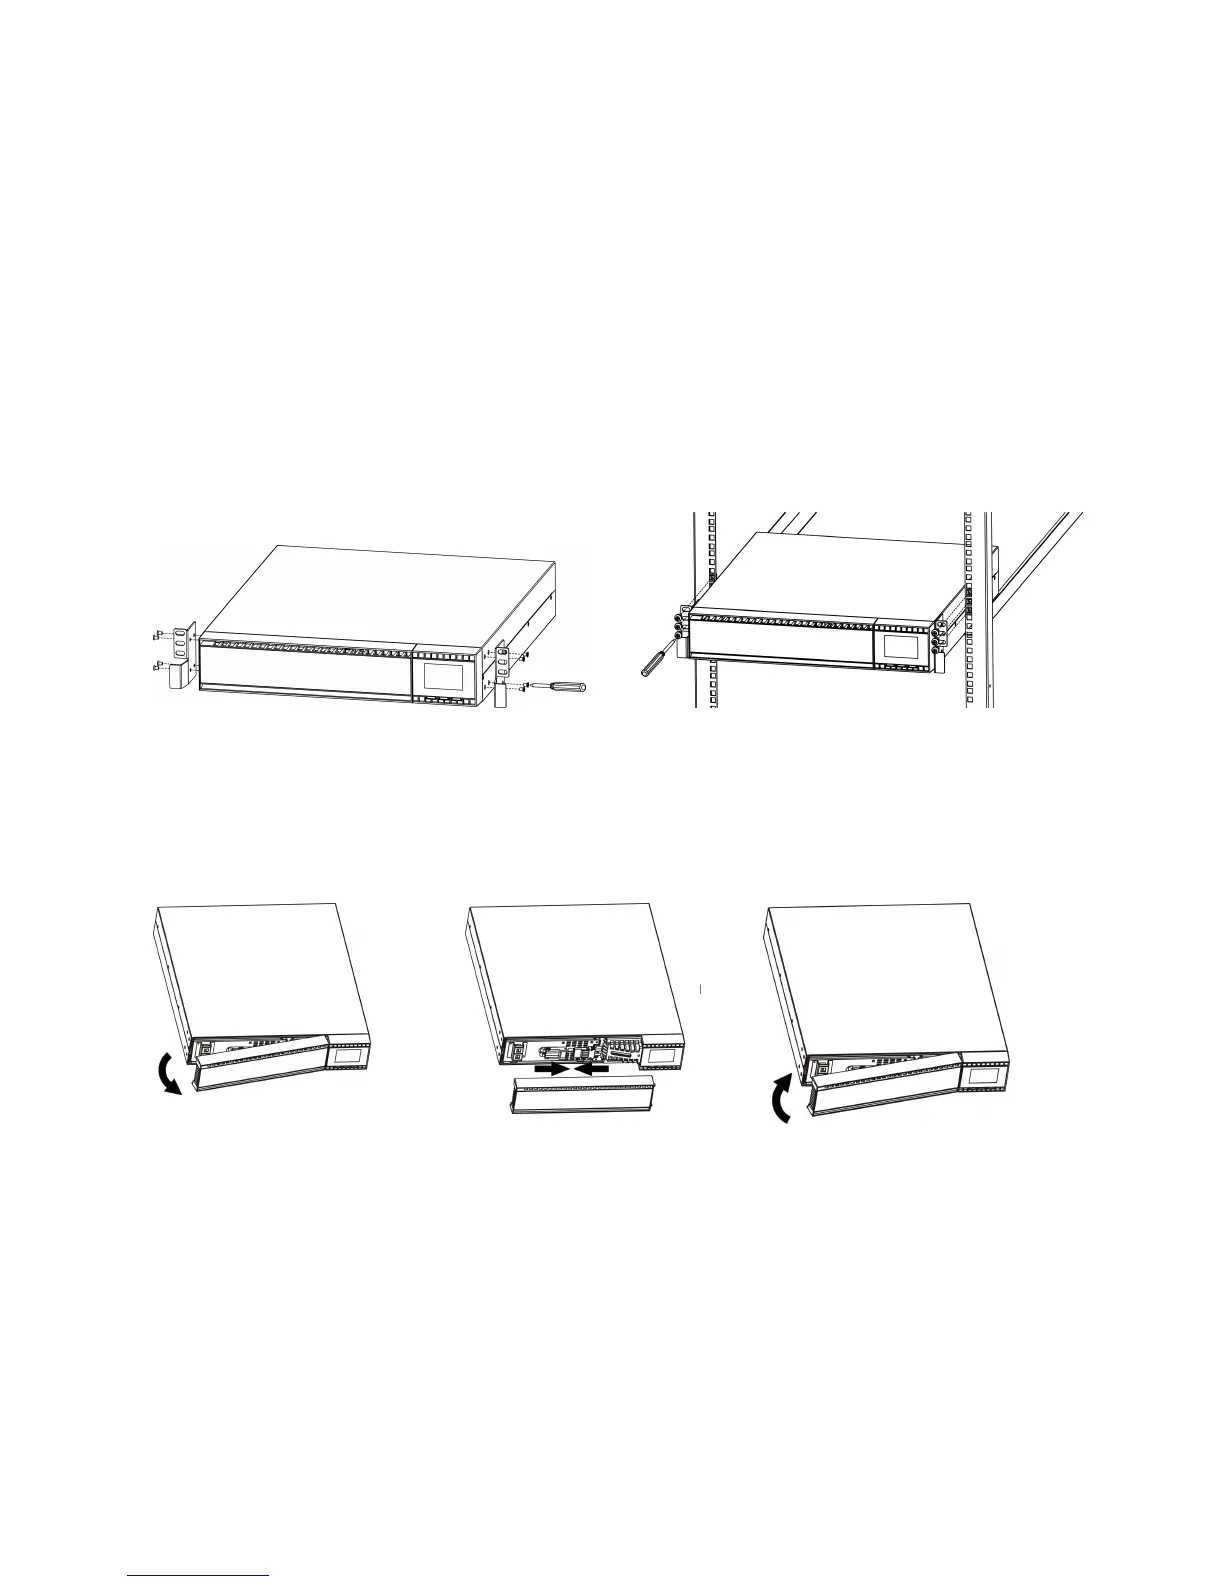
2-2. Rack-Mounted the UPS
This UPS can be mounted in the 19” rack chassis. Please follow below steps to position this
UPS.
Step 1 Step 2
2-3. Setup the UPS
Step 1: Connect battery wires
For safety consideration, the UPS is shipped out from factory without connecting battery wires.
Before install the UPS, please follow below steps to re-connect battery wires first.
Step 1 Step 2 Step 3
Remove front panel. Connect the AC input and
re-connect battery wires.
Put the front panel back to the
unit.
Step 2: UPS input connection
Plug the UPS into a two-pole, three-wire, grounded receptacle only. Avoid using extension
cords.
For 200/208/220/230/240VAC models:
The power cord is supplied in the UPS package.
For 100/110/115/120/127VAC models: The power cord is attached to the UPS. The input
plug is a NEMA 5-15P for 1K, 1KL, 1.5K and 1.5KL models, NEMA 5-20P for 2K and 2KL
models.
Note:
For Low voltage models
: Check if the site wiring fault indicator lights up in LCD panel. It
will be illuminated when the UPS is plugged into an improperly wired utility power outlet (Refer
to Troubleshooting section). Please also install a circuit breaker (40A) between the mains and