TREVOCE15 EQ DSP SUBWOOFER INSTALL GUIDE
Installation Precautions:
Before installing
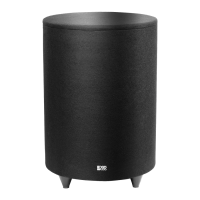
Thank you for buying the latest version of our most popular subwoofer.
The additional upgrades we have made make this the best all-round sub in our history. Incorporated in the Trevoce15 EQ DSP is the
new native EQ, and the IWoofer DSP engine. The native EQ has allowed us to extract the maximum bass extension possible from our
design. This allows the full range of musical instruments and special effects to be reproduced. The Trevoce EQ DSP Series does this all
without any increase in the size of the sub. Our Trevoce subs offer the smallest footprint you will nd in triple driver designs.
Before connecting your subwoofer, make sure all equipment is switched off and that voltage switch is set to your country’s voltage. Do
not connect the subwoofer power supply cable before completing all connections.
Features:
World Class Digital Amplier Technology
The TreVoce DSP Series powered subwoofer incorporates the latest digital amplier technology to maximize performance
while generating very little heat. In standby mode, the unit consumes less than 0.5 watts, making it one of the greenest
solutions available.
Tuned System Performance
Rear mounted volume control, low pass crossover, phase control and App controlled DSP ensure optimal system integra-
tion and built-in native EQ ensures the deepest bass frequencies.
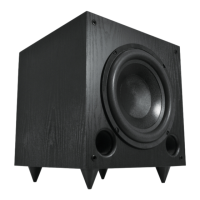
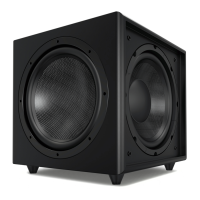
Cabinet
An attractive furniture quality solid cabinet with ‘leather’ nish, provides the foundation for high sound quality and clarity.
TREVOCE15 EQ DSP SUBWOOFER INSTALL GUIDE
Connection & Controls
1. High Level Inputs
Use for Left/Right connection from speakers.
2. Line Level Input
Use for Left/Right connection from subwoofer-out,
or line-out, on amp/AVR.
3. LFE Input
Connect to the LFE output on the Receiver/Processor.
4. Balanced XLR Input
For lower noise connection if available.
5. Power LED
(Red) Standby Mode - (Blue) Power Mode ON
6. DSP Mode Switch
Set the DSP ( OFF or ON )
7. Power Mode Switch
Set the power mode ( OFF, AUTO, or ON )
8. Phase Switch
Allows you to set the phase of the woofer 0-180°
9. Crossover Control
Adjusts the subwoofers frequency output output to match
main speakers
10. Volume Control
Adjusts subwoofer volume level.
11. Voltage Switch
Select input voltage. Default: 110-120V or 220-240V
12. Master Power Switch
Controls the main power to the subwoofer
13. AC Power Cord
Connect the included AC power cord.
14. Fuse Holder
Master Power Fuse. Includes spare fuse inside holder.
3.
2.
1.
4.
5.
6.
7.
8.
9.
10.
11.
12.
13.
14.
Settings & Controls
Setting the Power Mode
ON Mode:
If the subwoofer is set to ON mode, it will always be ready to play. However, undesired noise from interference or
connections changing may be heard. Use the standard ON mode only if needed, set the power switch to OFF when not in
use.
AUTO Mode:
Setting the switch to AUTO enables AUTO Sense. The subwoofer turns ON and OFF automatically in response to signal
input. The subwoofer will enter standby mode if no signal is sensed for longer than 15 minutes.
Set the MODE switch to the ON position for setup.
After making all the connections, setup your subwoofer using the following steps:
1. Plug the subwoofer into an electrical outlet using the included power cord. The status LED will illuminate solid blue
when power is present and the subwoofer is ON.
TreVoce15 EQ DSP manual.indd 2-3 9/3/21 7:55 AM
 Loading...