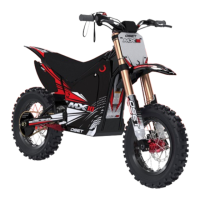
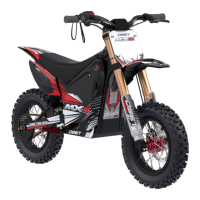
The OSET MX-10 is an electric mini motocross bike designed for off-road use by children in controlled and safe environments. As the owner, you are responsible for ensuring the rider's safety at all times. This includes supervising the rider, setting up the machine correctly, and maintaining it properly. If another adult supervises, it is your responsibility to ensure they have all relevant information and understand safe riding practices.
The OSET MX-10 is highly adjustable to suit the rider's abilities. It features a speed dial, a throttle response 'map' dial, and a power dial. These controls must always be set by a responsible supervising adult, and children should never be allowed to alter the settings or ride without suitable supervision. It is crucial to start riders at the slowest speed, response, and power settings, as the electric motor is powerful and requires respect and learned control. The bike's capabilities can grow with the rider's skills, but the learning process must always be controlled and given full attention.
The OSET MX-10 is virtually silent, allowing it to be used in various locations where gasoline bikes cannot, such as backyards, front yards, garages, and even indoors. It is designed exclusively for off-road use and must not be ridden on public roads or sidewalks. Always check and obey local laws, and ensure all required permissions are obtained for riding areas.
Usage Features:
The OSET MX-10 is designed for learning and progressing in off-road riding. It is crucial to follow the instructions for setting up the bike for riding, riding instructions, and safety tips.
Setting Up for Riding:
- Speed Dial: Set to the correct level for the rider. Always start with low settings for non-experts and riders under 10 years old.
- Response Dial: Set to the correct level for the rider. Low for non-experts and riders under 10 years old (anti-clockwise for low, clockwise for high).
- Power Dial: Set to the correct level for the rider. Low for non-experts and riders under 10 years old (anti-clockwise for low, clockwise for high). This is the most important adjustability feature and must always start at the lowest setting, with very small incremental changes.
- Pre-Ride Checklist: Before each ride, ensure everyone is clear of the bike, place the bike on a stand or block with both wheels off the ground, switch the bike on, and turn the speed dial to low. Always start the rider on the slowest settings.
- Tire Pressure: Check that tires are inflated to between 20 & 40 psi. Lighter riders can use lower pressures.
- Chain: Check for tightness and lubrication.
- Controls: With the wheels on the ground, sit the rider on the bike. Adjust the brake lever positions for easy reach and ensure brakes function correctly.
Riding Instructions & Safety Tips:
- Supervision: Riders must be supervised by responsible adults at all times, never beyond eye and voice range. Adults must assess and approve riding conditions and bike preparedness.
- Helmets & Safety Attire: A quality helmet is the most effective way to reduce injury severity. Riders should also wear suitable riding gear, including gloves, eye protection, and boots without laces.
- One Rider Only: The bike is engineered for one rider only.
- Overloading: Do not exceed weight limitations, as this affects handling and can cause damage.
- Obey Laws: OSETs are for off-road use only.
- Night Time: Do not ride after dark or in low light conditions.
- Weather & Riding Conditions: Brakes are less effective in wet conditions. Ride slowly and anticipate stops. Do not allow children to ride on steep slopes beyond their ability.
Stationary Learning:
- Ensure the key switch is in the off position.
- Lift the machine onto a stand or block so the back wheel is slightly off the ground, ensuring stability.
- Sit the rider on the machine.
- Explain and practice controls (throttle, front brake, rear brake) with the power off.
- With power on, practice opening and closing the throttle to develop control, not just an 'on-off' switch.
- Practice using the rear brake to stop the back wheel, coordinating it without simultaneously applying throttle and brake.
First Ride:
- Ensure power is turned off.
- With adult support, the rider gets on.
- The rider should comfortably touch the floor with both feet and reach the handlebars.
- Encourage rocking the machine to get comfortable with its weight.
- Switch the machine on.
- Before twisting the throttle, splay legs forward as 'outriggers'.
- Twist the throttle slowly and go, using brakes to stop. A supportive hand on the rear fender is helpful.
- Once comfortable, try to ride along and lift feet onto the pegs.
- When stopped, turn the power off.
Learning to Stand Up:
- With the machine stationary and rider on the bike, an adult stands behind and supports the rider at the waist.
- Rider positions themselves correctly, head over handlebars in a crouching stance, gripping the bike with their legs.
- When ready, open the throttle smoothly. Adult runs along and helps support.
- Once standing, leaning forward with elbows out, learn technique.
Learning Some Technique:
- Leaning: Practice leaning the bike side to side. Notice how it wants to turn. To execute a tight turn, lean the bike to the inside.
- Weight Distribution: Lowering the inside leg whilst cornering helps weight distribution. Keep the leg straight and toes pointed up.
- Awareness: Be aware of surroundings, obstacles, and other riders whilst turning.
- Foot Position: Once the turn is complete, return the foot to the peg.
Maintenance Features:
Unpacking and Assembly:
- Remove all packing materials.
- Tighten steering stem bolts (12nm) and secure handlebars. Adjust brake lever positions.
- Fit front mudguard.
- Fitting Front Wheel: Remove disk pad spacer (transport only), loosen top caliper Allen bolts, slide axle through hub, tighten pinch bolts, and replace locking bolt.
- Adjusting Rear Caliper: Ensure rear wheel is clear and brakes are not binding. Adjust if necessary.
- Install front number plate with zip-ties.
- Check tire pressure (20-40 psi).
- Connect batteries (vital for correct connections). Fit battery strap before connecting main battery lead.
- Unpack and read charger manual. Charge batteries fully before first use and never store with discharged batteries.
Brake Adjustment:
Brakes are self-adjusting, but correct alignment is vital for maximum performance.
- Loosen caliper mounting bolts.
- With bike raised, spin wheel and pull brake lever to center caliper on disc.
- Re-tighten caliper bolts while holding the lever.
- If the wheel does not spin freely, adjust caliper position with spacer washers.
- Adjust brake lever 'reach' with a 2mm Allen key for smaller hands.
Side Panel & Battery Removal:
- Twist fastener and lift side panel clear.
- To remove battery: turn off power, remove key, unscrew and disconnect power lead, release battery retaining strap, and lift battery box out.
Charging Instructions:
- Ensure key switch is OFF and battery discharge plug is disconnected.
- Align connector pins and plug charger into battery's charge port. Twist lock ring to secure.
- Plug charger into wall outlet and switch on.
- LED Indications: RED (power on), YELLOW (charging), GREEN (fully charged).
- When GREEN, switch charger off, unplug from wall socket, then from battery.
- Reconnect battery to bike.
- Important Notes: Takes up to seven hours for a full charge. Never overcharge (max 10 hours). Fully charge before first use. Always connect charger to bike before AC power, and disconnect AC power before disconnecting from bike. Do not block fan vent on charger. Charger is for indoor use only. Avoid water contact.
Battery Use, Care & Maintenance:
- Do not use this battery with any other vehicle or appliance.
- Never short circuit discharge terminals.
- Keep battery away from excessive heat/open flames. Avoid long-term sun exposure.
- Protect batteries from water/moisture. Dry as soon as possible. Remove from bike before washing.
- Avoid intense physical shock or severe vibration.
- Never open the battery box.
- Battery Care & Disposal: Use a multimeter to monitor battery health (34.0-54.4V). Dispose of used batteries properly. Contact dealer or customer service for guidance.
Maintaining Your OSET:
- Keep OSET clean and dry.
- Check all components for tightness and adjustment (handlebars, levers, axles, chain, brakes).
- Check wheel spokes for tightness regularly.
- Check speed, power, and response settings before each ride.
- Check tire pressure and inspect for damage.
Cleaning:
Hand clean with a damp cloth and slow-running water. Avoid water on sensitive electrical components (controller, throttle, wiring).
Long Term Storage:
If storing for 1 month or more, remove battery.
- Charge battery to 30-50%.
- Turn battery off.
- Check battery voltage and top up charge every 3 months.
- Store in a cool (50º to 70°F, 10º to 21ºC), dry place. Avoid direct sun exposure.
Wiring:
The OSET is an electric bike with numerous electrical components and wiring, all needing protection from water and dirt. Components include:
- Controller: The 'brains' of the drive system, non-serviceable.
- Throttle: Sends electronic signal to the controller, serviceable, must be protected from water.
- Batteries: One sealed lithium battery.
- Motor: Delivers power, servicing by trained technicians only. Do not attempt to dismantle.
- Relay: Activated by the switch, makes 48v connection, non-serviceable.
- Other components: switch, charge port, speed switch, response dial.