15
DIALS & INDICATORS
This dial must only be changed by a responsible
adult. When dial is turned to the fully clockwise
posion, the bike will have a maximum speed,
when in the an-clockwise posion the speed will
be reduced to its minimum.
Reducing this seng is ideal to set the bike up for
beginners & younger riders.
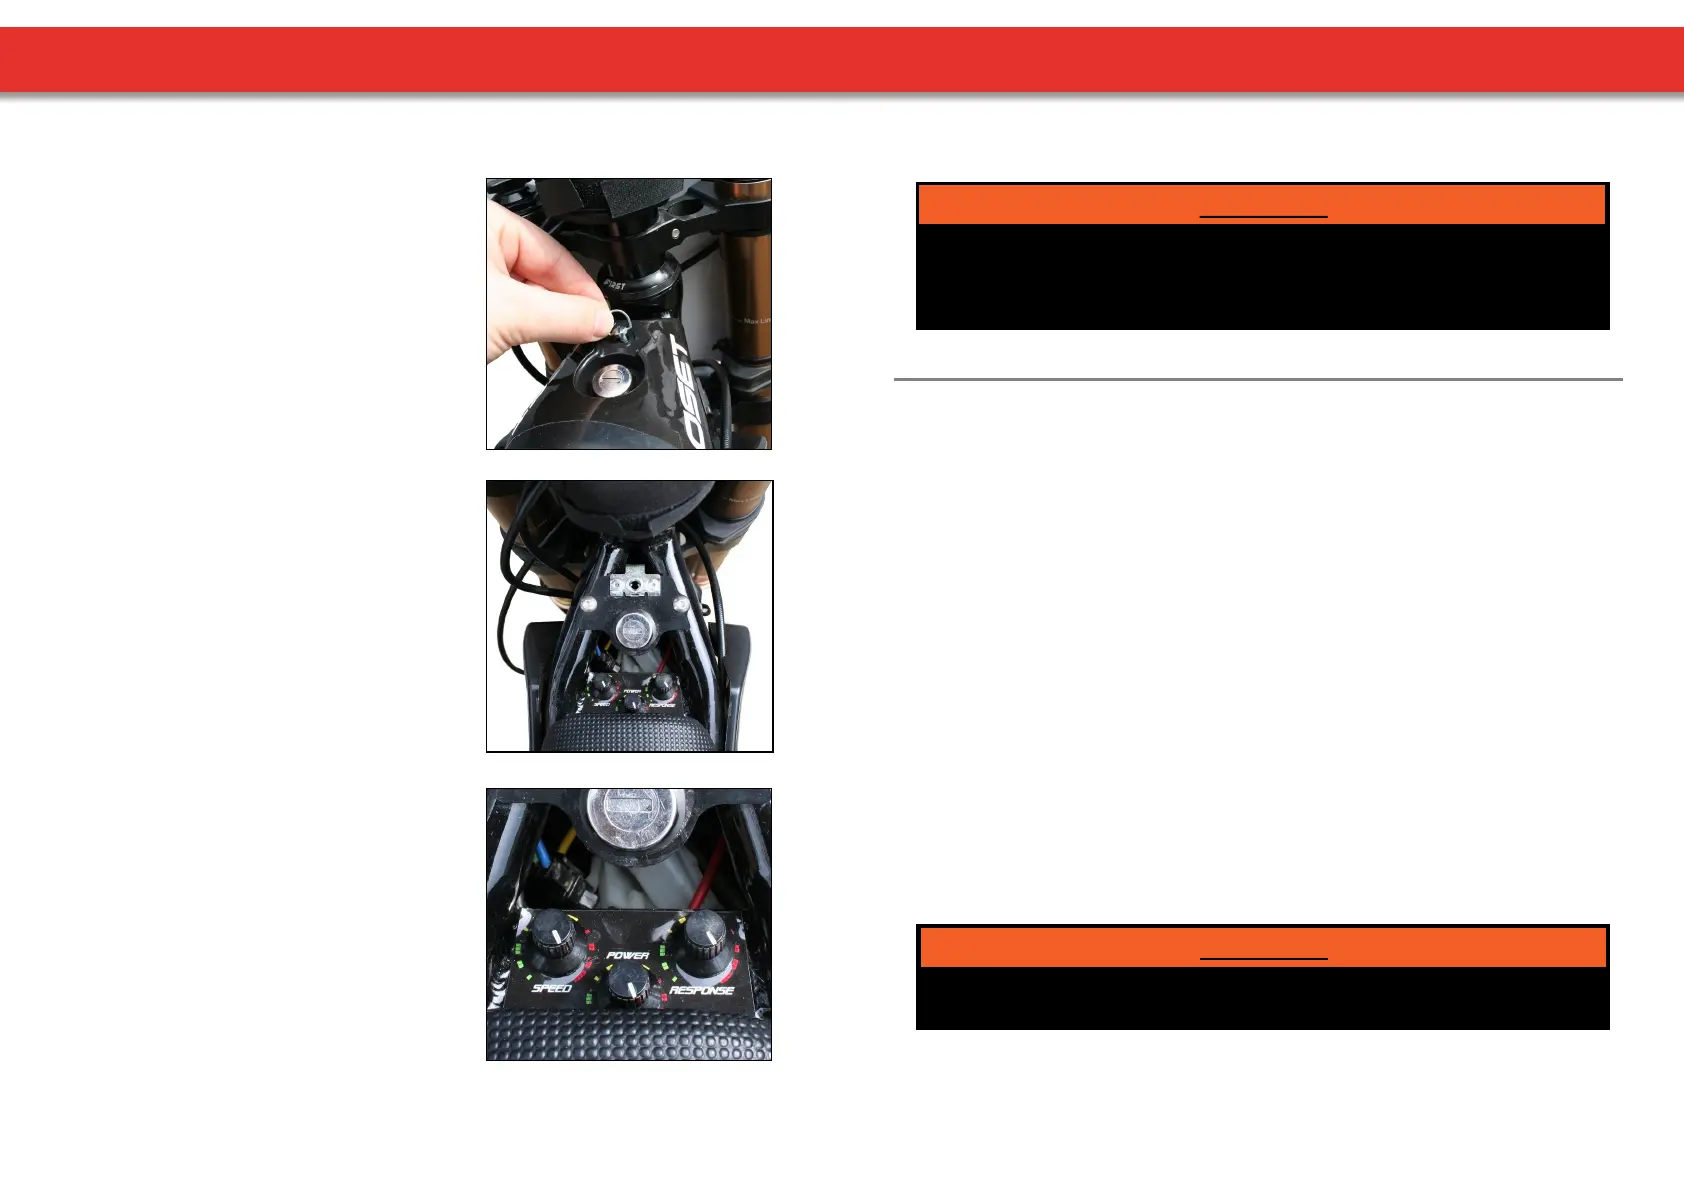
DIAL ADJUSTMENT
The bike’s adjustment dials are located beneath the
small black panel which also houses the key switch.
To remove the panel, twist the fastener and li the
front of the panel up and towards the handlebars.
SPEED DIAL
This is the most important adjustability feature on
the bike and must ALWAYS start with the lowest
seng, and make changes in very small increments.
It may appear that the highest power will be
suitable for an advanced rider, but it must be
understood that there is a lot of power available.
It is a great feature to have such a range available,
but it MUST be treated with respect. ALWAYS
adjust from lower to higher, in small increments.
POWER DIAL
It must be treated very carefully as the range of
adjustability is enormous.
THIS DIAL IS TO BE ADJUSTED BY A RESPONSIBLE
ADULT ONLY.
The funcon of this dial is to adjust the ‘response’
of the bike.
Fully an-clockwise will give the slowest throle
response. Fully clockwise will give the quickest
response.
THROTTLE RESPONSE DIAL
DIAL PANEL REMOVAL
16
It is very important to keep everyone clear of the bike when changing and checking the
speed and response sengs. The dial is sensive to small adjustments. Do not guess at
changes. Always check before the rider gets back on to ensure the desired seng is
correct for the abilies of the rider.
WARNING!
DRIVE CHAIN
Your OSET features a tradional chain and sprockets. It is direct drive, with no gears.
With the motor mounted in the swing arm, suspension movement has no eect on tension.
However, the chain does need to be checked and adjusted regularly, especially when the
bike is new.
The chain must be checked before every ride and adjusted as necessary. There should be
very lile slack in the chain. Adjustment is done as follows:
1. Ensure power is turned o.
2. Loosen axle nuts (shown opposite).
3. Turn chain tensioner nuts evenly on both sides. Very small movements can make a
big dierence. Do not ghten so much there is no slack at all.
It should be ‘taught’, not ‘ght‘. Rotate wheel by hand and check chain tension.
4. Lubricate the chain & check the sprocket bolts for ghtness.
5. Reverse the above procedure, ensuring all bolts are ght.
6. Check the wheel for alignment and the chain for tension. See pages 17 & 20 for
wheel alignment informaon.
Failure to maintain and adjust the chain and align the wheel correctly could result in the
chain jumping o the sprockets, causing a potenally dangerous and damaging condion.
WARNING!