Do you have a question about the Osram ROADsight 30 and is the answer not in the manual?
Observe country-specific laws for dashcam use, data duration, and transfer.
Ensure dashcam does not obstruct the driver's view of the road ahead.
Use supplied adapter, clean lens with soft cloth, avoid water exposure.
Search for OSRAMconnect in App Store or Google Play to download the mobile app.
Follow the app's setup process and enable necessary settings when prompted.
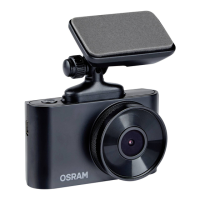
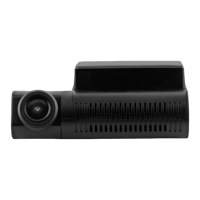
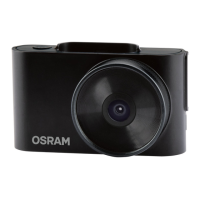
Contents include the main dashcam device and a quick start guide.
Package contains magnetic mount, USB cable, trim tool, and window sticker.
Ensure the windshield glass is clean, dirt, dust, and grease free.
Warm the adhesive pad for stronger adhesion; position the mount correctly.
Connect the power cable to the mount and plug the USB charger into the 12V socket.
The dashcam automatically turns on when the vehicle's engine starts.
Position device on windshield center; aim for 30% sky / 70% road capture.
Hold power button, then press UP arrow for 3 seconds to show Wi-Fi details.
Open phone settings, select dashcam's Wi-Fi hotspot, and enter password.
Use Power button to turn on/off; Menu button switches modes and takes pictures.
Up/Down buttons navigate menus; Rec button starts/stops recording or confirms.
Press the reset button on the bottom to reboot if the device is unresponsive.
Stop recording, hold Menu for 2s to enter Photo Mode, press Rec to capture.
Enter Playback Mode by holding Menu for 2s; use Up/Down to select files.
Press Menu once to enter options, use Up/Down to set, and Rec to confirm.
Ensure device is off, then insert memory card until it clicks into place.
Press the memory card slightly to release it, then remove from the slot.
Avoid excessive force; use a thin pointed device if needed for insertion.
The dashcam automatically powers on when the vehicle's ignition is turned ON.
Press the power button to turn on manually; hold for 3 seconds to turn off.
Loop Recording mode is set to 3 minutes by default; can be set to 5 minutes.
When storage is full, oldest files are replaced, except protected ones.
Protects the current video file from being overwritten or deleted automatically.
Activated by G-sensor (sudden acceleration/deceleration) or collision point.
Ensure recording has stopped; press and hold MENU to switch between Video & Photo.
Use Up/Down buttons to select files in Video & Photo Mode for viewing.
Click the Confirm button to start playback of the selected video or photo.
Press Menu to enter submenu, use Up/Down to select 'Delete', press Rec.
Select 'delete all files' or 'one file', then confirm choice following display.
Locked files need unlocking; formatting card also deletes all data.
Configure video resolution for optimum performance and loop recording duration.
Adjust G-Sensor sensitivity, Night Vision mode, and recording audio settings.
Enable or disable the date and time stamp on recordings.
Enable/disable WiFi, and adjust the device's date and time settings.
Select menu language, enable/disable plate number, and configure screen saver.
Adjust button sound, parking monitor, and format the SD card for optimal use.
View installed firmware version and information on where to get updates.
Reset the camera to its original factory configuration.
When ON, prompts to enter license plate number for display on recordings.
In the app, press the dropdown menu and select FAQs to view common questions.
FAQs cover SD card errors, dashcam not recording, and unsuitable memory cards.
Check for sufficient free space on the micro SD card.
Too many files stored, or file system errors; format the micro SD card.
Ensure lens sticker is removed and lens is clean; use special cleaning products.
Press the RESET button to reboot the device if it hangs up or has no response.
Ensure correct insertion; format card via settings menu if not recognized.
Download firmware file, extract, and ensure MicroSD card is formatted.
Copy firmware file to MicroSD card, insert into dashcam, connect power, and turn on.
Do not turn off power during update; format card after update if prompted.
Compares features like resolution, angle, storage, and recording time for models.
Provides definitions for Full HD, and notes on recording time dependencies.
Input voltage 5V DC 1.5A, charging input 12-24V DC, Mini USB connection.
Storage temperature: -20°C to 70°C. Operating temperature: -10°C to 60°C.
Batteries should be collected separately for correct treatment and recycling.
| GPS | No |
|---|---|
| Wi-Fi | No |
| G-sensor | Yes |
| Loop recording | Yes |
| Parking mode | Yes |
| Video Resolution | 1080p |
| Field of View | 130 degrees |
| Storage | microSD up to 128GB |
| Screen size | 2" |