STEP-BY-STEP
DlRECTiONS
1.
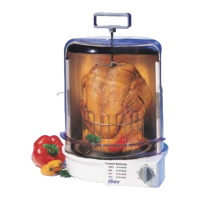
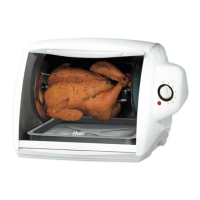
Place unit on a clean, dry surface with at least six inches of clearance on all sides.
2.
Peel off the static label from the door.
3.
To open the door, slide it counterclockwise.
4.
Cooking basket should be removed from the unit before loading with food.
5.
Vegetables or cut-up pieces of meat must be placed inside the basket around the spit.
6.
Chicken, roasts or other large cuts of meat should
be
skewered through the spit as fol-
lows:
!
Lift tines to the top of the spit.
!
By holding the tines with one hand, skewer the spit through the meat.
!
Screw the spit into the cooking basket until spit stops turning. DO NOT
SCREW
THE SPIT TOO TIGHTLY.
!
Once the spit is secured, lower tines and press them into the meat
CAUTION: THE SPIT AND TINES HAVE SHARP ENDS.
Note: Chicken or other poultry should be placed with the wings upward, legs
downward; stuffed poultry should be placed with the wings downward, legs upward.
7.
Position drip pan inside the Rotisserie.
8.
Lower basket onto center of the drip pan.
9.
Plug cord into 120 volt outlet.
10.
Set the timer for correct cooking time.
11. Cooking times vary by the size and type of food and recipes. The maximum capacity
for the rotisserie is 8 pounds.
(See
recipes section for cooking times).
12. The unit needs to cool for at least one half hour before using’it again. Allow your
Rotisserie to cool before cleaning and storing.
Page 8
.