10
10
step by step
16. Close the glass door. Make sure that the unit is
at least 8 inches from the walls and is not placed
under cabinets.
17. Plug unit into outlet and turn unit on by setting
timer to the desired cooking time.
18. Allow the food to rotate one or more times to
ensure that nothing hits the heating element,
heat reflector or door. If necessary, turn timer off
and adjust food.
19. If the spit does not rotate
properly, the poultry
or meat must be set closer to the fixed wheel
and
balanced on the spit. Turn unit off, unplug
the cord and reposition
food so that it will
be weighted evenly on the rotating spit.
Plug cord into outlet and set timer to
desired setting.
20. A bell will sound at the end of the cooking cycle
indicating that the machine is off and your food
is ready. Unplug the electric cord.
21. At the end of the cooking cycle allow the
Rotisserie to cool down for a few minutes before
removing hot food. Be sure to wear protective
gloves or oven mitts while handling hot machine
or food. Remove the door by undoing the safety
latch and lift up and out on the right side.
Always assume that both the Rotisserie and
food are hot after cooking.
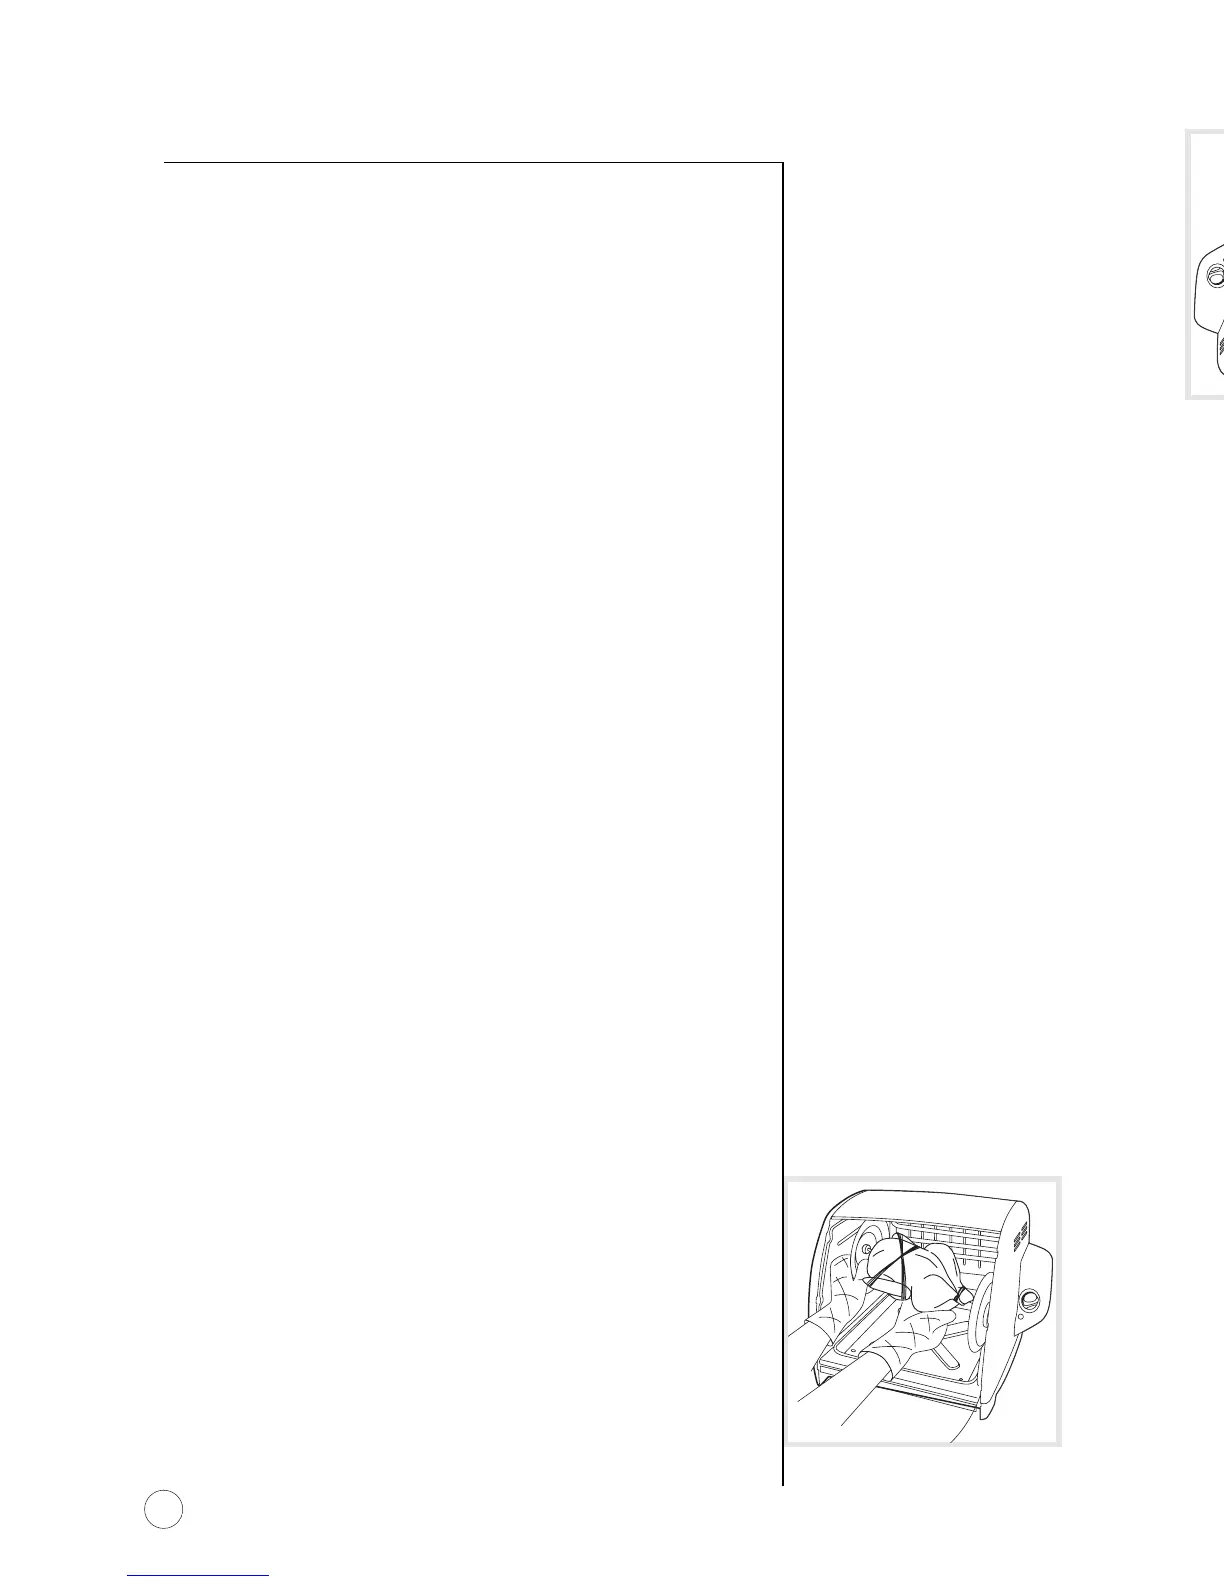
22. With glove or oven mitt, lift the left wheel out
of the cradle, while sliding the right pointed side
out of the hole. Remove the spit from the
machine and set food on a platter. (Figure 5)
16.Cierre la puerta de vidrio. Verifique que la unidad
esté colocada a por lo menos 8 pulgadas de las
paredes y que no esté colocada debajo de los
gabinetes.
17. Enchufe la unidad a una toma de corriente
eléctrica y enciéndala ajustando el cronómetro
en el tiempo de cocción deseado.
18. Permita que los alimentos giren una o más veces
para revisar que no estén en contacto con el
elemento calefactor, el reflector de calor o la puerta.
Si es necesario, apague el cronómetro y ajuste
nuevamente los alimentos.
19.Si la varilla no gira correctamente, la carne o
el ave deben colocarse más cerca de la rueda fija
y deben estar balanceados sobre la varilla.
Apague la unidad, desconecte el cable y coloque
nuevamente los alimentos para que el peso quede
repartido de manera uniforme sobre la varilla
giratoria. Conecte la unidad una toma de
corriente eléctrica y encienda la unidad al fijar
el reloj en el tiempo de cocción deseado.
20. Escuchará una campana al final del ciclo de
cocción, ésta indica que la máquina está apagada
y que sus alimentos están listos. Desconecte
el cordón eléctrico de la toma de corriente.
21. Al final del ciclo de cocción, permita que el
Asador se enfríe durante algunos minutos antes
de sacar los alimentos. Asegúrese de usar guantes
protectores mientras maneja los alimentos o el
aparato caliente. Quite la puerta desabrochando
la aldabilla de seguridad, levantando la puerta
hacia arriba y afuera en el lado derecho. Siempre
asuma que tanto el Asador como la comida están
calientes después de cocinar.
22. Con una guante protector, levante
la varilla
izquierda fuera
la horquilla, mientras que
resbala la cabeza de la flecha derecha
afuera
del orificio. Quite
la varilla
de la máquina
y fije el alimento en un platón. (Figura 5)
FIGURE 5
paso a paso
FIGURA 5