9
9
step by step
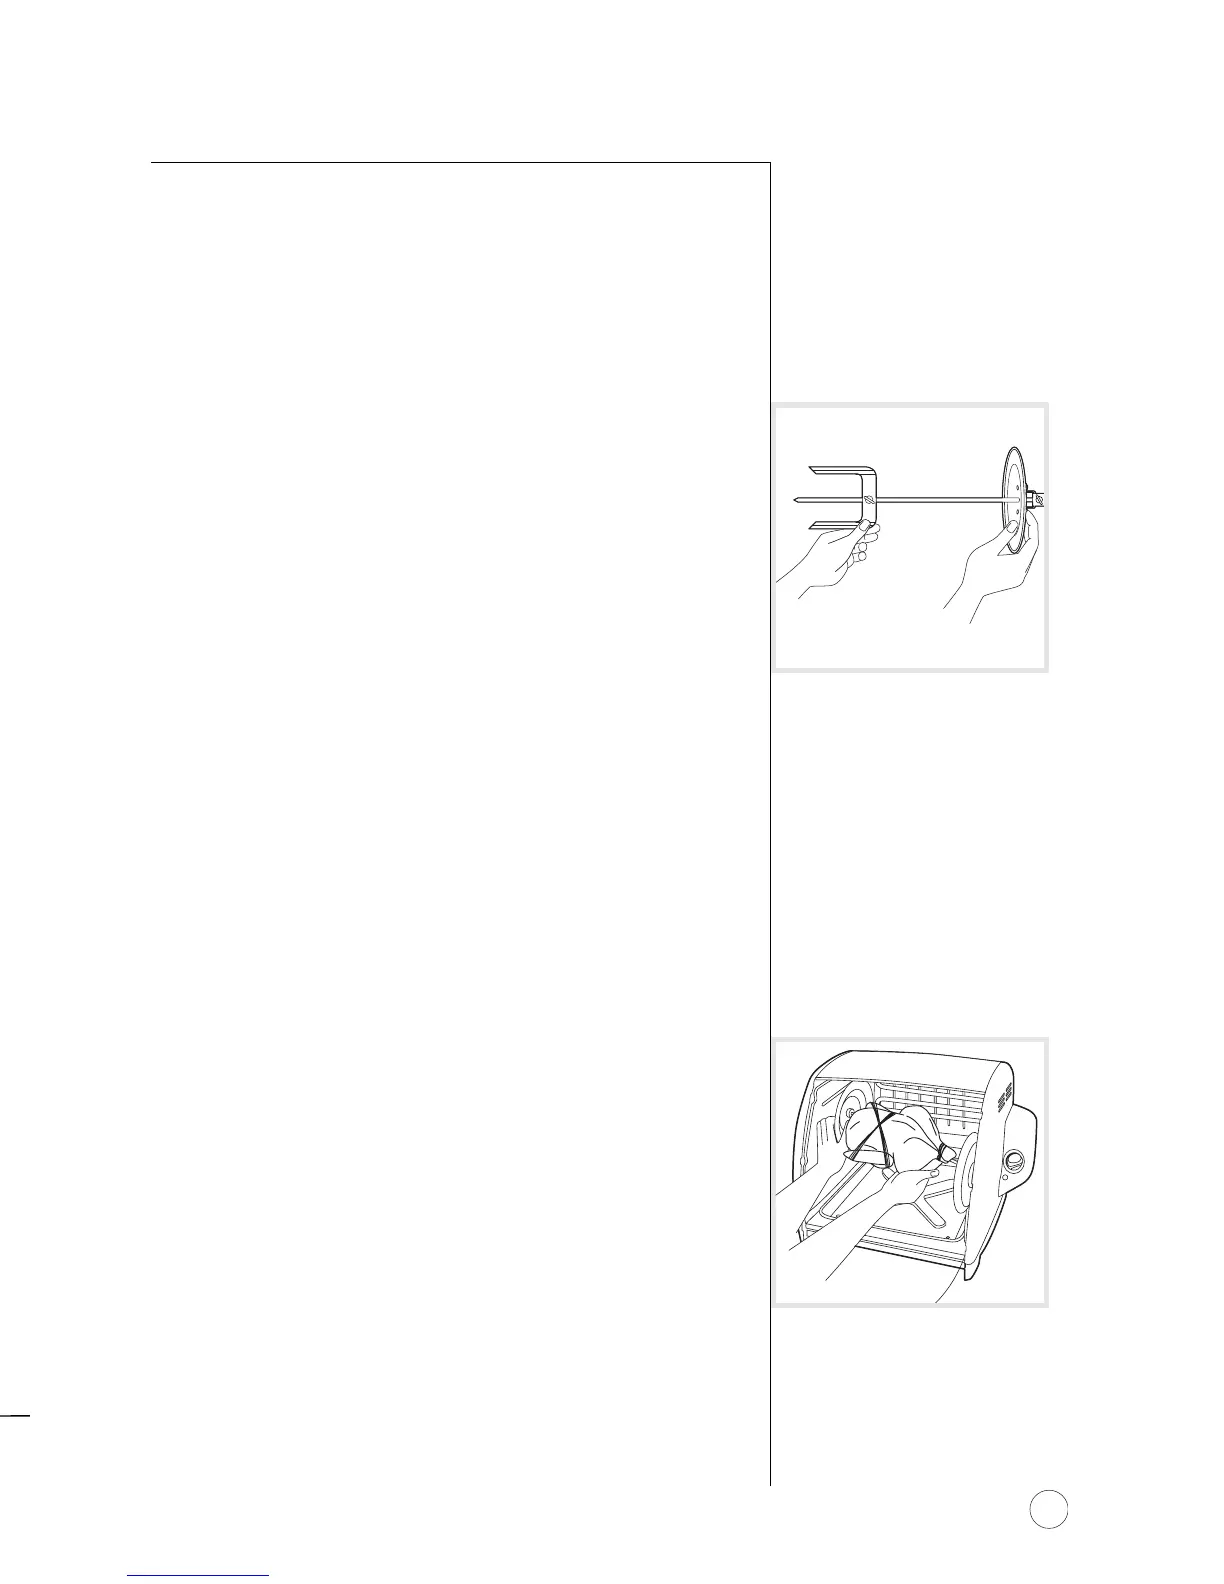
8. Open screws on adjustable fork then slide onto
spit rod with pointed ends facing open end of
spit rod. (Figure 3)
9. When cooking a chicken or turkey, reinsert spit
rod through center of poultry, starting at the
breast area.
10. Push food onto spit rod and into fork as close
to the fixed wheel as possible.
11. Place second fork onto spit rod and slide into
meat, adjust both forks
making sure that meat
or poultry is balanced on the spit. Make sure
that forks are tightly fixed on spit by securing
screws tightly by hand.
12. Once your meat or poultry is securely fixed on
spit rod, attach other wheel to end of spit rod
and secure the third screw tightly by hand.
13. Before placing the spit rod into the machine
remove the door by undoing the safety latch
and lift up and out on the right side.
14. To place the spit rod into machine, place right
hand under meat, use your left hand to firmly
hold the permanent wheel, place loaded spit into
unit at an angle with the pointed end on the
right side pointing down. Slide the pointed end
into the hole on the right side of the machine,
while lowering the left side into the cradle.
(Figure 4)
15. If BBQ sauce is desired, it can be applied to the
meat or poultry by gently brushing on with a
basting brush after cooking process.
8.Abra los tornillos sobre el trinche ajustable y
después deslice sobre la varilla con los extremos
en punta colocados el extremo abierto de
la varilla. (Figura 3)
9.Cuando cocina un pollo o un pavo, inserte
de nuevo la varilla a través del centro del ave,
iniciando en el área de la pechuga.
10.Presione los alimentos dentro de la varilla y
del trinche.
11.Coloque el segundo trinche en la varilla y
deslícelo introduciéndolo en la carne, ajuste
ambos trinches para asegurarse de que la carne
o ave esté centrada a lo largo de la varilla.
Verifique que los trinches estén fijos en la varilla,
apretando manualmente los tornillos.
12.Una vez que la carne o ave esté centrada y
colocada firmemente en la varilla, y asegure
el tercer tornillo firmemente con la mano.
13.Antes de colocar la varilla en la máquina,
quite la puerta desabrochando la aldabilla de
seguridad, levantando la puerta hacia arriba
y afuera en el lado derecho.
14.Para colocar la varilla en la máquina, coloque
la mano derecha debajo de la carne y la mano
izquierda para sostener firmemente la rueda
permanente, coloque la varilla dentro de la
unidad en un ángulo con el extremo con punta
en el lado derecho hacia abajo. Deslice el extremo
de la flecha dentro del orificio en el lado derecho
de la máquina, mientras baja el lado izquierdo
dentro de la horquilla. (Figura 4)
15.Si desea usar salsa BBQ o algún otro sazonador,
puede aplicarlo antes del proceso de cocción
a la carne o al ave, untándola ligeramente
con una brocha o pincel.
Step-By-Step Instructions
FIGURE
3
FIGURE 4
paso a paso
Instrucciones Paso a Paso
FIGURA
3
FIGURA 4