16
For Additional Troubleshooting Tips, See Pages 48 - 49.
TIPS FOR THE GOURMET BAKER
LAST THINGS LAST
You’ll see this tip in several places in this book, but it bears repeating: Always put the
liquids in first, the dry ingredients in next, and the yeast last (fruits and nuts are added
later, after the machine has completed the first knead). Dig a shallow hole in the dry
ingredients and place the yeast in the hole so that there’s absolutely no contact between
the yeast and any liquids or salt. This is especially important when you’re using the
Delay Bake option. You don’t want the yeast to be activated too soon in the process!
PLACEMENT COUNTS!
Place dried fruits, vegetables, and dried spices away from the liquid ingredients
in the bread pan. If they soak up water, they can undermine the bread’s chemistry.
FRESHNESS FIRST
Avoid using perishable ingredients – milk, yogurt, eggs, or cheese – with
the Delay Bake function.
JUST WAIT FIFTEEN
For best results, wait fifteen minutes before slicing; the bread needs time to cool.
DEEP FREEZE
To freeze fresh bread, let it cool completely and double-bag in plastic.
P
ROBLEM
C
HECK
T
HIS
:
T
HE UNIT DOES NOT OPERATE AFTER
• Unplugged
PUSHING THE
“S
TART
/S
TOP
”
BUTTON
• Setting was not selected
• Did not push “Start/Stop” button
to clear display after last cycle
T
HE BREAD ROSE TOO HIGH
• Too much yeast or moisture
T
HE BREAD DID NOT RISE HIGH ENOUGH
• Too much flour – not enough yeast
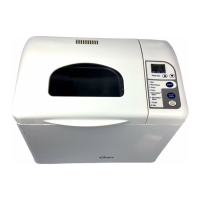
REMOVABLE LID
Your new Bread Maker is equipped with a removable lid for easy cleaning and storage.
To remove the lid, simply raise the lid just short of the vertical position (approx. 70° angle);
while holding the base of the unit with one hand, gently hold the front edge of the lid
and pull it to the right side so as to pop the left hinge pin out (you will hear a loud “pop”
sound when the hinge pops out). Then simply slide the lid to the left to remove the
right hinge pin.