5
Welcome
Congratulations on your purchase of your Oster
®
Versa
™
Performance Blender.If
youhaveanycomments,questionsorinquiriesaboutthisrevolutionaryproduct,
pleasecall1-800-334-0759.
Learning About Your Product
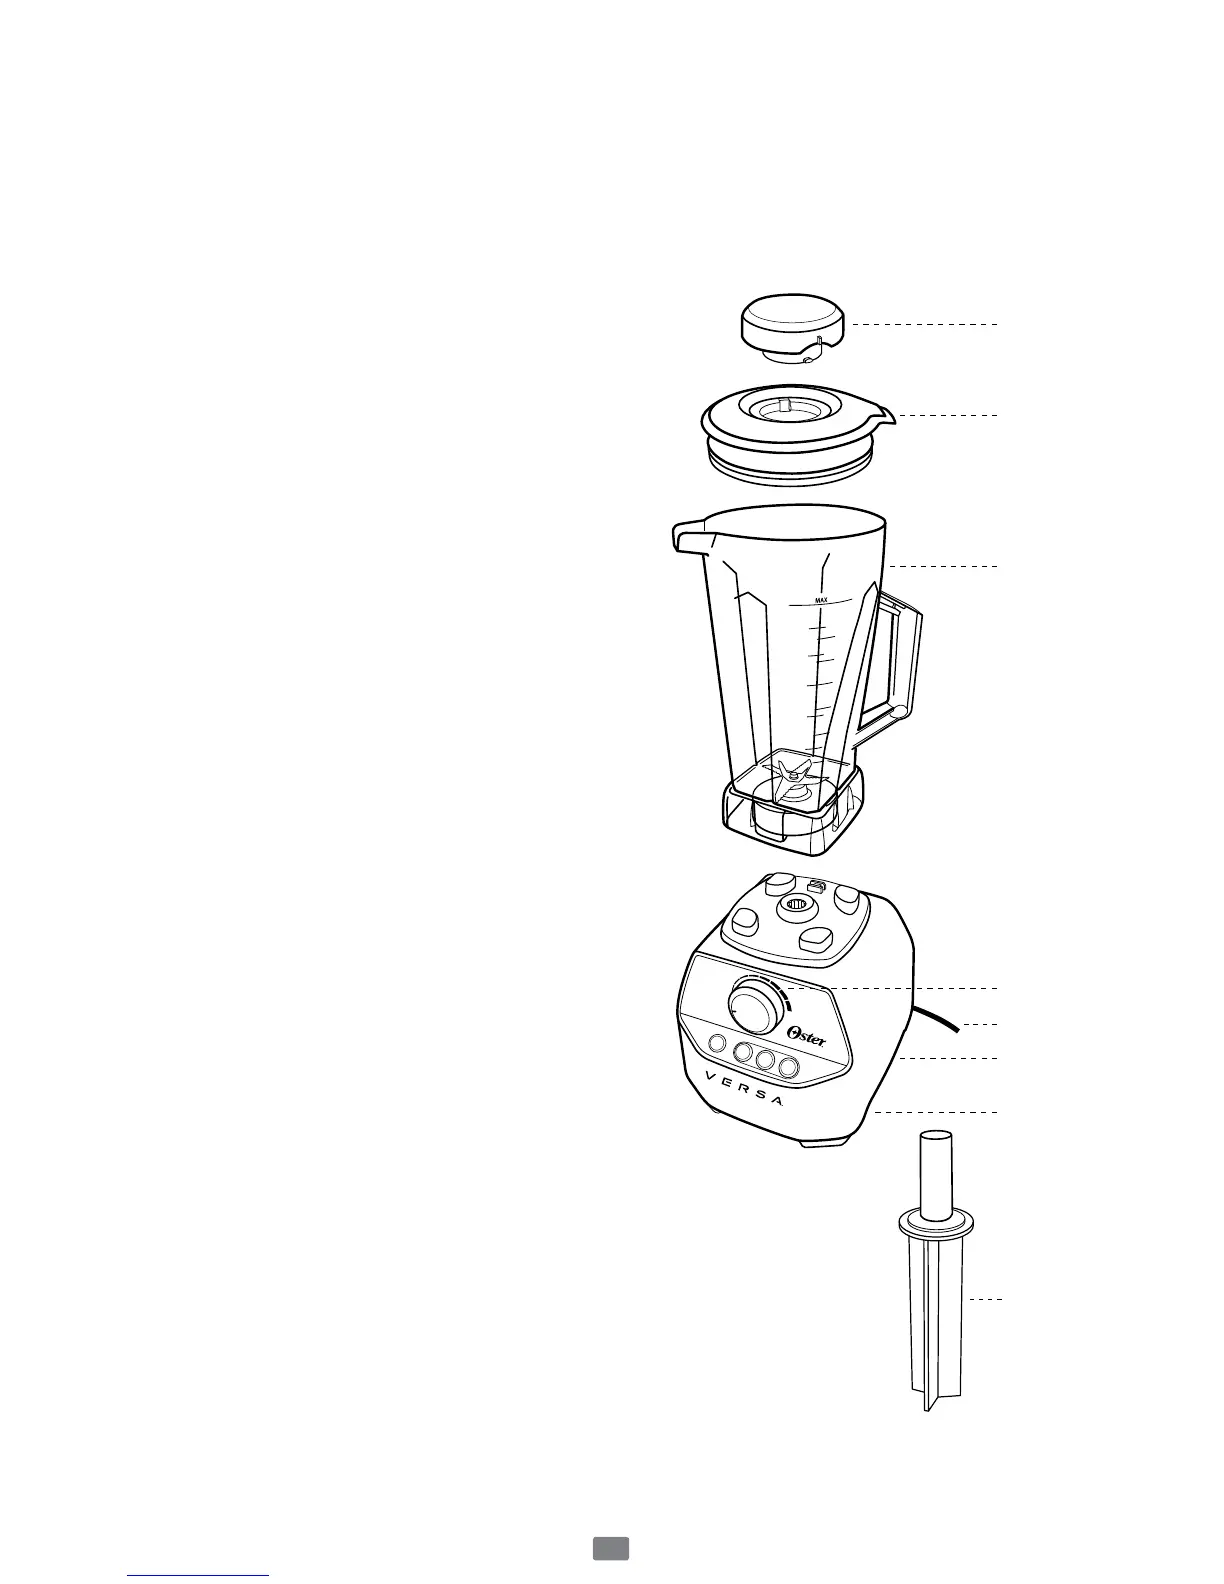
Features and Assembly
1. Filler Cap – 2oz/60mlllercap
doublesasameasuringcup.Align
notch with the hole to insert in lid; turn
clockwisetosecureinplace.Remove
fromlidtoaddingredientswhile
blending.
2. Lid (Flap goes on opposite side of pour
spout) – Sealsthejar.
3. Jar & Blade Assembly – 64oz/2L
BPA-freeplasticjarwithpermanently
attachedbladeassembly.
4. Control Panel –Includesspeeddial,3
programmedsettingsandpulse.
5. Power Cord –3-prongpowercord.
6. Fuse –Incorporatedtoprotectthemotor
fromoverheating.Ifthemotorshutsoff
whileinuse:Turncontrolknobto
“Off”andunplugfromthewall.
Removejarfrombaseandfree
bladeofanyobstructions.Pressexternal
resettablefusebuttononthebottomof
thebase.Wait30-45minutesforthe
unittocool.
7. Cord Storage –Spaceonthebottomof
thebasetostorethecordwhilenotinuse.
8.Tamper –Afterblendinghasstarted,
removethellercapandplacethetamper
through the opening in the lid to assist
withpushingthefooddowntotheblade.
Note–thetamperisnotlongenoughto
reachtheblade.
Before you use the product for the first time,separatetheTamper,Lid,Filler
Cap,andJar.Washinwarm,soapywater.Rinseanddrywell.
Pulse
Soup
Dips/
Spreads
Smoothie
HI
OFF
PROGRAMMED
PULSE
PROGRAMMED SETTINGS