8
0002-000-2407 Rev B
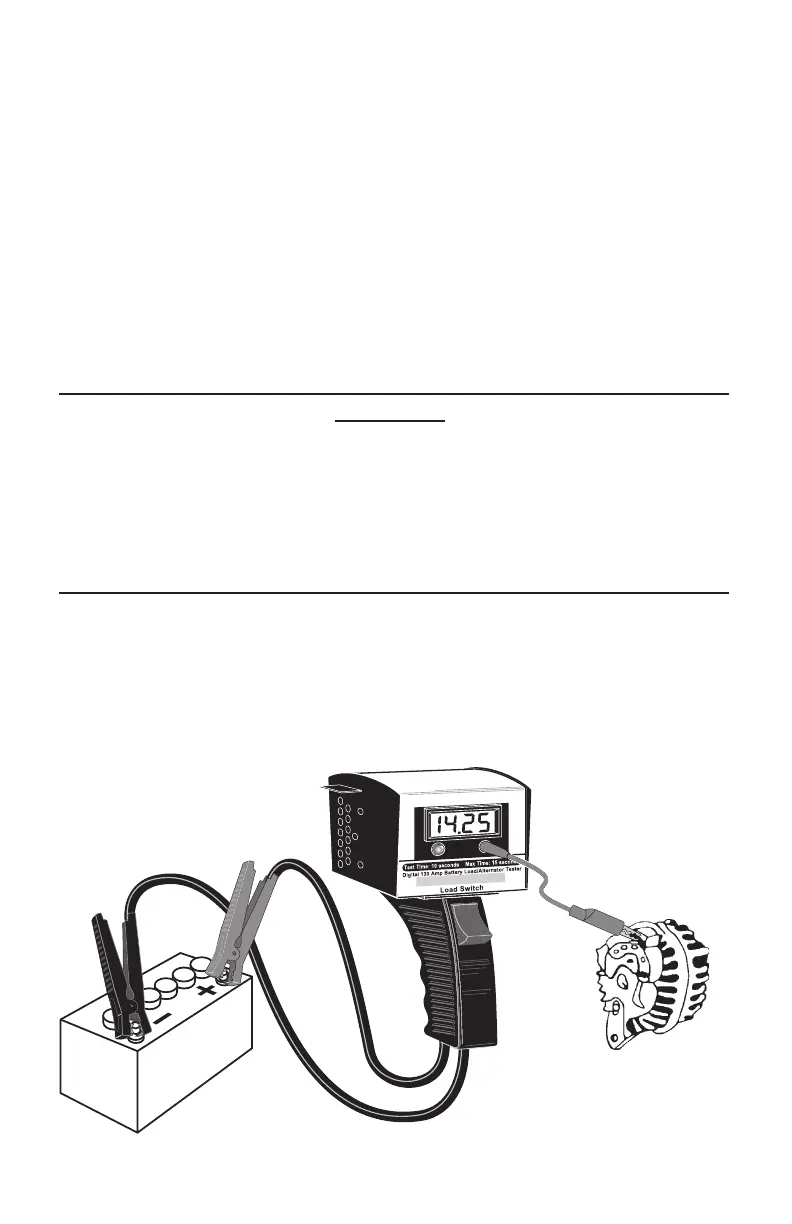
Figure 7 Alternator Test Setup
Alternator Test
Thistestidentiesproblemsassociatedwiththealternator.
1.AsshowninFigure 7,connectthetester’sclampstothevehicle’sbatteryposts:
Redtopositive(+),Blacktonegative(-).Connectthetestleadtothetester
andpositiveterminalonalternator.OnGMalternators,attachthetestleadto
terminalNº1withoutdisconnectingtheplug.
2.Startengineandallowittoidle.
3.IfaGMalternatorisbeingtested,observethetester’sRedLEDanddo not
press the LOAD SWITCH.Otherwise,continuewithStep4.
•IftheLEDashesOnandgoesOFF,ornevercomesON,thentheDiode
Trioisfunctioningproperly.
•IftheLEDstaysON,thentheDiodeTriomightbedefective.Thealternator
needs repair or replacement.
4.Revtheenginetoafastidle(1200-1500RPM).
CAUTION!
• The Battery Load Tester becomes hot when applying the load.
Allow tester to cool between discharges; about 2 minutes. In warm
temperatures, allow more time to cool. If overheating occurs, the LCD
might temporarily become dim. After cooling down, the tester’s LCD
will return to normal.
• Do not activate and hold the load switch for more than 15 seconds.
This will overload the tester resulting in damage and void the warranty.
5.PressandholdLOAD SWITCHontesterfor5secondsandobservethetester’s
RedLED.Whendone,turnengineOFFanddisconnectthetestleads.
•IftheLEDashesONandthengoesOFF,ornevercomesON,thenthe
diodes(rectiers)arefunctioningproperly.
• If the LED stays ON or ashes continuously, then one or more diodes
(rectiers) are defective. Repair or replace the alternator and/or voltage
regulator.
 Loading...